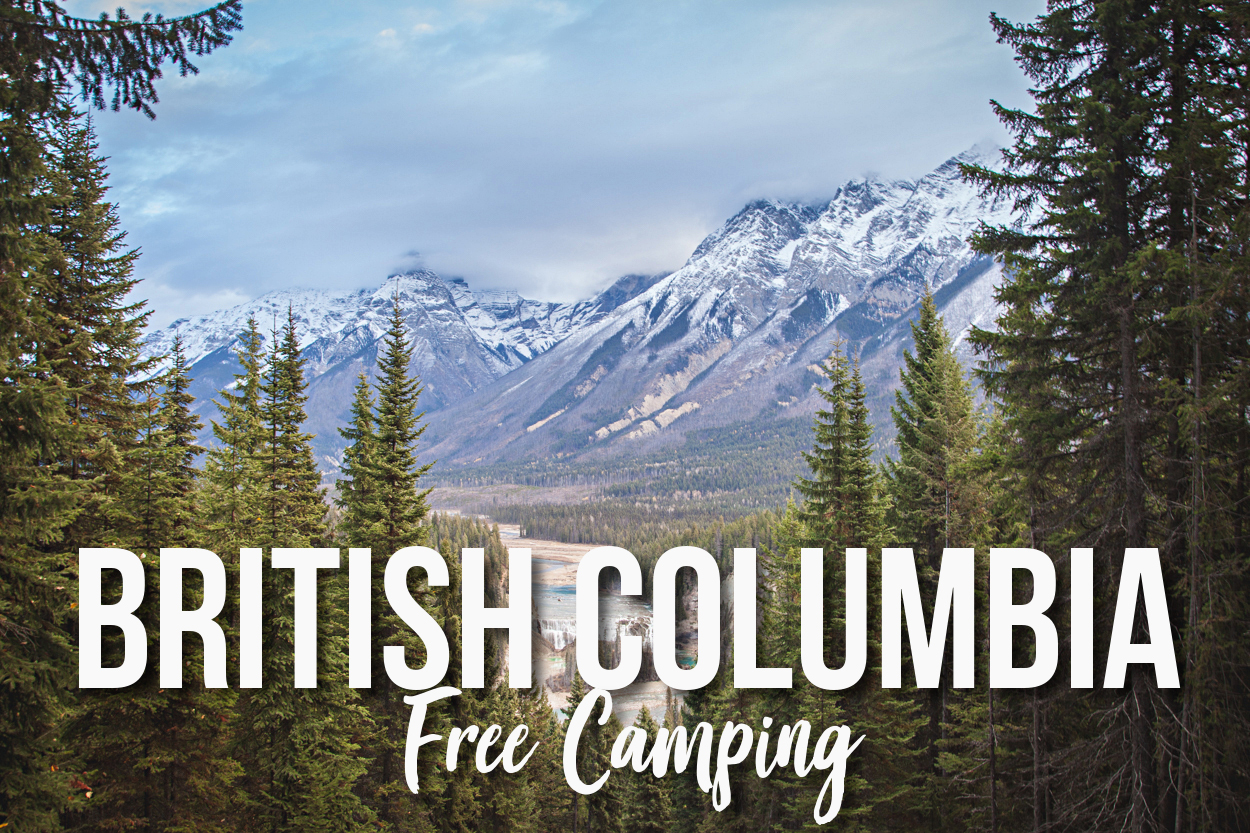
FREE Camping: Wapta Falls Recreation Site-Field, British Columbia

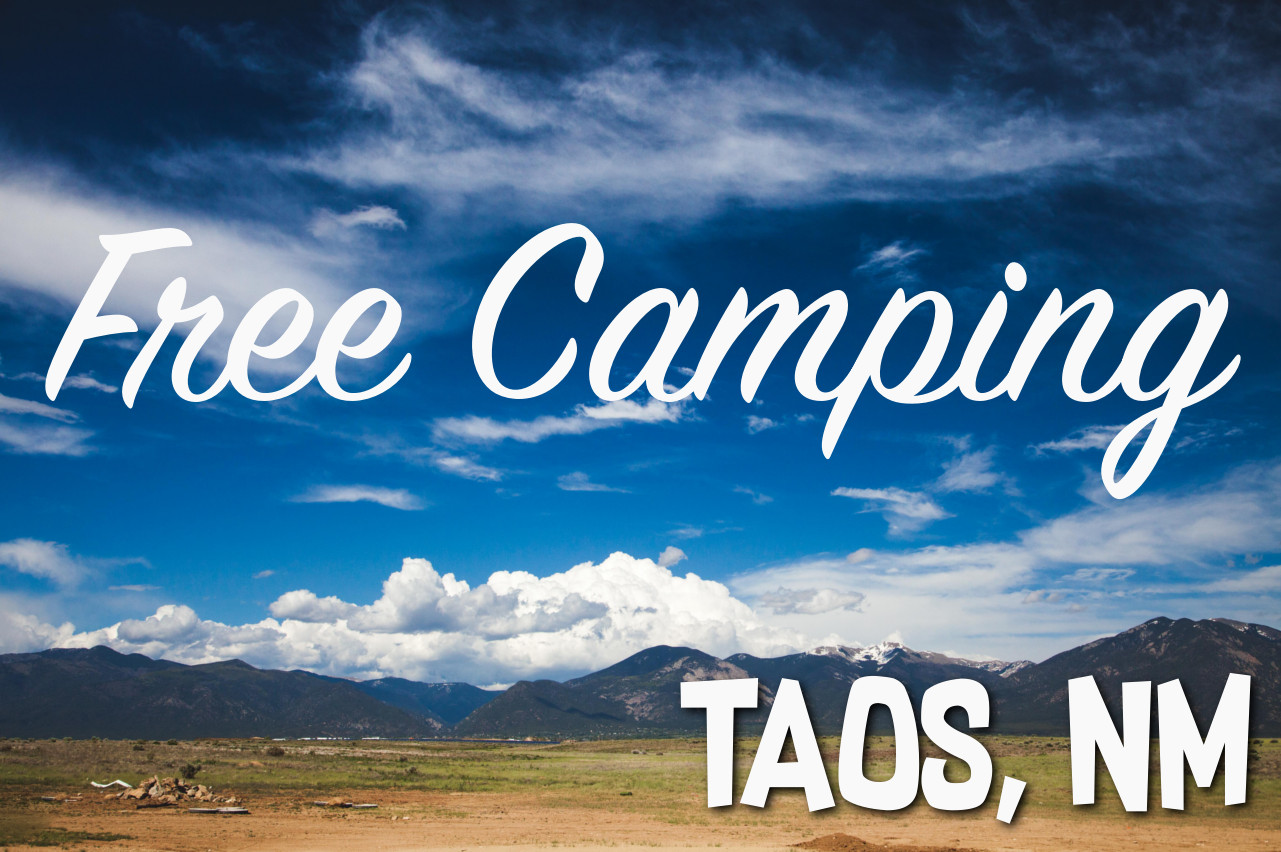
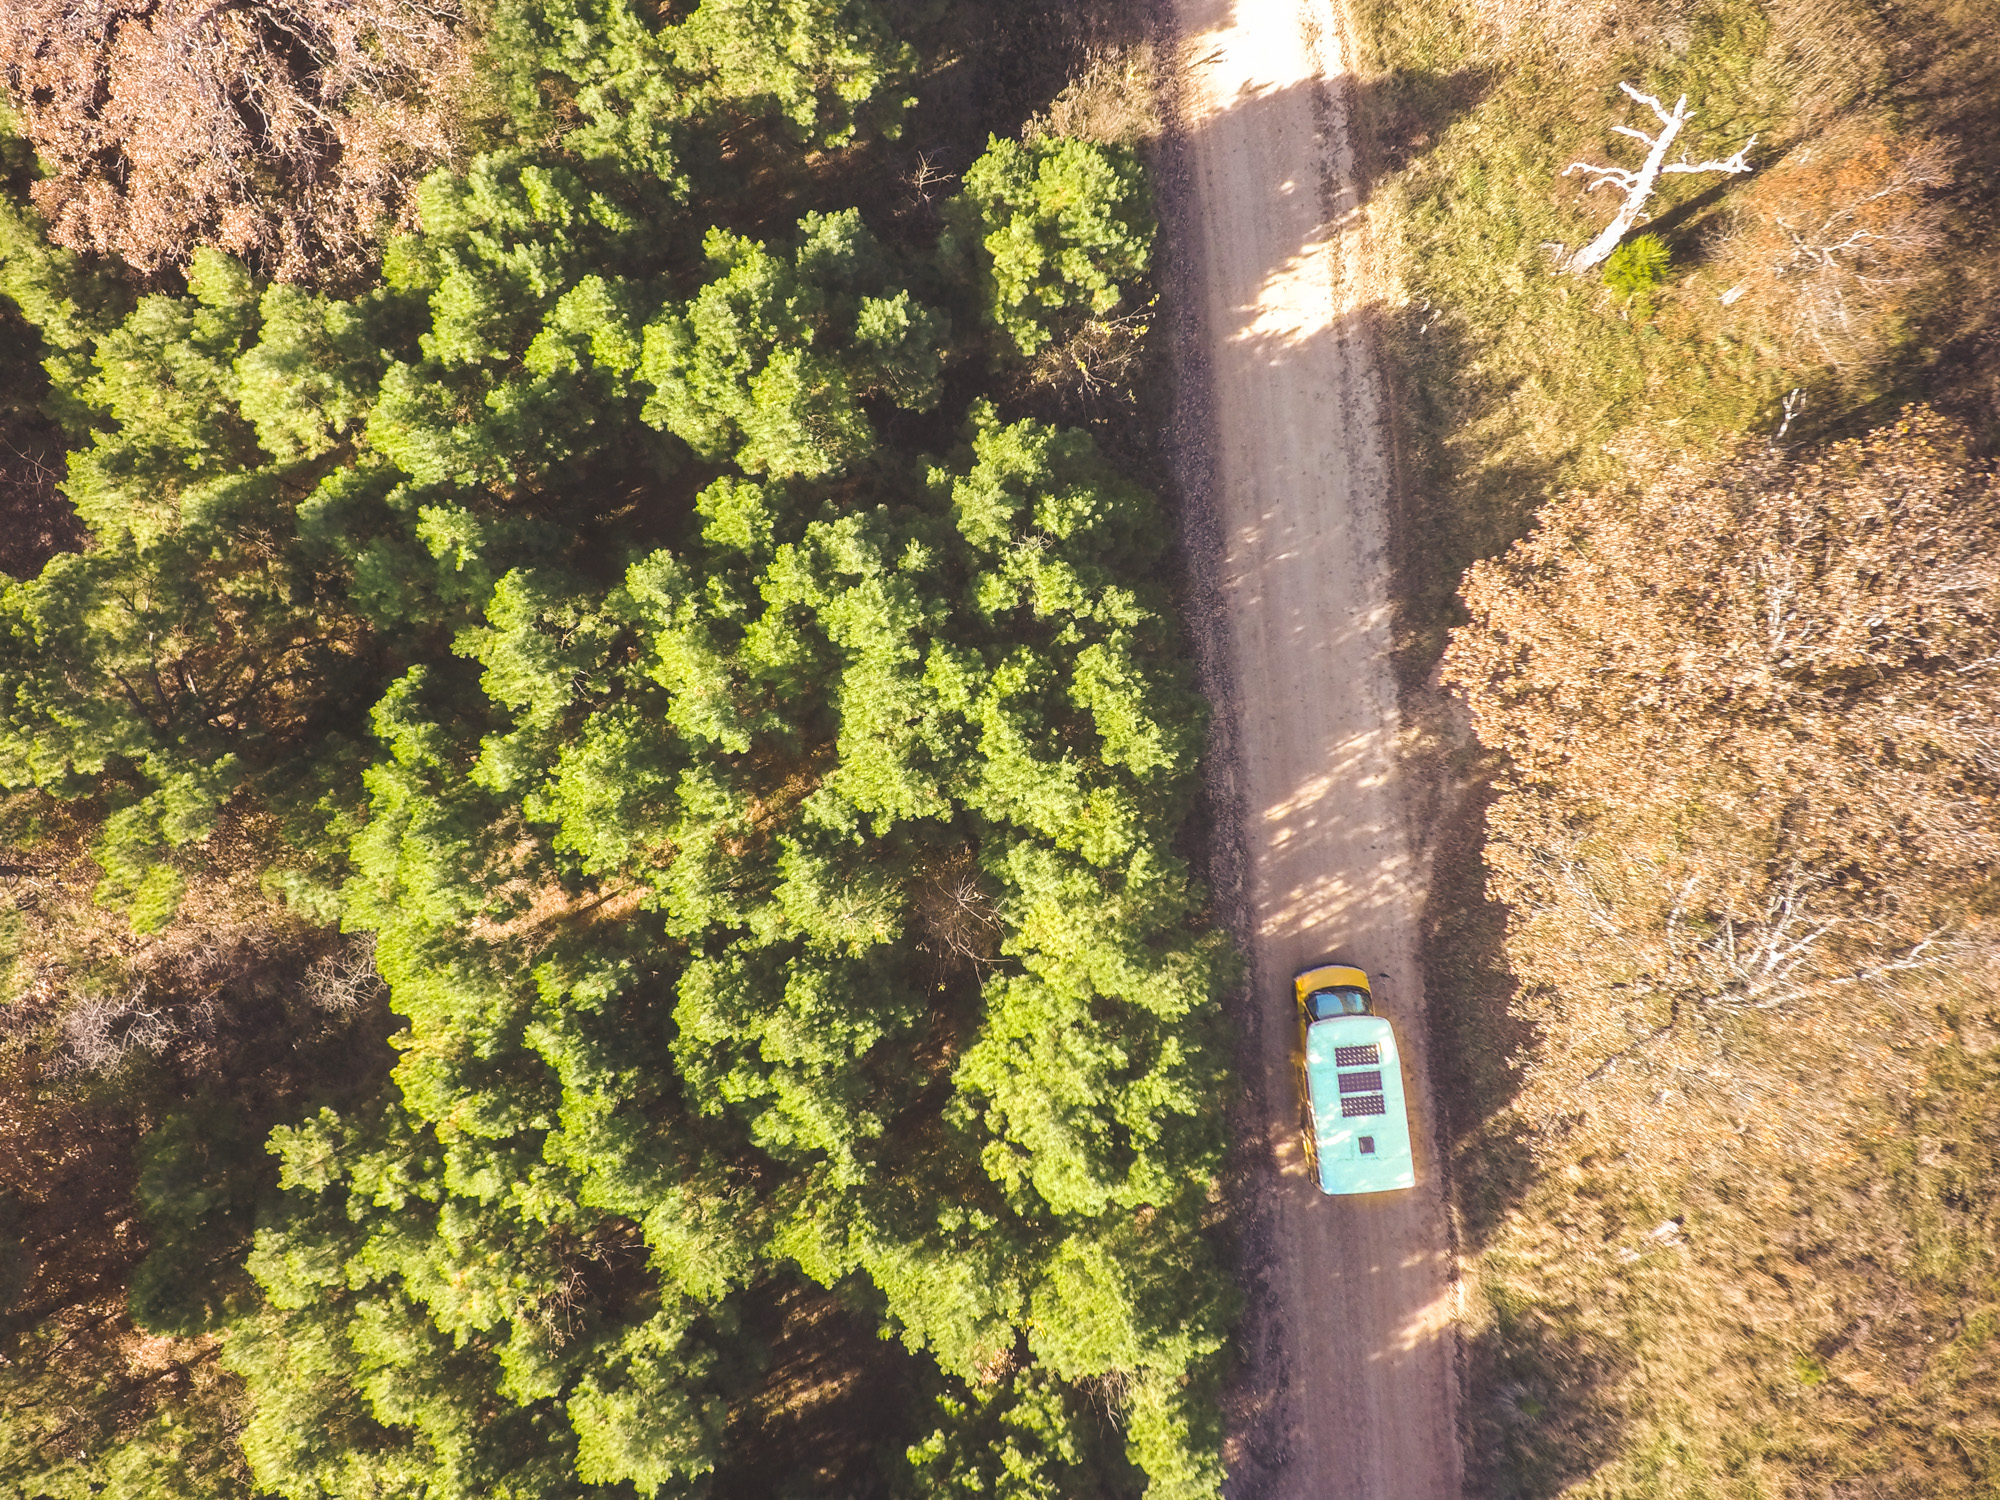
If you haven’t noticed yet, we don’t like paying for camping. We especially don’t like paying for camping when we are traveling through beautiful Western Canada and every dollar means we can stay on the road a little longer and see more of this beautiful country. Many thanks to the British Columbia Recreation Department for having so many awesome, free campsites and trails for public use. This one was located just down the road from Wapta Falls and offered amazing views of the falls and the mountains beyond.

How to Get There- (GPS: 51.109397, -116.500873)

Once you visit Jasper National Park, travel back down the Icefields Parkway and turn West on HWY 1 toward Field turn onto Beaverfoot Rd. Stay on Beaverfoot Rd for nearly 8 miles of rough logging road and turn left at the sign for Wapta Falls Recreation Site. The dirt road to the campsites is rutted and could be difficult to navigate in wet weather. We managed fine through a few puddles in a 19 ft. Class C RV. Getting out was a little tricky, but with some careful driving we made it out with no problem.

We pulled in at night and didn’t really understand how good of a FREE camping spot we had stumbled upon. Rachael started working on a delicious meal of red beans and rice and I took a walk outside to see what I could see, and hear. The sound of Wapta Falls 2000 feet below was LOUD! And if the stars could make noise they would have drown out the falls. This was by far the best night for night photography on our trip, but it didn’t last long. By the time Rachael got done with dinner, most of the stars had hidden themselves behind cloud cover.

We rested easy knowing that the parking brake was on and that we would awake to the sound of a mountain waterfall and what was sure to be a beautiful view. We slept in the next morning and awoke to great conditions and undoubtedly one of the best views of the trip. Chancellor Peak and Mt. Vaux dominate the horizon and Wapta Falls, massive in its own right, is dwarfed by the peaks above. It is crazy to think that only a day before we were hiking to the abandoned campground and the hoodoos at the base of Chancellor Peak and now we were viewing the same peak from a great distance.

You could say that there were facilities here. There were a couple of fire pit areas and a couple of picnic tables that seemed to be pretty well maintained. There was also a pit toilet between the campsites that seemed to be in okay shape. We would definitely poop here again.

Activities in the Area

  • Wapta Falls Hike-The most obvious activity in the immediate area is to hike to Wapta Falls. The falls are beautiful and huge. There are two options to hike to the falls from this campsite. One is to drive Beaverfoot Rd back to HWY 1 and turn West until you see the sign for Wapta Falls on your right. The second option (we suggest this one) is to hike down and bushwhack your way from the campsite to the falls. It is a lot of elevation to climb back up, but we think the views will more than make up for it.
  • Golden, BC- This quiet little town was one of our favorites from the trip mostly because of the quaint size and the amenities that abounded for such a small town. Our favorite stop in Golden was Bacchus Books. This bookstore doubles as a cafe and coffee shop. The selection of books was impressive considering the whole place couldn’t have been 2000 square feet on both floors. We enjoyed the baked goods and reading in a coffee shop that wasn’t packed full of people.

It really was a shame that we had to leave this campsite so soon, but we had more to see in Yoho and time was starting to run out on our Canadian adventure. We hope that you enjoyed our review of this campsite and hope that you continue to follow our adventures on YouTube, Instagram and Facebook as @okienomads.

FREE Camping: Taos Ski Valley

With every trip that we take into the wild, we strive to not pay for camping. Nature should be free. There are a few exceptions, such as the folks over at Hotel Luna Mystica: those guys and girls know how to have a good time in the middle of the desert(pictured above), you should check them out. We spent a night with them on our last trip to Taos, NM. More on that later.

If you find yourself traveling to the Taos area during the summer season (Memorial Day to Labor Day) we have a camping area that is free and awesome! There are actually a couple of spots that we found on Free Campsites. This is a free resource that shows user generated reports on FREE campsite locations around the country. We use this site nearly every time we camp in a new location. There is FREE camping EVERYWHERE! This post is about the free campsite that we chose which is right at the base of the ski runs and is a few steps from the Wheeler Peak trail.

GPS Coordinates: 36.573815, -105.437082

TO GET THERE-

From Taos, head North on US-64W. Turn right onto NM-150N. 150 will wind into the mountains and lead you directly to the ski resort area. Once you reach the main parking lot, stay left on Twining Rd. The main parking lot is the location of our back-up campsite that we didn’t need to use. Take a hard left onto Zapp’s/Porcupine/Kachina RD and travel toward the Bavarian. Once you reach the Phoenix Grill, hang a left on Bluejay Ridge Rd and drive until you can’t drive any farther. The campsite is on your left.

There are no facilities at this location, but the woods (and lots of woods) are right there. Everything uphill from this spot is National Forest and all Leave No Trace precautions should be used. There is a nearby creek for water and bathing. It was in full run-off mode when we visited around Memorial Day and provided great noise at night. I am a big fan of using a SteriPen to treat all of our drinking water when camping, but this water was CLEAN. I think we could have gotten away without using the UV light this time around.

There were two gear casualties on this trip and one happened at this campsite: the demise of my old friend and trusty hammock. The poor, bright blue, Walmart special couldn’t support the weight of both of the Okienomads and ripped in two pieces during an afternoon cuddle sesh. So long old friend, thanks for the hangs. He has been replaced by a brand new ENOS Doublenest that I will be reviewing in a later post and in case you were wondering, it was a very worthwhile upgrade.

The second gear fatality of this trip was my beloved Cannondale mountain bike. It was my first venture into mountain biking and it served me well for a few years. The rear derailuer took a dive on a beautiful mountain bike trail outside of Taos.

The beauty of this campsite (besides the obvious) is it’s proximity to the trailhead for Wheeler Peak. This campsite is at approximately 12,000′ of elevation, so spend a day at camp then make a push for nearby Wheeler Peak (13,161′). The trail is well marked and even with a large amount of snow still on the trail, we found our way up to the top. Regardless of conditions, I suggest that you start at day break or earlier and get to the top before the crowds and before snow melt/thunderstorms in the afternoon.

After hiking this trail during the late season, we made a mental note that the next time we are here will be in the early spring and we will hike for some backcountry ski/board lines, the terrain is beautiful!

Just before tree-line is Williams Lake. The lake was obviously still frozen when we arrived, but still made a beautiful campsite for several backpackers on a nearby ridge. If you are brave and warm natured, the peace and tranquility of this campsite might be worth the hike, but be prepared for high winds, temperatures below freezing, and critters that are very curious. Please use a bear bag and hang it properly away from your camp.

The hike up from the lake got very steep and involved quite a bit of snow. I suggest bringing trekking poles as balance is hard to come by on the snow and ice. The poles may also come in handy on the way down in the slush. I wore trail running shoes and Rachael hiked in hiking boots. Neither of us were disappointed in our choice.

We made it to the top and simply took in the sunlight and the view. It seemed like we might have been the first or second group on the summit and we passed  A LOT of hikers on our way down that had slept in. The peak allows some amazing views of the nearby San De Cristo range and farther Rocky Mountains in the distance.

The hike down took around an hour and a half. With the snow pack still fairly deep, we were able to slide on our butts most of the way down. There would be GoPro footage, but the slide required a very specific set of skills to stay upright while sliding.

This campground was excellent. We really enjoyed the distance from the trailhead, the privacy, and the natural beauty. This site ranks in my top 5 best campsites that I have ever been to. The only down-side that I could see would be if someone were staying in the ski house near the site. Constant traffic might be annoying, but we did not see a soul while we were there on a holiday weekend. I highly recommend this campsite to anyone in the Taos, NM area and look forward to the next time we make it back. And best of all, IT WAS FREE!

As always, follow us on Instagram to get the most up to date images and video from our trips and build progress on our bus. We would love it if you would check out the rest of the blog and the YouTube page as well. All social media is @okienomads. Thanks for reading and have a blessed day!

Coming Soon- Campground Review: Hotel Luna Mystica

SaveSave

SaveSave

SaveSave

SaveSave

SaveSave

A Hike Through an Abandoned Campground: Hoodoo Creek Trail, Yoho National Park

Abandoned campsites. Dilapidated bathroom facilities. Wood stoves and propane tanks. 75 tent campsites left to ruin. What causes a large campground in a Canadian National Park close abruptly and leave large amounts of infrastructure to be taken back by the forest?

In 2013, Parks Canada elected to close Chancellor Peak Campground, which provided 59 campsites on the Western side of Yoho National Park. The decision was made after extreme flooding of the Kicking Horse River ripped through the Chancellor Peak Campground in Summer 2012. Parks officials stated that money was set aside to remove infrastructure such as fire rings, picnic tables, and buildings before more damage could occur.

Then why was Hoodoo Creek Campground abandoned in 2001 and left to rot? Seventy-five campsites lay empty near the town of Field, BC with remains of numbered signs still showing the rings of tent-sites barely visible through the grass and trees that have overgrown around them. Large bathroom facilities sit unlocked and still fully furnished with large amounts of plumbing supplies laying in their stalls. Huge, covered outdoor gathering areas with wood stoves and picnic tables lay un-touched if you disregard the numerous graffiti tags scattered through-out. Large dumpsters and outbuildings remain unused and still in relatively good shape considering the time that they have sat in the bitter Alberta winters.

Online research into the Hoodoo Creek Campground and it’s closure returned very little information. While digging through a Land Management Plan for Yoho NP from 2000, I found a section that mentions efforts to “Examine ways to improve wildlife movement at constricted areas, called pinch points… the Hoodoo Campground”. The Canadian Government has shown time and again that it is serious about protecting wildlife, but would it close a profitable campground in a unique location simply to allow animals to pass through the area easier? If so, wouldn’t Parks Canada Marketing take a story like that and run with it?

The location is still used heavily by visitors that seek to use the 30 campsites at the entrance to the campground, far from the A-F loops of the old campground. Thousands of visitors have probably stayed in the new sites without even knowing that the old sites were still there, that is how heavy the underbrush and trees have become. The other major draw to this area is a 3.3 KM hike to a rock formation called a Hoodoo, the namesake of the abandoned campground.

Mt. Chancellor towering over the abandoned Hoodoo Creek Campground

Once parked at the road block that keeps visitors from visiting the old campsites you must travel down a flat gravel road to reach the campground and Hoodoo Creek. You will begin to see campground signs for Camp A, B, C… Within each ring of sites, you will see short 4×4 posts with numbers on them marking where a tent pad used to be. Travel past the campsites to the creek and cross over to get to the trailhead. It appears that a few iterations of a bridge have been built over time and all have been wiped away by the spring snow melt.

Keep in mind that this is a very, very, steep trail. It gains over 300 m of elevation over less than a couple of kilometers. You begin hiking a set of gradual switchbacks through Douglas fir and the remnants of a prescribed burn in 2005. When we visited in October of 2017, the trail was clear and in good shape.

The switchbacks continue until you round the corner with a clear view of Mt. Chancellor and Wapta Falls in the distance. More on that in a later post. Continue around the bend and you will begin to see views of several Hoodoos jutting out of the side of the hill and Hoodoo Creek directly below. You will reach a sign for a couple of different view points. I advise taking the upper view point as the lower simply wasn’t very impressive.

Hoodoos are formed when softer rock is eroded away, yet the sedimentary rock that is covered by the harder stone above is protected from erosion and remains, forming a tower-like formation. The Lenchcoil Hoodoos are rare in that this type of rock formation is normally found in drier climates than Yoho NP.

The view from the edge of the Hoodoos is fantastic and it gives a very real sense of the size and scale of the formations. Continue up the trail for an interesting perspective of interesting objects, or spend some time soaking up the views of the crazy rocks from below.

This hike is an out and back and as you descend back to the creek you will be rewarded with excellent views of the surrounding valley. Wapta Falls is visible in a Tolkien-esque landscape over the horizon and should definitely be on your list of sites to see if you are fortunate enough to visit Yoho National Park. The hike down is much more enjoyable that the rather tough hike up to the Hoodoos.

A final note on the Hoodoos Campground: Although we thoroughly enjoyed our time exploring the Hoodoo Creek area, we couldn’t seem to get past the idea that something tragic happened here. When we crossed back across the creek, we found a water pump house next to a large water storage tank, a couple of thousand gallons of capacity if I had to guess. Inside this ridiculously well-maintained pump house was a brand new generator that had enough juice to power a small village. All of the water fittings on the storage tank were in excellent shape and had been used recently. We also found a large mass of water pipe that appeared to be used to pump water out of the creek at some point.

Is this a secret water heist?

Was there a mass-murder in the Hoodoo Creek Campground in 2001? 

Or was this simply a move by Parks Canada to protect the travel of wildlife from one area of the park to another?

My research was inconclusive and hopefully someone who reads this can fill us in on what exactly happened at Hoodoo Creek. If you have information about this mysterious campground, we would love to hear from you. As always, follow us on Instagram to get the most up to date images and video from our trips and build progress on our bus. We would love it if you would check out the rest of the blog and the YouTube page as well. All social media is @okienomads. Thanks for reading and have a blessed day!

SaveSave

SaveSave

SaveSave

Giveaway!!! Win a Framed Print from Okienomads

The Okienomads have had a great year! We are increasing our followers on Instagram and have just started building our following on Facebook and YouTube and to celebrate, we are giving away a print from our gallery! The print will be 16″ x 20″ and printed on professional paper, just like what I sell in my gallery. The winner will get to choose the print plus some Okienomads Swag to go along with it!

The rules are simple:

  1. Follow us on either Instagram, Facebook or Subscribe to our channel on YouTube.
  2. Comment on one of the above social media pages and tag a friend that you think would enjoy our page.
  3. Once we reach 1200 Instagram followers, 100 YouTube subscribers, or 250 Facebook followers, we will draw randomly for the prize! The more likes and follows, the better your chance of winning.

SaveSave

SaveSave

SaveSave

SaveSave

Gear Review: Mountainsmith Morrison 2 Backpacking Tent

I got the itch many years ago to try my hand at backpacking. The first and single most important piece of gear to get into the woods is a tent. The tent provides shelter, security and sometimes warmth. When you venture several miles from any civilization, a good tent can change a really crummy trip into a great experience in the woods.

My first backpacking experience is one of my favorite memories, but one of the worst experiences with a tent that I have ever had. A few (3) friends and I decided to undertake a daunting hiking trip spanning some 30+ miles over 4 days through the early spring Ozark Wilderness. Rain was barely in the forecast so we neglected to bring any real rain gear. We lucked out and avoided rain. The ground, however, was soaked from the previous 6 days of rain that hit the area. The awful Ozark Trail 4 man tent did not do what I had assumed it was made to do. This tent can be purchased at any of the thousands of Wal-Mart stores in the country and was created to be used in state parks and backyards when precipitation is not in the forecast.

We got soaked. To be fair there was a small creek running under the bottom of the tent and I am not sure the best of tents would have survived, but the big box store tent let us down. We were wet, cold, and unhappy that we lugged this big thing up and down the trails all spring break.

Upon returning from that trip to the Ozarks (which ended in a snowstorm, ushering our unprepared group off the trail and back home) I began researching backpacking tents that had to fit a few criteria:

  • Price- The tent had to be less than $200. At the time, I was a college student with very little spending money. This dropped my options considerably as some ultralight tents can be had for upwards of $750! CRAZY!
  • Weight- I wanted a tent that I could haul on solo trips and also split with someone on longer hauls into the wild. The Morrison came in under 5lbs which was much more manageable than the 12-15lbs I was carrying with the Wally World tent.
  • Space- I am 6’3″ tall and had a very rough time finding a tent that I could lay in without my feet or head hitting the tent walls. I also wanted to be able to sit up and change or read while the doors are closed.
  • BONUS- If I could manage it, I wanted vestibules on both doors. It is so much more convenient to be able to store your pack and wet/dirty gear outside and still have peace of mind that it is protected by the rain fly.

My constraints were pretty rigorous, but I knew a tent had to exist with these specs. I tried out several tents such as the ALPS Mountaineering LYNX, The North Face Stormbreak, and the Kelty Salida series and none of them met my criteria. I then found the Mountain Smith Morrison 2 and it checked every box!

The Morrison has several features that are big deal breakers for me now that I have used it rigorously for half a decade.

  1. IT IS HUGE! There is so much room inside, it feels like a bigger tent sometimes. I would feel comfortable cramming a third person in on extremely raining trips if need be. I can fully stretch out without turning diagonally and I can sit up to read or change without bumping into anything.
  2. It is one the simplest designs I have ever used. 2 poles, 4 stakes (for the tent, more with fly) and you are in business. It takes 2 people less than 2 minutes to set this tent up and less than 5 minutes solo.
  3. It is well made! This tent is solid. When guyed down we have used this tent in 50-60 MPH winds with no damage to the tent or us inside. The zippers are all high quality and all vents/windows provide adequate ventilation for hot trips. Any tent will get sticky when it is 90◦+ outside. The tent also retains heat really well in cold trips. I have had it down to below freezing several times and there is a noticeable warmth when compared to being outside.

Suggested changes-The tent is great right out of the box, but a few minor tweaks make it a spectacular 3 season backpacking tent.

Stakes

First, quality stakes are a must. Although the stakes that come with the tent are sufficient for backyard/state park camping, I would not try to use them in rocky soil or muddy soil. We use MSR Cyclone stakes and they have been fantastic. The price is right and I have yet to remotely bend one.

Dry Sack

Second, the Morrison comes with a stuff sack that is great for storing the tent. I suggest you always hang or spread out your tent in a cool dry area, but if that isn’t realistic than the provided sack will suffice. On the trail however, the sack will not cut it when it comes to compressing the tent down to as small of a package as possible.

We use a variety of stuff sacks accumulated over the years, but our newest is by far the favorite. Our Sea to Summit is a compression sack that is also water-resistant for when the rain or rapids get the best of you. You can cinch down the straps and compress the tent and rain fly to a very small (youth football) sized package.

Over the years, we accumulate gear that sticks with us and has an impact on how we experience the wild places that we visit. This tent is one of those pieces of gear. I can’t imagine going to the woods without it and it feels like home when I return to it. It seems crazy that a nylon shelter can feel like home, but I challenge you to give it a chance. You will be amazed at how much fun you can have in the woods with this little tent keeping you dry.

As always, follow us on Instagram to get the most up to date images and video from our trips and build progress on our bus. We would love it you would check out the rest of the blog and the YouTube page as well. All social media is @okienomads. Thanks for reading and have a blessed day!

*As you can see, there are embedded links throughout this post to products that we use and recommend. We will not provide affiliate links if we are not happy with the performance of a product. If you decide to purchase something using one of these links, a very small percentage of that sale goes to fund our adventures at no additional cost to you. If you are interested in an item, please use the links. It means a TON to us!

SaveSave

SaveSave

SaveSave

SaveSave

Jasper, AB: The Town of No Elk

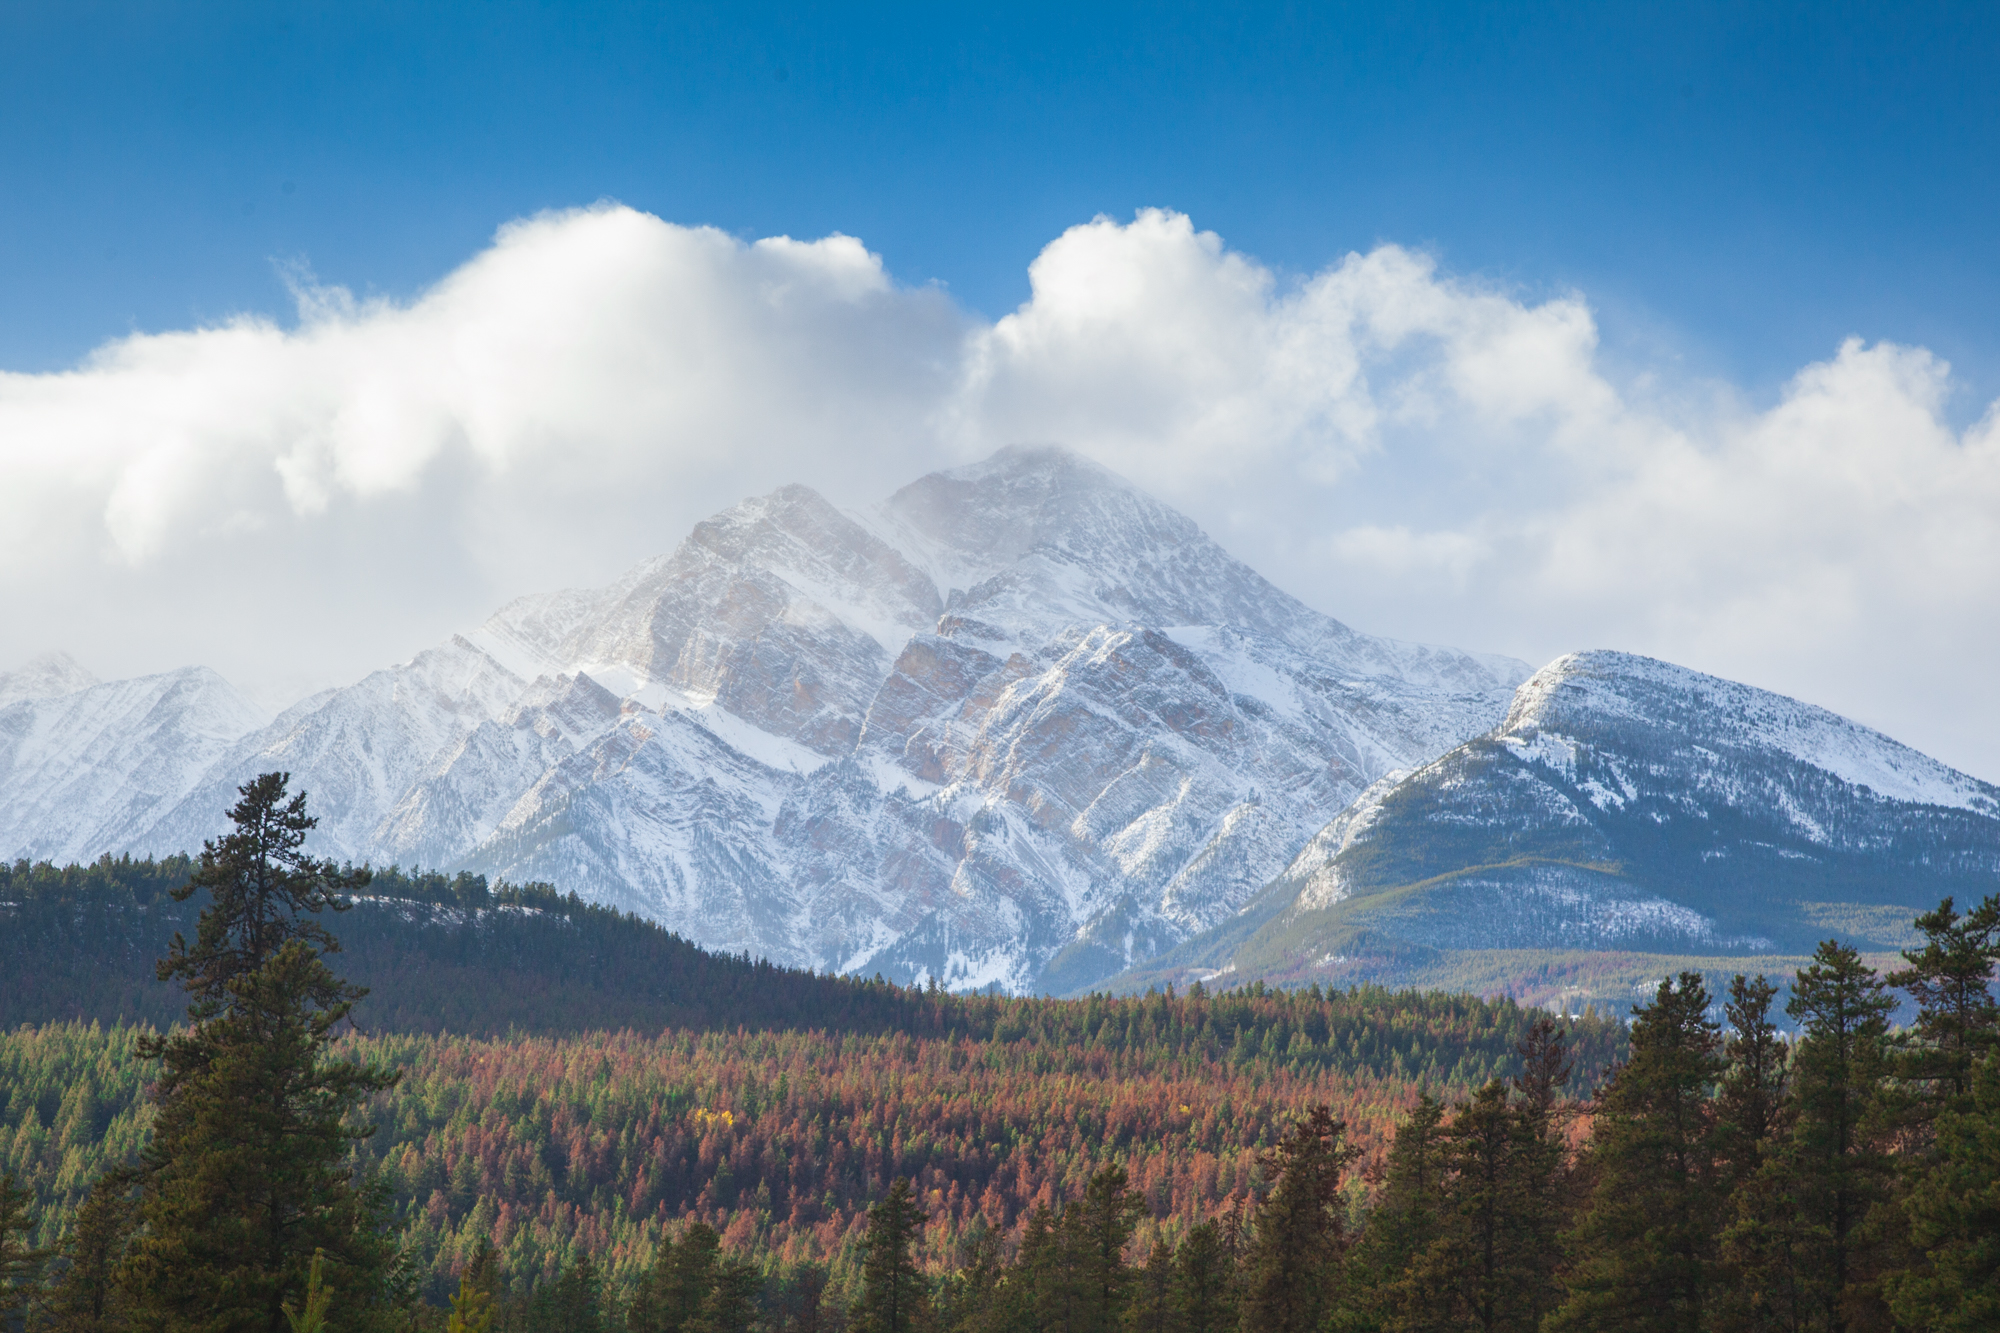
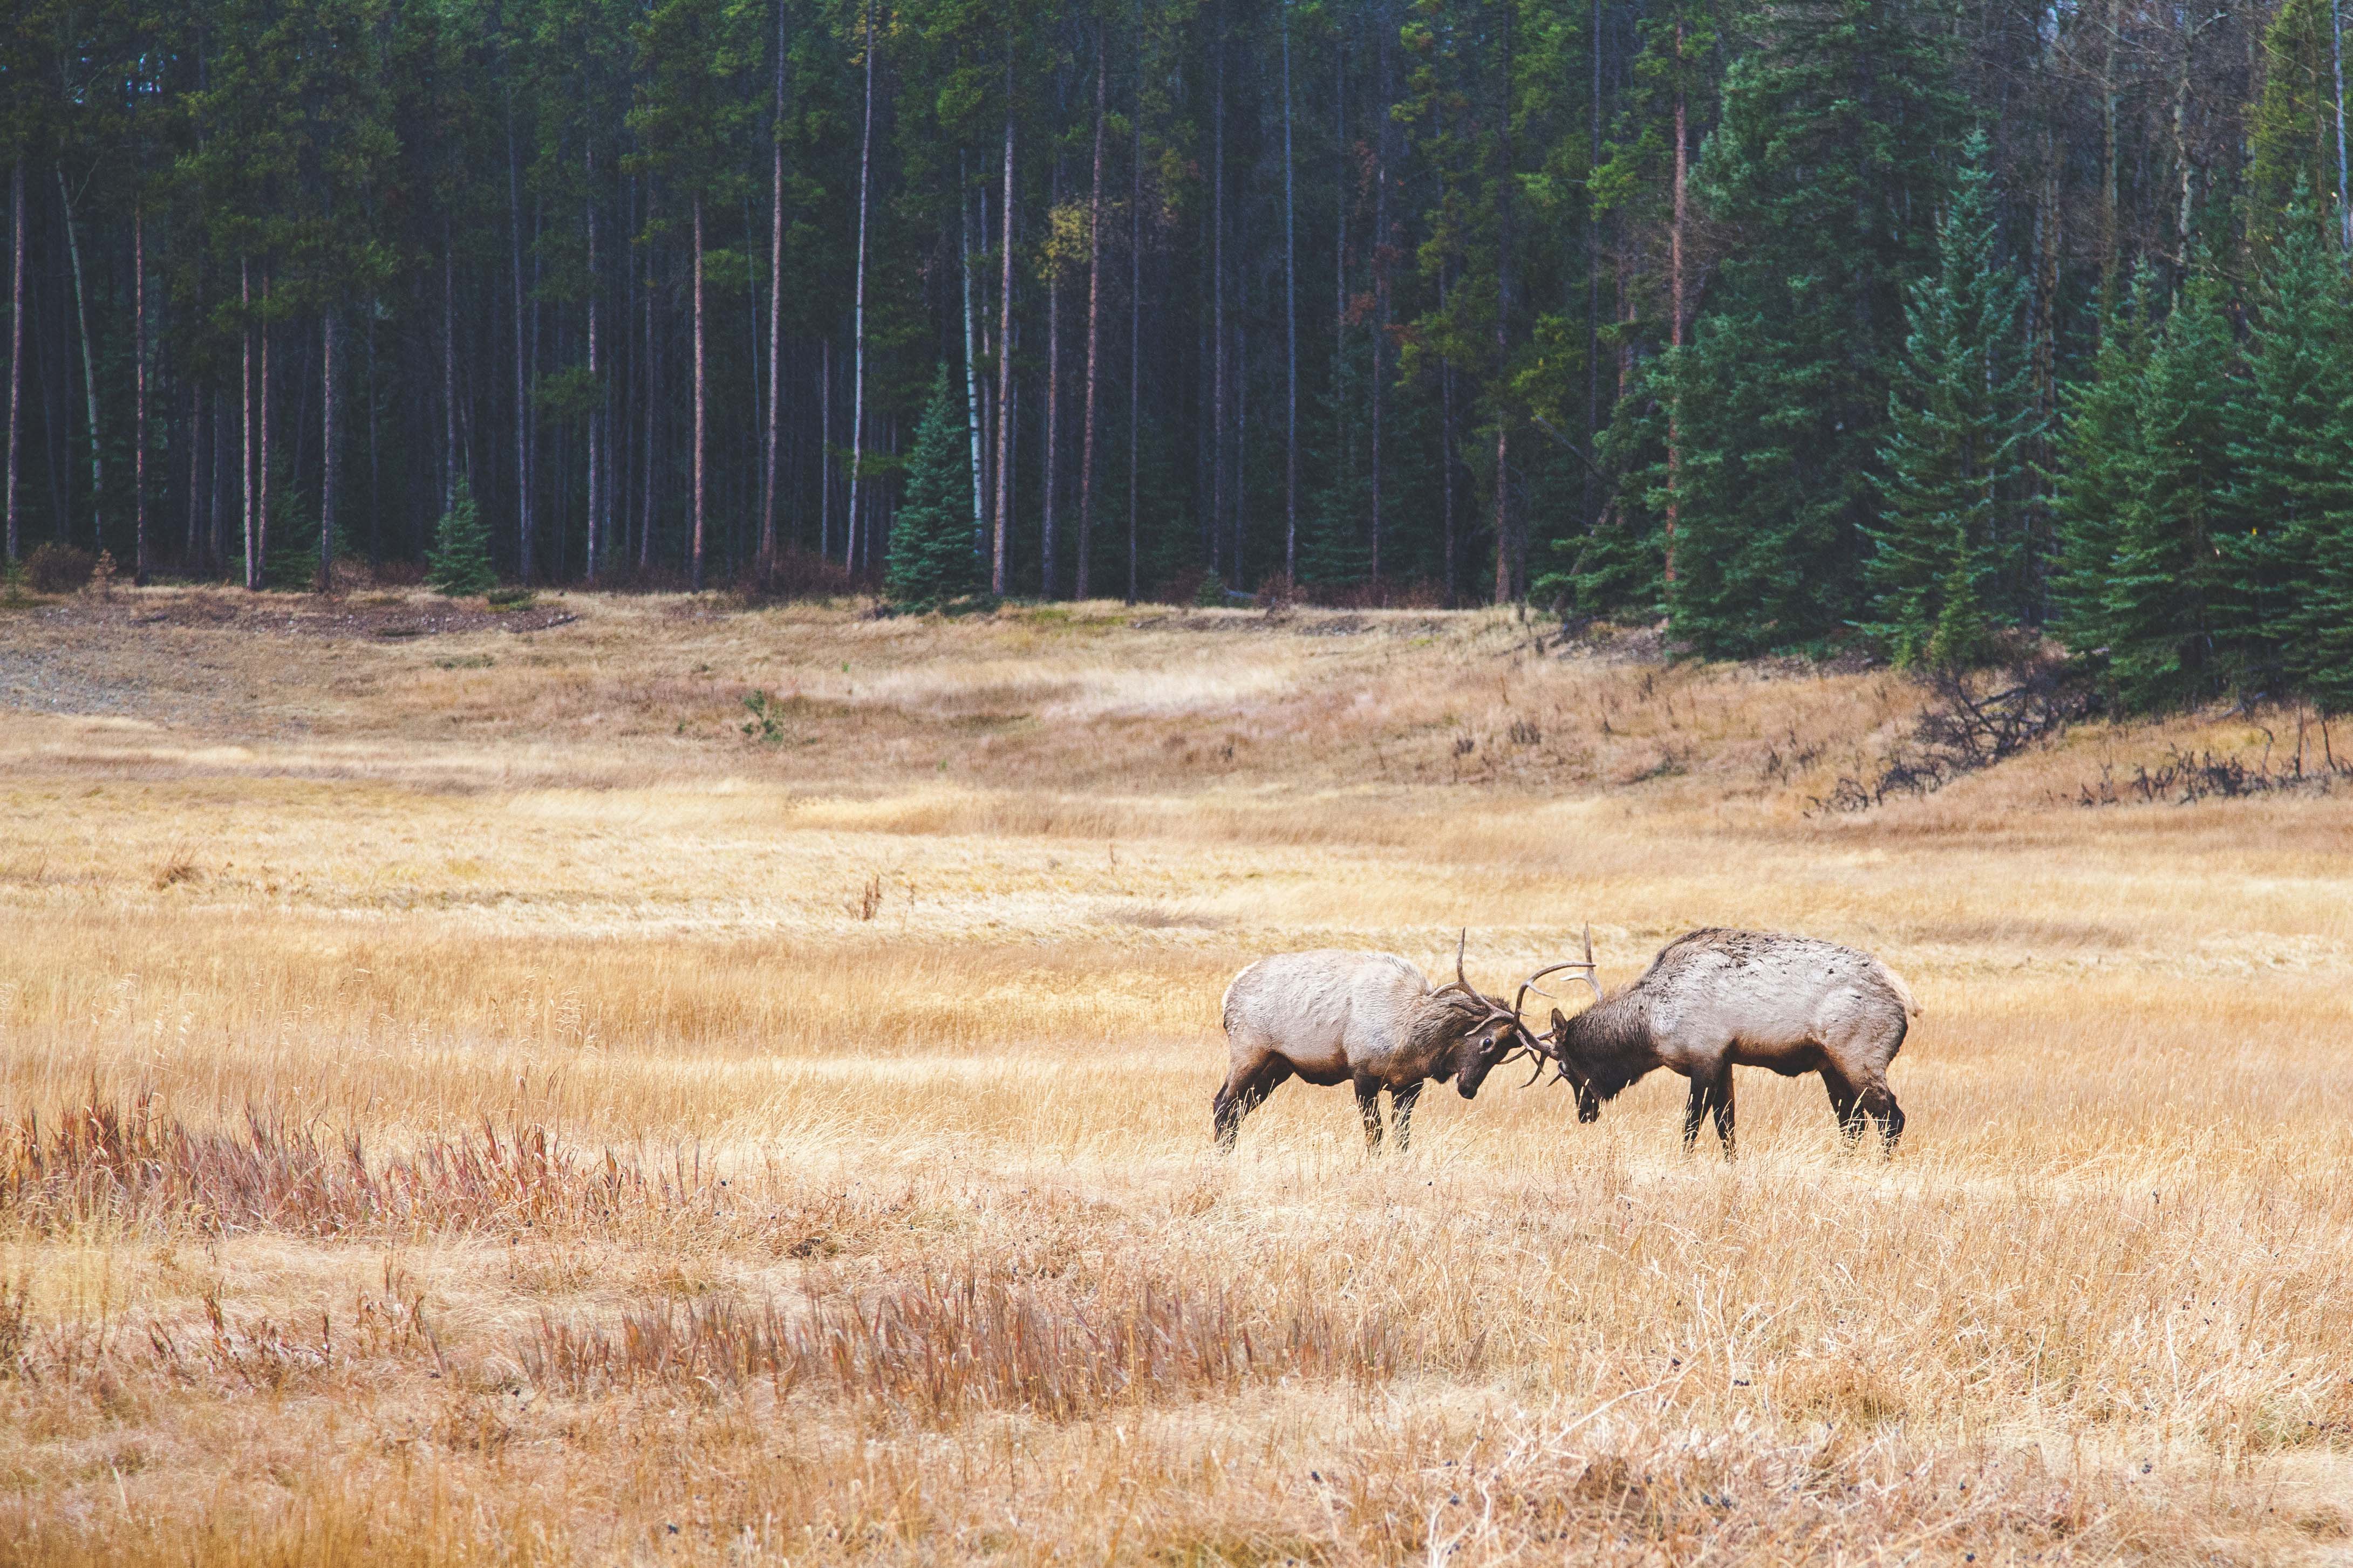
When we arrived to our campground just outside of town, I went for a little run into Jasper along the town’s trail system. The air was cold, but not uncomfortable and the run was fantastic. I ran 3 miles into town and back to our campground.I only had to touch pavement twice, in crosswalks. It is truly fascinating that a town that essentially closes for half of the year has a comprehensive trail system that encircles the entire town. I need to figure out an efficient method of taking pictures and video while running. Maybe I will start taking my phone with me, we will see. Once I got back to the campground, we had dinner and went to check out the river at night, together.

Athabasca River-Jasper, AB

The riverside was beautiful. We walked along the water and took in the sights, hoping for a glimpse at the Northern Lights. I think we were still a little early in the season and early in the evening. The clear skies were still a sight to see. We relaxed into a really nice evening in the RV with some reading and a nice night’s sleep. Needless to say, we weren’t alone.

Wapita Campground- Jasper, AB

We awoke to the sound of a diesel hunting truck warming up for a while and the rest of the morning was peaceful. We had a quick breakfast, enjoyed the heated bathroom and drove into Jasper.

I have to mention something that I have written about in previous posts. Just because you pay $25USD for a campsite in a National Park, doesn’t mean that you won’t be parking in a parking lot with 100 other RV’s. That is the main reason why we try to camp off of the beaten path when we travel in our skoolie. There is more privacy, less noise, and normally a much better view. Be on the lookout for our next blog post in this series from a beautiful campsite just over the border into British Columbia.

We made the short drive into Jasper and needed two utilities really badly, coffee and laundry.

Skoolie Tip #003: Pack light. In the case of our bus, it is a 4-window, basically the smallest modern skoolie you can own. If we packed all of the clothing that we owned in it, we would not have room for gear or food. By having about a week’s worth of clothing and planning outfits that use multiple combinations of a few key clothing articles, we save space and the amount of weight that we have to carry into the laundromat.

We found both coffee and laundry in the Snowdome Laundromat in downtown Jasper. The concept of this business is genius. It is a laundromat that also serves coffee. Or it’s a coffee shop, with laundry machines. Either way, it helped us shave one stop off of our day of errands in Jasper. We spent a couple of hours there on a weekday morning and it was busy There were roughly 20 people drinking coffee and around 10 doing laundry. It seemed to be a happening place. I would give this place 5 stars, but they had timed internet, which as a traveller, is crippling and really challenging. When you have been on the road for a week, 30 minutes of internet isn’t a lot. Regardless, next time I am in Jasper I will go get a cup of coffee here even if I don’t need to wash the pants that I have worn for 4 days straight.

Snowdome Laundromat at 607 Patricia St.

Once done with laundry and a resupply in Jasper, we took off for Maligne Canyon and Maligne Lake. The canyon is extremely accessible and has paved ADA walkways to most of the features of the canyon. The canyon runs so deep that you almost can’t see the water from the edge. We had only a limited amount of time at the canyon, but I am convinced that you could spend all day walking the trails to the different cascades.

Maligne Canyon-Jasper, AB

Maligne Canyon was a nice break to stretch our legs and prepare for the winding and snowy road to Maligne Lake. The road passes by Medicine Lake, which is a site to see in it’s own right. Once you get to Maligne Lake the first thing you notice is the iconic Maligne Lake Boathouse that dates back to 1928. Donald “Curly” Phillips built the boat house to attract business to his hunting and fishing trips to the lake. He stocked the lake with trout that he transported in barrels to the shores. Phillips lived in the boat house until his untimely death in an avalanche accident in 1936. The house is now used as storage for rental canoes and paddleboat used by Maligne Lake Tours. As most popular images of this location reveal, the boat house roof is in fact bright red, we visited when it was covered by snow.

Maligne Lake Boathouse- Jasper, AB
Maligne Lake- Jasper, AB

Winding back along the road from Maligne Lake we witnessed a couple of moose spending some quality time together and the crowd quickly gathered on the side of the highway to view the massive and majestic creatures. We left the moose alone and continued back to Jasper. We were rewarded for giving the moose their space with one of the most extravagant views that I have ever seen. It gives me chills writing about it months later. Pyramid Mountain, aptly named in the 1800’s for it’s appearance, dominates the horizon above Jasper and quickly became one of my favorite shots of all-time.

Pyramid Mountain- Jasper, AB

Jasper was an interesting place that we caught at an interesting time. During the summer, I imagine the hiking, biking, and climbing is spectacular. Likewise in the winter I can’t imagine the possibilities of winter activities. Shoulder season seemed like a great time to visit Jasper without the crowds, but also without the elk. We spent 2 days in Jasper and didn’t see a single elk. This was a little disappointing because the town center is known for the excellent elk population. The missing elk simply give us another reason to return to Jasper someday.

Thank you so very much for taking the time out of your day to read about our adventures and view our photos. If you haven’t yet, please take a couple more minutes to follow us on Instagram and subscribe to our channel on YouTube. Take a look around our website and if you see anything you like or have any suggestions, please let us know by commenting or e-mailing us at okienomads@gmail.com.

New VLOG Episode: 1 Year Bus-iversary: Skoolie Build Update

We have a new VLOG episode live on our YouTube channel. In this episode of our Vlog, we catch you up on our progress on our Skoolie build. We relocated our inverter and charge controller away from the water under the sink and built cabinets all over the bus!

Please follow along on Instagram

Please subscribe and comment on YouTube

Stay tuned for our next episode and subscribe to our channel so you can watch as we take our bus on the road in April 2018!

I Hope We Can See It Before It Is Gone: Bears Ears National Monument

I try to remain politically neutral on the internet, but I can’t stay in Geneva anymore. What happened on December 4th is disgusting. Here’s some history to show you what I mean:

1908: President, War Hero, and Environmentalist Theodore Roosevelt Jr. signed into law the Antiquities Act. This act gave the president of the United States the power to designate areas as National Monuments that ultimately led to the creation of Devil’s Tower and Grand Canyon National Monument.

1908-Present: The Antiquities Act has been used 157 times to protect ares such as Giant Sequoia Trees in California and has only been used twice to reduce the size of monuments in a time when challengers for the environment weren’t prepared to fight for public lands.

December 6, 2016: President Candidate Donald Trump delivered a speech in Fayetteville, NC where he said this:

December 4, 2017: President Donald Trump delivered a speech in Utah reducing the size of Obama-era Grand Staircase Escalante and Bears Ears National Monuments by almost 2,000,000 acres.

This announcement comes almost exactly one year after the speech above declaring to follow in the steps of Teddy Roosevelt as a protector of the outdoors. Ironically enough, through this announcement, President Trump has spit in the face of the environmental legacy of Roosevelt’s that Trump promised his voters that he would follow in the footsteps of. Roosevelt created the Antiquities Act. Trump is reversing the use of the Antiquities Act.

Environmentalist companies and organizations such as Patagonia, The Wilderness Society, and the Sierra Club have filed suit against the United States. Native American tribes such as the Navajo, Hopi, and Zuni that have lived in the area for thousands of years have also joined in the fight to stop the President.

Get Involved

  • Spread the Word! Raising awareness on social media is the easiest and most effective means to fight this injustice.
  • Donate! Friends of Cedar Mesa are raising funds for a Bears Ears Eduction Center HERE.

We hope to see Bears Ears and Grand Staircase on the road in 2018. I am in hopes that the wheels of bureaucracy will turn slowly and we will still have access to the original National Monuments in the Spring. Maybe the good guys will win and the President’s order will be reversed, only time will tell.


In the meantime, take a look at what the Trump administration would rather sell off to the states and private extraction interests instead of keeping it in the hands of Americans.

Photo by: Tim Peterson

Photo by: Josh Ewing

Photo by: Adriel Heisey

Banff, AB: Okienomad’s Trip Through Canada’s Oldest National Park

Once we had rested up from our flight and Canadian Thanksgiving in Calgary, we picked up our rental RV, and pointed the RV North and tried to get out of the city as quickly as possible. You can read about our experience with the RV rental in a previous Blog Post. We made a short stop in Canmore, AB to hike a bit, grab some coffee, and score the single coolest thrift store purchase that I have ever made (see: 90’s Shimano bike jersey).

Canmore

First thing is first, Canmore and much of Alberta as a whole, has bike lanes, hundreds of them. To an unsuspecting tourist from bike-averse rural Oklahoma, these lanes look like lanes for cars. I mistakenly tried to turn onto one of these glorious bike lanes and was swiftly pulled over by one of Canada’s finest. After a short run of my ID through what I have to guess was Interpol, we were free to go.

We stopped for coffee at Good Earth Café and after a mediocre cup of joe, we were on our way to Grassi Lakes Trailhead. I wish we had more time in Canmore as it was an interesting little town with what appeared to be a ton of mountain biking and hiking trails, but we had only planned on this one hike so we hoped it would be a good one.

Zach Elseman Photography: Canadian Rockies- October 2017 &emdash;

When we saw the trailhead, we couldn’t help but notice the hundred-foot waterfall that cascaded down the side of the hillside. We hiked along-side the waterfall to the top, where we found the Grassi Lakes. The views from the top were exceptional and we picked a great hike to start our trip into the Canadian Rockies.

Zach Elseman Photography: Canadian Rockies- October 2017 &emdash;

Do yourself a favor and if you are ever presented with two options on a hike, “easy” and “less easy”, always take the “less easy” route. You will be glad that you did. These lakes were well worth the hike up and the views were worth the effort to hike the “less easy” trail.


Banff

Zach Elseman Photography: Canadian Rockies- October 2017 &emdash;

We arrived in Banff at dark and drove straight to our first campground of our trip, Tunnel Mountain 2. We camped at Camp “2” because it was officially winter season in Canada. The entire campground is huge (600+ RV sites) and I can’t imagine what this place looks like during peak season. Most of the facilities were on and in good condition, but our “campsite” was literally a parking spot with a plug-in. My expectations for RV living probably needed to be adjusted a bit.

Travel Tip #1: If you are traveling in an RV in the late Fall or Winter FILL UP WHENEVER POSSIBLE! Every chance that you get to dump your grey water, fill your fresh water, fill propane, or fill vehicle fuel, do it! You never know who will have fresh water in the next town on the map. 

When we woke up we saw a rig parked across from us that was unique and had some branding on the side of the RV. The rig belonged to the Symons, a family living full time in their RV and travelling all over Canada. You can learn more about them at http://symons4everonroad.over-blog.com.

Zach Elseman Photography: Canadian Rockies- October 2017 &emdash;

If you have never been to Banff, there a few things that you need to see first. The Fairmont Hotel, Cave and Basin Historical Sight, and Bow Falls are a few that come to mind. These are iconic sights that are beautiful and fun to experience. We spent half of our first day in Banff visiting these locations. We parked in town and walked the impressive trail system from one side of town to the other and back around for lunch.

Zach Elseman Photography: Canadian Rockies- October 2017 &emdash; Zach Elseman Photography: Canadian Rockies- October 2017 &emdash;

Zach Elseman Photography: Canadian Rockies- October 2017 &emdash;

Zach Elseman Photography: Canadian Rockies- October 2017 &emdash;

For coffee or to get on the web for a while, we recommend Whitebark Café. The café is in a hotel lobby, so it is comfortable, has a public restroom and Wi-Fi plus the coffee was some of the best that we had in Alberta. If you are in an RV or large vehicle, we recommend parking at Wolf St and Lynx St near the Banff Canoe Club or at the Central Park Parking Lot on the South end of town. Central Park has public restrooms and is across the street from Banff Public Library (free Wi-Fi). Both parking spots are near the Bow River and make a quick walk to downtown.

One of my favorite businesses in Banff was the All in the Wild Gallery on Banff Ave. Jason Bantle is an excellent photographer and his work is on display and for sale in his downtown gallery. To see more of his work, check him out at www.bantlephoto.com . –Zach

I really enjoyed the walkability of Banff in that you could park in the FREE public parking and walk to anywhere in town. It was nice to not have to move the RV to go do something different.” -Rachael

Zach Elseman Photography: Canadian Rockies- October 2017 &emdash;


If you have an afternoon in Banff, take the time to drive to Lake Minnewanka. It is a long and winding road to get to the lake, but be sure to cross the lake and complete the loop alongside Two Jack Lake. The views of the lakes and forest along the road are beautiful and we saw quite a bit of wildlife on this road, including some rutting bull elk that were locking antlers when we arrived.

Zach Elseman Photography: Canadian Rockies- October 2017 &emdash;

Zach Elseman Photography: Canadian Rockies- October 2017 &emdash; Zach Elseman Photography: Canadian Rockies- October 2017 &emdash;

If you are leaving Banff and heading toward Jasper, travel on HWY 1A instead of the TransCanada HWY, the Bow Valley Parkway is much more scenic and much less traveled. The road leads you to a destination called Johnston Canyon. Do not skip Johnston Canyon! There were more waterfalls and cascades scattered along this canyon than any other location in Alberta. To read about Johnston Canyon and the rest of Banff National Park, you will need to keep an eye out for our next blog post: Bow Valley Parkway and Lake Louise.

Zach Elseman Photography: Canadian Rockies- October 2017 &emdash;

Thank you so very much for taking the time out of your day to read about our adventures and view our photos. If you haven’t yet, please take a couple more minutes to follow us on Instagram and subscribe to our channel on YouTube. Take a look around our website and if you see anything you like or have any suggestions, please let us know by commenting or e-mailing us at okienomads@gmail.com.

error

Enjoy our content? Help spread the word! ;)

Follow by Email
YouTube
YouTube
Instagram