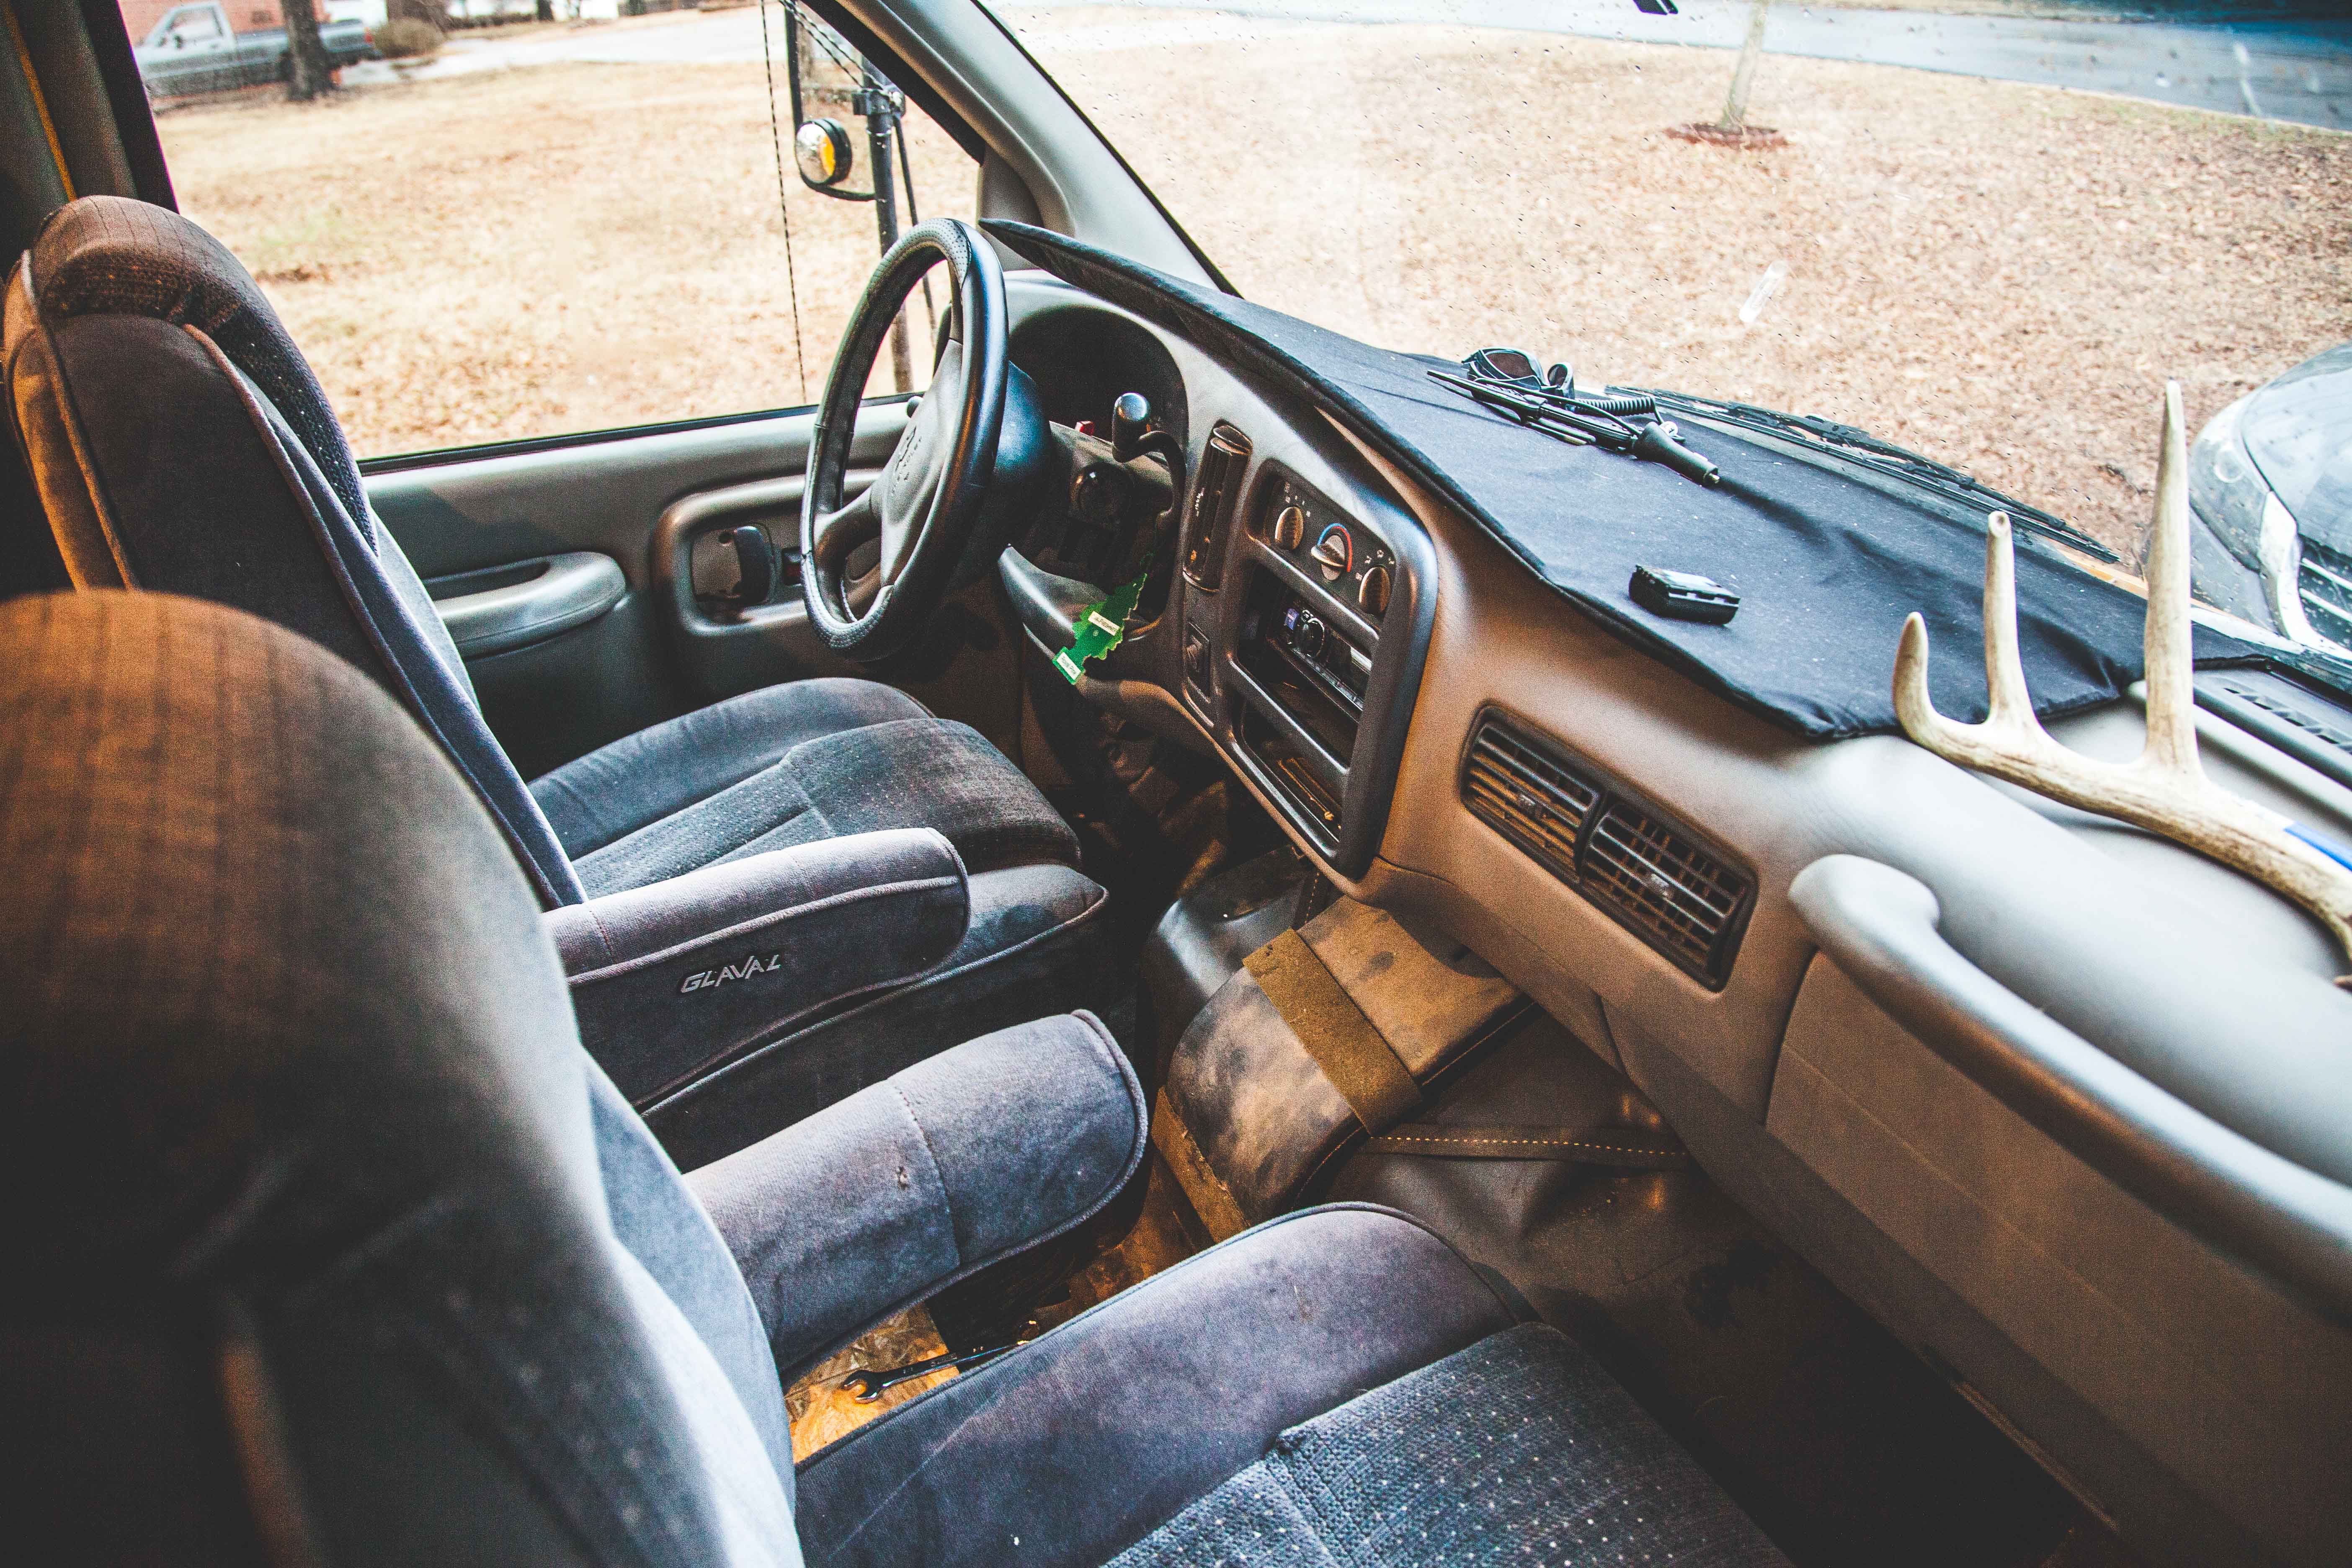
Glamping on the Mesa: Hotel Luna Mystica- Taos, NM

I will be honest: I don’t like paying for camping. On previous trips, we have avoided paid campgrounds by camping in a city park! However, that was before we were faced with a dilemma in Taos, NM. We had a grand campsite at the top of the tree-line, nestled next to a multi-million dollar home, but it was up in the mountains and we wanted to spend some time down on the mesa and enjoy Taos Mesa Brewing Co. and similar establishments in and around Taos.

Enter Hotel Luna Mystica and the Starlight Campground. These guys have done it right. First, they have brought in ten of the raddest, refurbished, vintage trailers from all around and hooked them up to modern utilities so you can glamp in style and comfort. For example, check out Ralphie, the 1962 Airstream Overlander.

Image courtesy of www.HotelLunaMystica.com

Like all of the trailers at the hotel, Ralphie is outfitted with top of the line amenities including a FULL BATH! The interiors of these trailers have been completely redone and are simply works of art. There is a cookstove, coffee pot, and AC to make your stay as cozy as can be. Light up the fire pit out front and unwind from your day of adventuring with a nice fire and a pint from Taos Mesa Brewing.

If glamping isn’t your thing, the Starlight Campground is for you. We camped here before it was a campground and it was BEAUTIFUL! I can’t imagine what it’s like with all of the enhancements completed.

AND THEY HAVE A BUS! The chill bus was in fact, very chill. Tons of improvements have been made here since we were there in May 2017 including shade structures, trees to block the wind, and a shower house. Hotel Luna Mystica and Taos Mesa Brewing host many events throughout the year and camping is available at all of them. Check out the schedule on the brewery website when planning your trip.

@hotellunamystica

The new sail shades and pad improvements make a huge difference as it is in the middle of a desert. The overall flow of the campground has a great vibe and is staffed with awesome people. Construction was going on when we were there on the trailers and one of the carpenters even gave us tips on a local mountain bike trail not far from there. It was a great spot and a highlight of the trip.

Perhaps the most important part of this location is its proximity to Taos Mesa Brewing. TMB has one of the most iconic buildings in the Taos area with the mothership and they offer live music every night of the week. When we were there we saw The Drunken Hearts and they put on a really good concert. The beer is brewed on-site and is spectacular. We sampled some up at the ski area a day or so before and were rewarded with more selection and awesome staff at the mothership. Once we finished some tacos and beer, we made our way across the street to our tent and crashed. The sound of coyotes in the distance put us right to sleep and waking up to the mountains made for a great way to wake up.

So whether you are shredding the local mountain bike trails (we recommend Horsethief Mountain Bike Trail) or skiing at Taos Ski Valley, Hotel Luna Mystica is right for you. How many people can honestly say that they have stayed in a vintage RV hotel?

SaveSave

SaveSaveSaveSave

SaveSave

SaveSave

SaveSave

SaveSave

SaveSave

SaveSave

Free Camping: San Jon City Park(NM)

Everyone has the feeling on a road trip where your eyes start getting heavy, your Red Bull is wearing off and you can only sing “Don’t Stop Believing” so many times before it fails to keep you attentive. You might even venture to explore the rumble strips on the side of the expressway. This is a no-judgement-zone, we have all been there.  This is one of those times.

Over the years I have developed this extremely low level of “give a crap” when it comes to camping. Once I am done driving, hiking, or generally doing anything, my next move is to find somewhere to sleep. My poor friends are looking for flat campsites or their girlfriends are looking for a cheap Air BnB or hotel room and I am over here trying to fold down the seats in the car and somehow fit my 6’3″ frame in a 6′ trunk. I guess I have accepted the inevitability of discomfort that comes with camping and backpacking. Your back aches from using a 1/2″ thick blow-up sleeping pad that has a slow leak and your neck is sore because your stuff sack filled with your rancid clothes doesn’t feel quite the same as your pillow at home. This is why God created fly-over towns. In most of these tiny dots on the map you can get by with laying your feet out of the window of the car and catching a few hours of shut-eye behind the truck stop or near a church parking lot.

Sometimes you get lucky and find a town that knows what you are shopping for and delivers! Enter San Jon, NM.

San Jon (pronounced “San Jone”) is a village in Northeast New Mexico that has a city park specifically designated for camping and overnight parking. The city’s population is around 300 as of 2000 and since I40 bypassed the town, most every business has died off and left town. However, dirtbag camping is alive and well in San Jon.

We arrived around midnight on the Friday night of Memorial Day Weekend and were greeted by an 80’s Class A motorhome on the South side of the park and the rest of the place to ourselves. We found the bathrooms to be nearly spotless and they had running hot water, score! We freshened up a little and setup the tent for a short stay. Due to the wind, we staked our backpacking tent down and enjoyed a mostly uninterrupted sleep. Another vehicle showed up in the middle of the night with an a-frame bumper-pull in tow and we were none the wiser. We awoke to light that only really happens in the desert and we were packed up in a matter of minutes.

While walking around, you could tell that this town used to be something. It seemed like we were walking the streets of a town from a “Cars” movie where the entire town had lost it’s identity when the interstate came through. I half expected to see a rusted dump truck parked on the corner of town. Instead there are vacant service stations, boats on blocks, and one lonely hotel that somehow stays in business.

Our time in San Jon was short, but memorable. I recommend a visit to this town if you are passing through, especially if you are needing a place to crash for the night on I40 between Oklahoma and Arizona. A huge thanks goes out to the town of San Jon for looking out for us budget campers that would rather spend our money on gas and food for the next adventure than on camping. Your facilities are great and I can’t wait to stop in your town again soon!

GPS COORDINATES: 35.107665, -103.331169

If you liked this post and want to see more like it, please look around the rest of the website and let us know what you think. We are on Instagram and YouTube as well as @okienomads, a like and follow or subscription would mean a lot and help you to keep up with us on the road. Have a blessed day and thanks for reading.

A Hike Through an Abandoned Campground: Hoodoo Creek Trail, Yoho National Park

Abandoned campsites. Dilapidated bathroom facilities. Wood stoves and propane tanks. 75 tent campsites left to ruin. What causes a large campground in a Canadian National Park close abruptly and leave large amounts of infrastructure to be taken back by the forest?

In 2013, Parks Canada elected to close Chancellor Peak Campground, which provided 59 campsites on the Western side of Yoho National Park. The decision was made after extreme flooding of the Kicking Horse River ripped through the Chancellor Peak Campground in Summer 2012. Parks officials stated that money was set aside to remove infrastructure such as fire rings, picnic tables, and buildings before more damage could occur.

Then why was Hoodoo Creek Campground abandoned in 2001 and left to rot? Seventy-five campsites lay empty near the town of Field, BC with remains of numbered signs still showing the rings of tent-sites barely visible through the grass and trees that have overgrown around them. Large bathroom facilities sit unlocked and still fully furnished with large amounts of plumbing supplies laying in their stalls. Huge, covered outdoor gathering areas with wood stoves and picnic tables lay un-touched if you disregard the numerous graffiti tags scattered through-out. Large dumpsters and outbuildings remain unused and still in relatively good shape considering the time that they have sat in the bitter Alberta winters.

Online research into the Hoodoo Creek Campground and it’s closure returned very little information. While digging through a Land Management Plan for Yoho NP from 2000, I found a section that mentions efforts to “Examine ways to improve wildlife movement at constricted areas, called pinch points… the Hoodoo Campground”. The Canadian Government has shown time and again that it is serious about protecting wildlife, but would it close a profitable campground in a unique location simply to allow animals to pass through the area easier? If so, wouldn’t Parks Canada Marketing take a story like that and run with it?

The location is still used heavily by visitors that seek to use the 30 campsites at the entrance to the campground, far from the A-F loops of the old campground. Thousands of visitors have probably stayed in the new sites without even knowing that the old sites were still there, that is how heavy the underbrush and trees have become. The other major draw to this area is a 3.3 KM hike to a rock formation called a Hoodoo, the namesake of the abandoned campground.

Mt. Chancellor towering over the abandoned Hoodoo Creek Campground

Once parked at the road block that keeps visitors from visiting the old campsites you must travel down a flat gravel road to reach the campground and Hoodoo Creek. You will begin to see campground signs for Camp A, B, C… Within each ring of sites, you will see short 4×4 posts with numbers on them marking where a tent pad used to be. Travel past the campsites to the creek and cross over to get to the trailhead. It appears that a few iterations of a bridge have been built over time and all have been wiped away by the spring snow melt.

Keep in mind that this is a very, very, steep trail. It gains over 300 m of elevation over less than a couple of kilometers. You begin hiking a set of gradual switchbacks through Douglas fir and the remnants of a prescribed burn in 2005. When we visited in October of 2017, the trail was clear and in good shape.

The switchbacks continue until you round the corner with a clear view of Mt. Chancellor and Wapta Falls in the distance. More on that in a later post. Continue around the bend and you will begin to see views of several Hoodoos jutting out of the side of the hill and Hoodoo Creek directly below. You will reach a sign for a couple of different view points. I advise taking the upper view point as the lower simply wasn’t very impressive.

Hoodoos are formed when softer rock is eroded away, yet the sedimentary rock that is covered by the harder stone above is protected from erosion and remains, forming a tower-like formation. The Lenchcoil Hoodoos are rare in that this type of rock formation is normally found in drier climates than Yoho NP.

The view from the edge of the Hoodoos is fantastic and it gives a very real sense of the size and scale of the formations. Continue up the trail for an interesting perspective of interesting objects, or spend some time soaking up the views of the crazy rocks from below.

This hike is an out and back and as you descend back to the creek you will be rewarded with excellent views of the surrounding valley. Wapta Falls is visible in a Tolkien-esque landscape over the horizon and should definitely be on your list of sites to see if you are fortunate enough to visit Yoho National Park. The hike down is much more enjoyable that the rather tough hike up to the Hoodoos.

A final note on the Hoodoos Campground: Although we thoroughly enjoyed our time exploring the Hoodoo Creek area, we couldn’t seem to get past the idea that something tragic happened here. When we crossed back across the creek, we found a water pump house next to a large water storage tank, a couple of thousand gallons of capacity if I had to guess. Inside this ridiculously well-maintained pump house was a brand new generator that had enough juice to power a small village. All of the water fittings on the storage tank were in excellent shape and had been used recently. We also found a large mass of water pipe that appeared to be used to pump water out of the creek at some point.

Is this a secret water heist?

Was there a mass-murder in the Hoodoo Creek Campground in 2001? 

Or was this simply a move by Parks Canada to protect the travel of wildlife from one area of the park to another?

My research was inconclusive and hopefully someone who reads this can fill us in on what exactly happened at Hoodoo Creek. If you have information about this mysterious campground, we would love to hear from you. As always, follow us on Instagram to get the most up to date images and video from our trips and build progress on our bus. We would love it if you would check out the rest of the blog and the YouTube page as well. All social media is @okienomads. Thanks for reading and have a blessed day!

SaveSave

SaveSave

SaveSave

Gear Review: Mountainsmith Morrison 2 Backpacking Tent

I got the itch many years ago to try my hand at backpacking. The first and single most important piece of gear to get into the woods is a tent. The tent provides shelter, security and sometimes warmth. When you venture several miles from any civilization, a good tent can change a really crummy trip into a great experience in the woods.

My first backpacking experience is one of my favorite memories, but one of the worst experiences with a tent that I have ever had. A few (3) friends and I decided to undertake a daunting hiking trip spanning some 30+ miles over 4 days through the early spring Ozark Wilderness. Rain was barely in the forecast so we neglected to bring any real rain gear. We lucked out and avoided rain. The ground, however, was soaked from the previous 6 days of rain that hit the area. The awful Ozark Trail 4 man tent did not do what I had assumed it was made to do. This tent can be purchased at any of the thousands of Wal-Mart stores in the country and was created to be used in state parks and backyards when precipitation is not in the forecast.

We got soaked. To be fair there was a small creek running under the bottom of the tent and I am not sure the best of tents would have survived, but the big box store tent let us down. We were wet, cold, and unhappy that we lugged this big thing up and down the trails all spring break.

Upon returning from that trip to the Ozarks (which ended in a snowstorm, ushering our unprepared group off the trail and back home) I began researching backpacking tents that had to fit a few criteria:

  • Price- The tent had to be less than $200. At the time, I was a college student with very little spending money. This dropped my options considerably as some ultralight tents can be had for upwards of $750! CRAZY!
  • Weight- I wanted a tent that I could haul on solo trips and also split with someone on longer hauls into the wild. The Morrison came in under 5lbs which was much more manageable than the 12-15lbs I was carrying with the Wally World tent.
  • Space- I am 6’3″ tall and had a very rough time finding a tent that I could lay in without my feet or head hitting the tent walls. I also wanted to be able to sit up and change or read while the doors are closed.
  • BONUS- If I could manage it, I wanted vestibules on both doors. It is so much more convenient to be able to store your pack and wet/dirty gear outside and still have peace of mind that it is protected by the rain fly.

My constraints were pretty rigorous, but I knew a tent had to exist with these specs. I tried out several tents such as the ALPS Mountaineering LYNX, The North Face Stormbreak, and the Kelty Salida series and none of them met my criteria. I then found the Mountain Smith Morrison 2 and it checked every box!

The Morrison has several features that are big deal breakers for me now that I have used it rigorously for half a decade.

  1. IT IS HUGE! There is so much room inside, it feels like a bigger tent sometimes. I would feel comfortable cramming a third person in on extremely raining trips if need be. I can fully stretch out without turning diagonally and I can sit up to read or change without bumping into anything.
  2. It is one the simplest designs I have ever used. 2 poles, 4 stakes (for the tent, more with fly) and you are in business. It takes 2 people less than 2 minutes to set this tent up and less than 5 minutes solo.
  3. It is well made! This tent is solid. When guyed down we have used this tent in 50-60 MPH winds with no damage to the tent or us inside. The zippers are all high quality and all vents/windows provide adequate ventilation for hot trips. Any tent will get sticky when it is 90◦+ outside. The tent also retains heat really well in cold trips. I have had it down to below freezing several times and there is a noticeable warmth when compared to being outside.

Suggested changes-The tent is great right out of the box, but a few minor tweaks make it a spectacular 3 season backpacking tent.

Stakes

First, quality stakes are a must. Although the stakes that come with the tent are sufficient for backyard/state park camping, I would not try to use them in rocky soil or muddy soil. We use MSR Cyclone stakes and they have been fantastic. The price is right and I have yet to remotely bend one.

Dry Sack

Second, the Morrison comes with a stuff sack that is great for storing the tent. I suggest you always hang or spread out your tent in a cool dry area, but if that isn’t realistic than the provided sack will suffice. On the trail however, the sack will not cut it when it comes to compressing the tent down to as small of a package as possible.

We use a variety of stuff sacks accumulated over the years, but our newest is by far the favorite. Our Sea to Summit is a compression sack that is also water-resistant for when the rain or rapids get the best of you. You can cinch down the straps and compress the tent and rain fly to a very small (youth football) sized package.

Over the years, we accumulate gear that sticks with us and has an impact on how we experience the wild places that we visit. This tent is one of those pieces of gear. I can’t imagine going to the woods without it and it feels like home when I return to it. It seems crazy that a nylon shelter can feel like home, but I challenge you to give it a chance. You will be amazed at how much fun you can have in the woods with this little tent keeping you dry.

As always, follow us on Instagram to get the most up to date images and video from our trips and build progress on our bus. We would love it you would check out the rest of the blog and the YouTube page as well. All social media is @okienomads. Thanks for reading and have a blessed day!

*As you can see, there are embedded links throughout this post to products that we use and recommend. We will not provide affiliate links if we are not happy with the performance of a product. If you decide to purchase something using one of these links, a very small percentage of that sale goes to fund our adventures at no additional cost to you. If you are interested in an item, please use the links. It means a TON to us!

SaveSave

SaveSave

SaveSave

SaveSave

New VLOG Episode: 1 Year Bus-iversary: Skoolie Build Update

We have a new VLOG episode live on our YouTube channel. In this episode of our Vlog, we catch you up on our progress on our Skoolie build. We relocated our inverter and charge controller away from the water under the sink and built cabinets all over the bus!

Please follow along on Instagram

Please subscribe and comment on YouTube

Stay tuned for our next episode and subscribe to our channel so you can watch as we take our bus on the road in April 2018!

The Icefields Parkway: Promenade de Glaciers

Before you read about one of the best and most iconic roads in North America, go read about our journey through Alberta in Bow Valley Parkway and Lake Louise and Banff, AB: Okienomad’s Trip Through Canada’s Oldest National Park.

Now onto this road. The Icefields Parkway is a 167 mile road that links Lake Louise to Jasper. The road winds and curves along pristine alpine rivers, over massive mountain passes and passed some of the coolest attractions in Canada.

We left out of our epic hillside parking spot and made the turn West and onto the Icefields Parkway.

Just after starting up one of the mountain passes, we were greeted by a herd of bighorn sheep crossing the road. These creatures did not remotely care that we were on the road. We let them pass and continued on up the hill.

We shortly stumbled upon the Columbia Icefield and proceeded to hike as close as we could before the crevices started. I was really taken aback by the glacier and how much it has retreated into the mountains since discovery. The date markers showing the toe of the glacier over time really convey the effects of global warming. I enjoyed the hike because of the beauty but was also humbled by the reality of what damage we have done to our planet.

On our way up the Icefields Parkway, we somehow missed the turn off for Tangle Falls. We realized it shortly after we missed the sign, but decided to come back to it on our way back South. We were not disappointed. This waterfall looked like something on a tropical island. I can’t imagine what it looks like in the summer season. We met a man here, he was actually stopping to use the facilities, and he was on his way from Alaska to Idaho, solo, in a 2nd generation Nissan Xterra. I was a little jealous of the epic distance of his trip and also very nervous for him driving through the wilds of North America through the night on his own.

We continued down the parkway toward Athabasca Falls, aptly named for the river that feeds the falls. The falls were incredible and what we missed seeing over the horizon due to the fog, we made up for in snow-covered trees bordering the river.

Racheal and I attempted to follow a trail around to the lower falls, but ended up on an old rail track and followed it a little ways into the forest. We returned to take in one more look at the falls and head toward Jasper.

This road is iconic and epic due to the sweeping views and the beautiful natural features that litter the landscape. If you are traveling the Icefields Parkway, I encourage you to take two days to see this road, especially during the summer season. If you feel like turning off and getting a picture, do it. We stopped for a lot of pictures of the road and I still wish we had stopped for more. There are so many beautiful scenes to see, TAKE YOUR TIME!

We made our way to Sunwapta Falls, a Class VI waterfall with a drop of 60ft. I would have loved to see someone ride a kayak through this set of falls as it is impressive in size and volume. I encourage you to visit this (and any other iconic sights) early in the morning. If you can be the first one there as the sun comes up, you will miss the hoards of tourists that bus in during the day. It became difficult to even setup a shot at Sunwapta due to the masses of people during the week in mid-October. Nevertheless, it was beautiful and well worth the stop.

We met the nicest woman from Ontario while we were hiking around the falls. She was visiting her son in Alberta and decided to stop at some sights along the way. Meeting people on the road is one of our favorite elements of long-term travel. We are contemplating making a business card so we can stay in touch with people that we meet on the road.

We pulled into the Jasper area close to dark, so we got the RV parked and paid for in the Wapiti Campground. Similar to Tunnel Mountain II in Banff, Wapiti is a massive campground. Be warned, during the winter months, there is not water fill or dump station at Wapiti, it is strictly an electric-only site. We were not alone at Wapiti, but the shore power and warm, clean showers were worth the $25USD that we paid to park in a parking lot with other RV’s. We will tell the story of our time in Jasper in another post, stay tuned.

Thank you so very much for taking the time out of your day to read about our adventures and view our photos. If you haven’t yet, please take a couple more minutes to follow us on Instagram and subscribe to our channel on YouTube. Take a look around our website and if you see anything you like or have any suggestions, please let us know by commenting or e-mailing us at okienomads@gmail.com.

SaveSave

SaveSave

SaveSave

SaveSave

Gear Review: Lowepro DroneGuard CS 400 is the Answer to 3DR Solo’s Problem

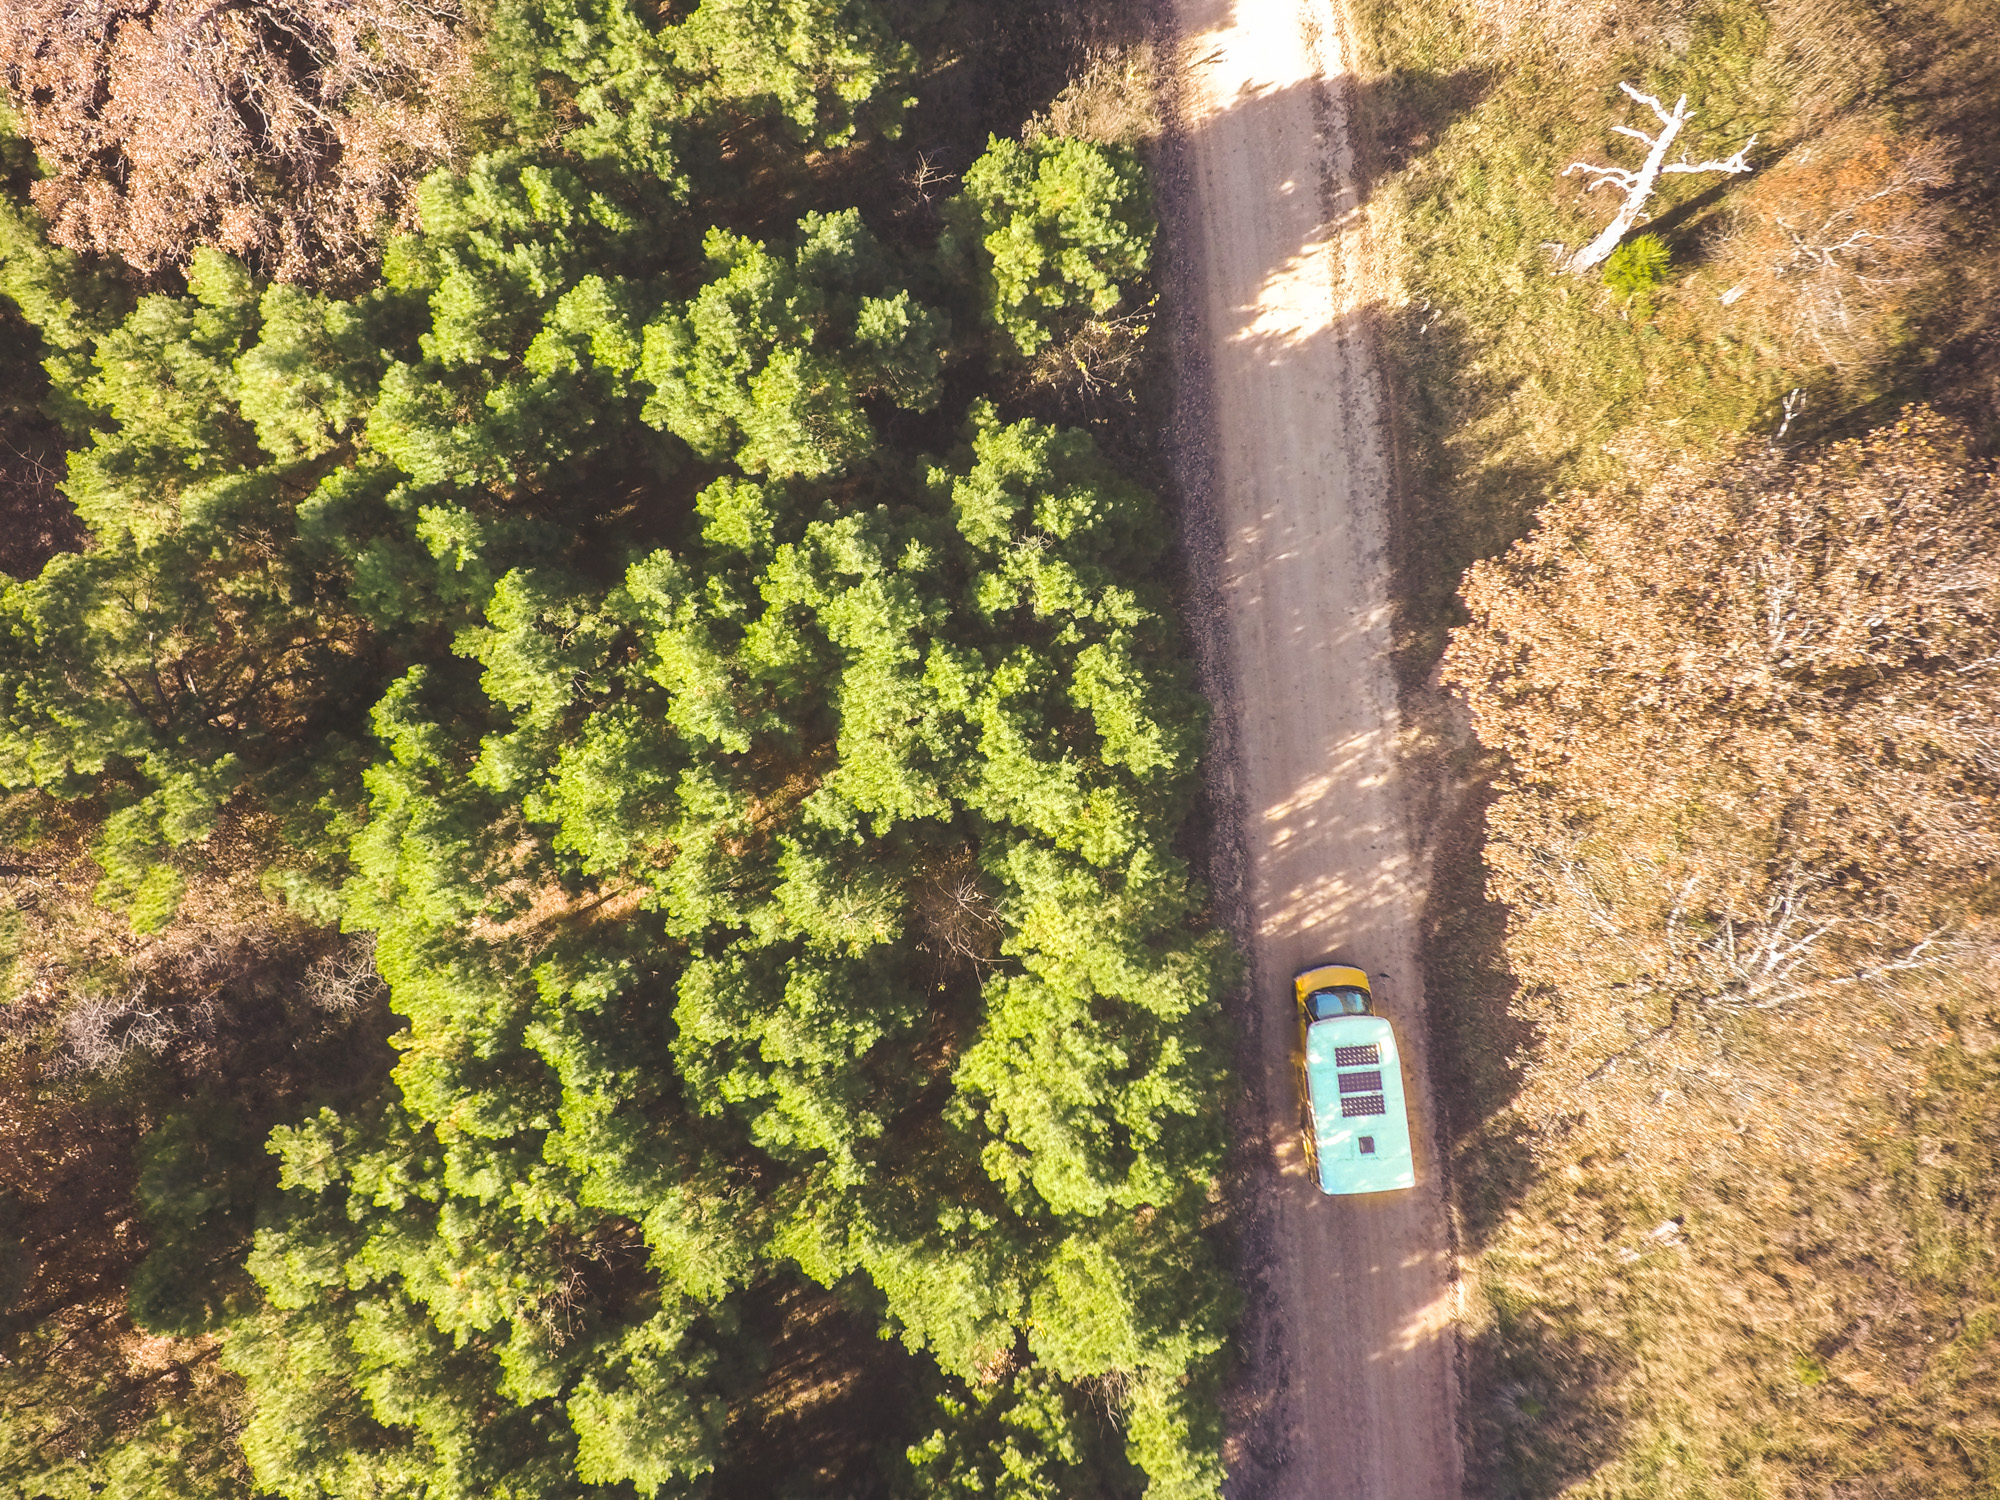
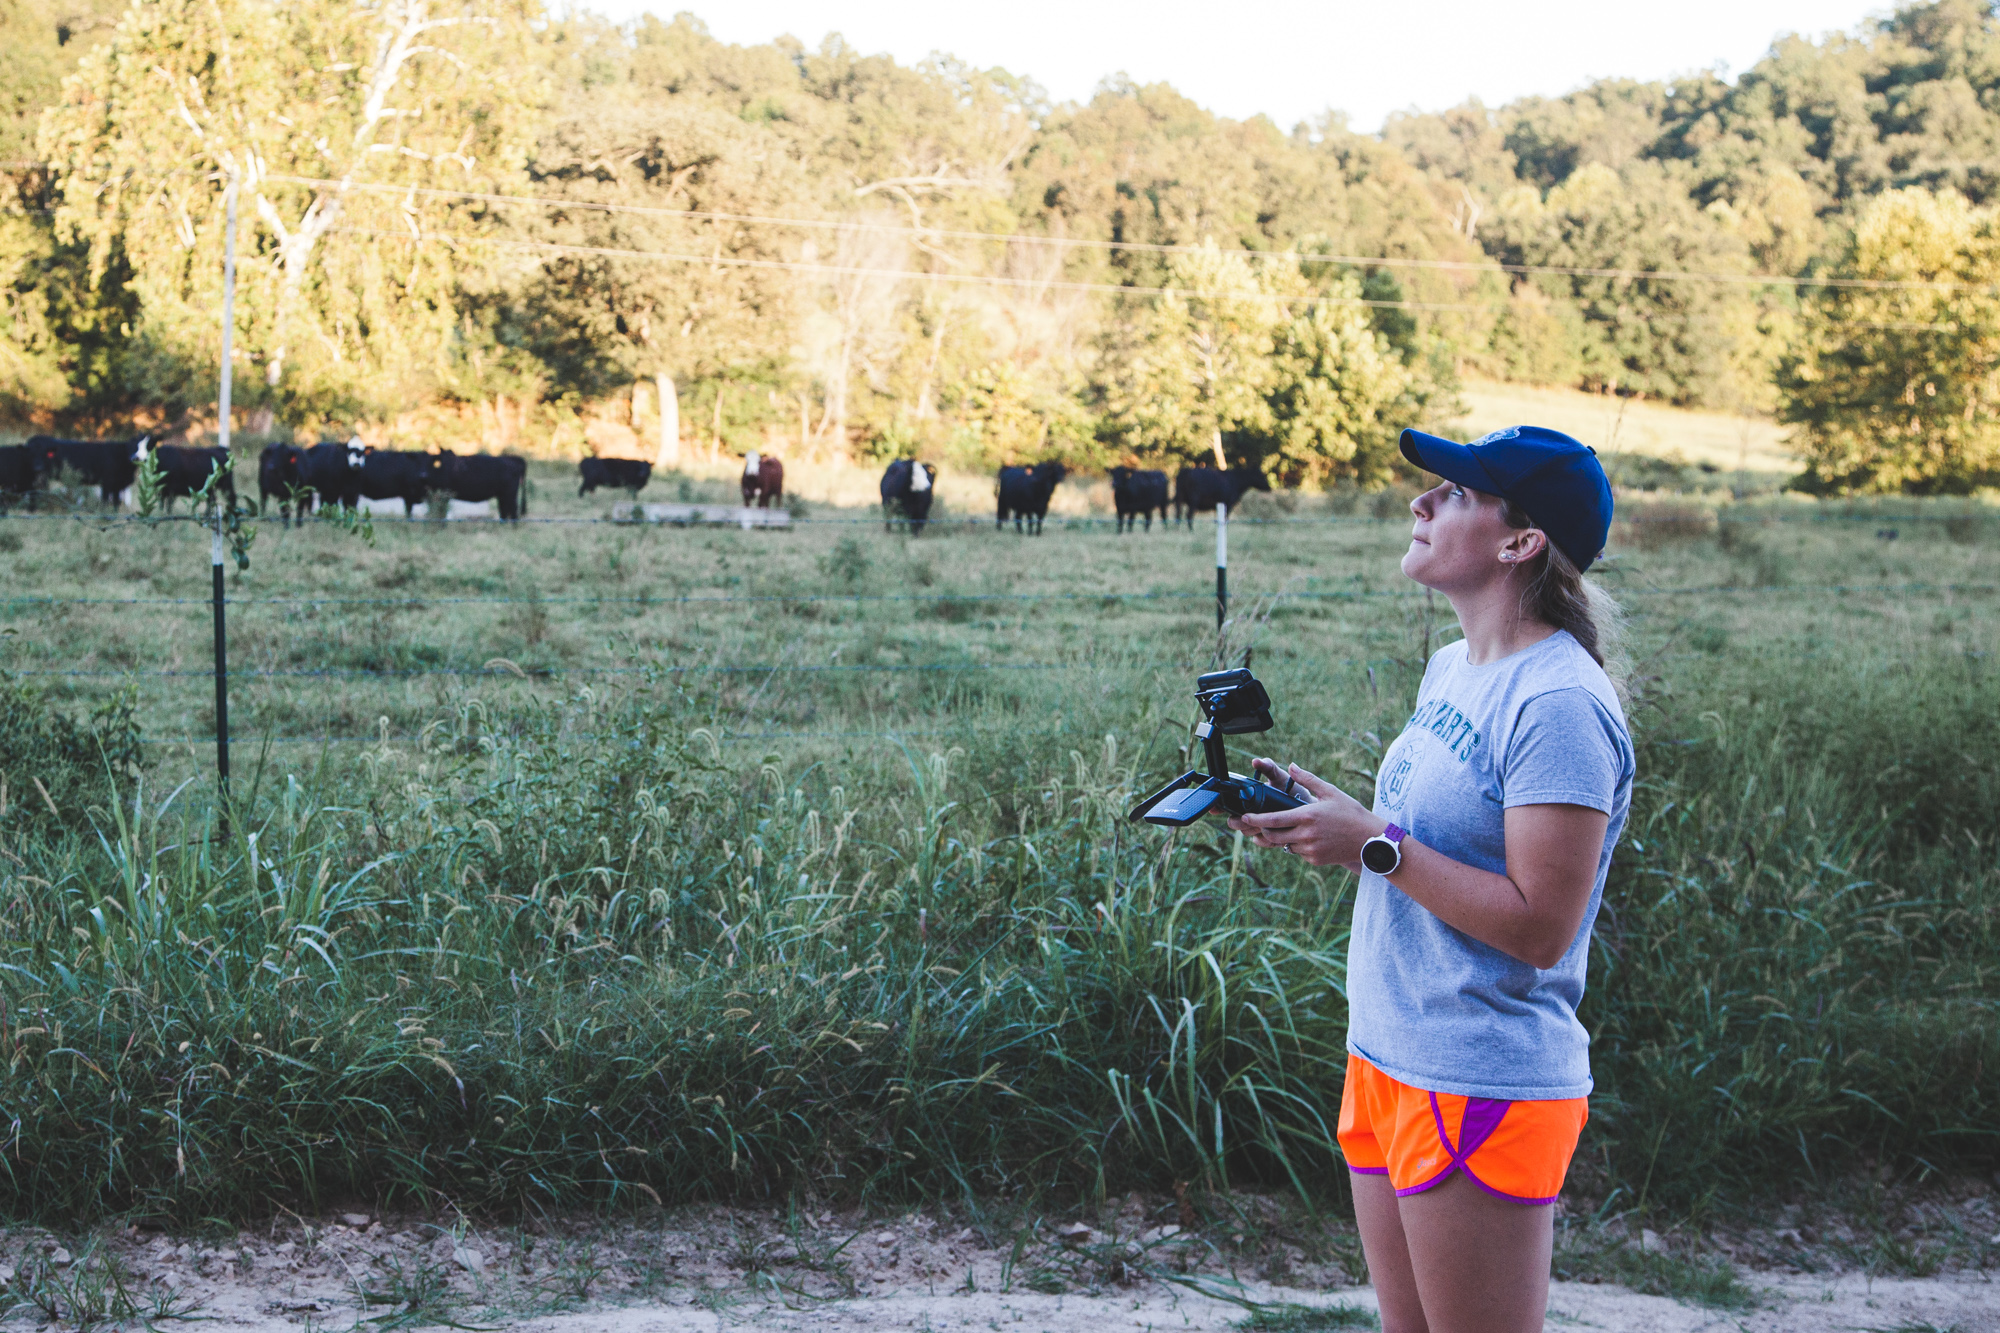
One of our newest and most unique pieces of camera kit is our drone. We use a 3DR Solo Quadcopter, filming with a GoPro4 Silver. The drone allows us to get shots like these:

Zach Elseman Photography: Illinois River Flood-2017 &emdash;

Zach Elseman Photography: Illinois River Flood-2017 &emdash;

Zach Elseman Photography: Illinois River Flood-2017 &emdash;

The Solo is a very user friendly and easy to operate, however, one of the drawbacks is the case that it comes in from 3DR; the case is cardboard and has a luggage style handle instead of shoulder straps. Enter Lowepro DroneGuard CS 400.

Exterior

The CS400 has a patented “Foam Shell” carbonate casing that makes it strong enough to protect your drone and accessories without adding the bulk and weight of a Pelican case. The back-pad and straps are padded enough to be comfortable for short walks and moderate hikes, but would probably require some additional padding for longer hikes.

Zach Elseman Photography: Blog Images &emdash;

Zach Elseman Photography: Blog Images &emdash;

The exterior of the case is extremely scratch resistant and will more than likely not show most stains such as dirt or similar. I wouldn’t however apply a lot of pressure to the case as it is not as rigid as a hard case.

Interior

The interior of the CS400 has the “Drone-Guard” customization system that allows several different drones to be able to fit in the case with a simple switch of some panels. Take a look at the Lowepro website for more detailed images of some of the different customizations you can come up with to fit your drone.

Below is how my 3DR Solo is setup, with plenty of room for a jacket or additional camera on either side.

Zach Elseman Photography: Blog Images &emdash;

Zach Elseman Photography: Blog Images &emdash;

Zach Elseman Photography: Blog Images &emdash;

As you can see, the case fits everything that I need to operate the Solo and even has room for more batteries if I add some later on. Zippered pouches are well placed to allow storage of chargers, cables, and more. The propellor board is Velcro’d to the lid and is removable.

Zach Elseman Photography: Blog Images &emdash;

Durability

I have only just received this case and have not had a chance to run it through a field test as of yet, so I cannot speak to the durability of the case. I will report back after extensive use if the case was anything short of satisfactory.

The only potential failure points that I can see is the semi-rigid construction of the shell. Any large amount of pressure from someone accidentally sitting on it, will more than likely cause damage to the drone and the case. The case is heavily padded and should be able to withstand short drops, throws, and slides.

Overall

I am very happy with this case so far. Time will tell if it is worth the $100 price tag or if a Pelican hard case would have been a better bet for a little bit more money. If this case holds up to the abuse of a traveling photographer, I will be satisfied with the purchase. As with anything made by Lowepro, a lot of time and energy was put into designing this case, and it shows.

Bow Valley Parkway and Lake Louise

If you haven’t read the last installment of our blog, you should. See it HERE!

After a short, beautiful drive up the Bow Valley Parkway, you should arrive at Johnston Canyon. Johnston Canyon was a favorite stop for both of us. The trail is easy and well-marked and meanders along some truly beautiful cascades. The falls themselves make for an excellent place to stop and take in the view.

Zach Elseman Photography: Canadian Rockies- October 2017 &emdash;

Zach Elseman Photography: Canadian Rockies- October 2017 &emdash;

Zach Elseman Photography: Canadian Rockies- October 2017 &emdash;

A more strenuous hike leads up the mountain-side to the “ink pots”. These pools were less than interesting, but the vast expanse of the top of the forest made the hike worth it. If you visit in the fall, be sure and take some warm clothes, it was brisk up top.

Zach Elseman Photography: Canadian Rockies- October 2017 &emdash;

Zach Elseman Photography: Canadian Rockies- October 2017 &emdash;

Zach Elseman Photography: Canadian Rockies- October 2017 &emdash;

Zach Elseman Photography: Canadian Rockies- October 2017 &emdash;

We camped in the Johnston Canyon RV parking lot across the street from the trailhead. It was free and no one hassled us either night that we camped there. To see more about where and how we boondocked in our rented RV, check out our blog post here! www.okienomads.com/rvrental .

Zach Elseman Photography: Canadian Rockies- October 2017 &emdash;

Lake Louise-
This is what we woke up to the next morning…

Zach Elseman Photography: Canadian Rockies- October 2017 &emdash;

Continue travelling down the Bow Valley Parkway as far as you can and it will terminate at Lake Louise Village. Due to bad weather and visiting in October, we had to leave the parkway at Castle Junction and continue North on HWY-1. If the weather and road closures permit, take your time on this road. There are beautiful things to see all along it. Don’t get in such a hurry that you miss it.

Zach Elseman Photography: Canadian Rockies- October 2017 &emdash;

Zach Elseman Photography: Canadian Rockies- October 2017 &emdash;

Lake Louise is an interesting little village, but there was not much in the actual village that interested us. We got some advice for a “private” hike from a ranger at the information center in Lake Louise that we were glad we got.

The gentleman explained that he liked to be alone, and this is the hike he likes to be alone. We followed his directions to Moraine Lake Rd and parked at the road closed sign to continue on foot. Due to visiting in mid-October, Moraine Lake Rd was closed, but we parked at the highway and continued onto Lake Annette on foot.

We bundled up and stepped out into a fairly substantial snowfall and brought along our YakTrax in case things got sketchy. We hiked the road for a few KM’s and found the trailhead to Lake Annette, as described by our new friend at the visitor center. The trail was moderate and fantastic as it was covered in about 6 inches of fresh powder. We were the only humans that had been on it since the most recent storm.

Zach Elseman Photography: Canadian Rockies- October 2017 &emdash;

Zach Elseman Photography: Canadian Rockies- October 2017 &emdash;

We hiked a total of around 11 KM’s up to ice-covered Lake Annette and the unnamed glacier hanging on Mt. Temple. We made much better time back down the trail as we followed our original steps out of the woods. Although this is prime bear country, we saw none. We saw absolutely no wildlife on this hike, which was strange. This however was a great snow hike and an awesome experience to get into the backcountry.

Zach Elseman Photography: Canadian Rockies- October 2017 &emdash;

Zach Elseman Photography: Canadian Rockies- October 2017 &emdash;

We then made our way to iconic Lake Louise and the Fairmont Chateau that rests on the lakeshore. Although the hotel is beautiful and in a prime location for hiking and skiing in the winter, it is not really our style and definitely not in our price range.

Zach Elseman Photography: Canadian Rockies- October 2017 &emdash;

The lake, however, is beautiful. The mountains in Alberta seem to burst out of the lakes and erupt into the clouds. So is the case for Lake Louise. The emerald blue water is like nothing I have ever seen. We walked around the lake and took in the sights, conversed with some very nice tourists, took obligatory shots of the boathouse and made our way back to the RV for lunch.

Zach Elseman Photography: Canadian Rockies- October 2017 &emdash;

Zach Elseman Photography: Canadian Rockies- October 2017 &emdash;

Zach Elseman Photography: Canadian Rockies- October 2017 &emdash;

A lot of the popular trails either had roads closed to the trailheads or were socked in with snow, so we missed some of the more iconic hikes at Lake Louise such as the Plain of Six Glaciers or Moraine Lake. We will save those for another trip.

North of Lake Louise, the Bow Valley Parkway turns into HWY 93, the Icefields Parkway. One could spend a few days travelling the Icefields Parkway by itself, and we will leave that to a later post. Thank you for taking time out of your day to read about our adventures. If you enjoyed the stories or the photos, let us know by leaving a comment or sending us an e-mail at okienomads@gmail.com. You can see all of our images on Instagram and videos of our bus build on YouTube. Subscriptions, shares, and follows are always appreciated, they help keep this dream alive.

Banff, AB: Okienomad’s Trip Through Canada’s Oldest National Park

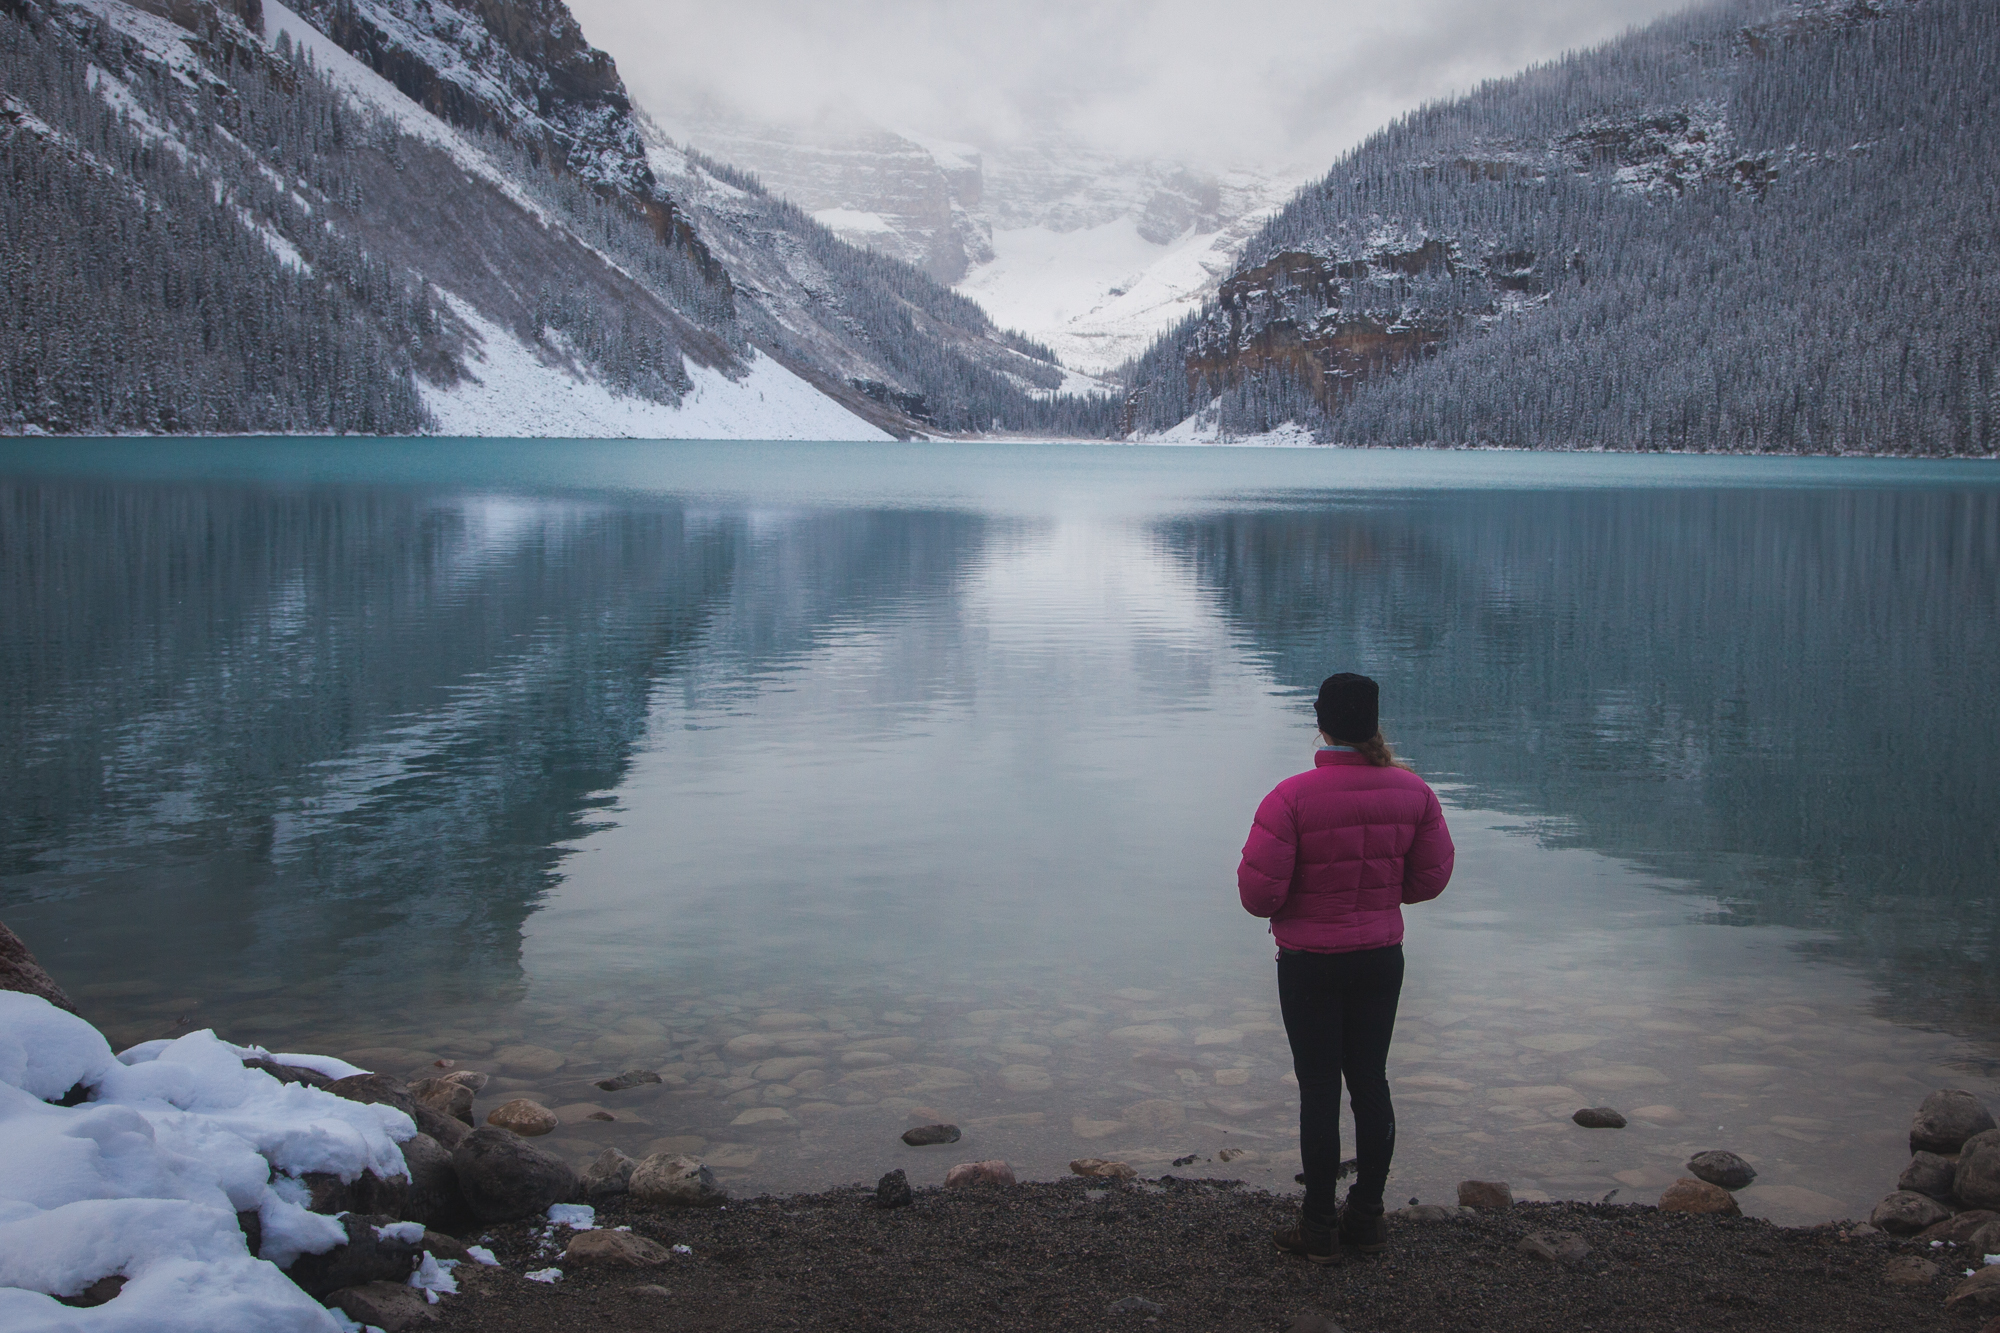
Once we had rested up from our flight and Canadian Thanksgiving in Calgary, we picked up our rental RV, and pointed the RV North and tried to get out of the city as quickly as possible. You can read about our experience with the RV rental in a previous Blog Post. We made a short stop in Canmore, AB to hike a bit, grab some coffee, and score the single coolest thrift store purchase that I have ever made (see: 90’s Shimano bike jersey).

Canmore

First thing is first, Canmore and much of Alberta as a whole, has bike lanes, hundreds of them. To an unsuspecting tourist from bike-averse rural Oklahoma, these lanes look like lanes for cars. I mistakenly tried to turn onto one of these glorious bike lanes and was swiftly pulled over by one of Canada’s finest. After a short run of my ID through what I have to guess was Interpol, we were free to go.

We stopped for coffee at Good Earth Café and after a mediocre cup of joe, we were on our way to Grassi Lakes Trailhead. I wish we had more time in Canmore as it was an interesting little town with what appeared to be a ton of mountain biking and hiking trails, but we had only planned on this one hike so we hoped it would be a good one.

Zach Elseman Photography: Canadian Rockies- October 2017 &emdash;

When we saw the trailhead, we couldn’t help but notice the hundred-foot waterfall that cascaded down the side of the hillside. We hiked along-side the waterfall to the top, where we found the Grassi Lakes. The views from the top were exceptional and we picked a great hike to start our trip into the Canadian Rockies.

Zach Elseman Photography: Canadian Rockies- October 2017 &emdash;

Do yourself a favor and if you are ever presented with two options on a hike, “easy” and “less easy”, always take the “less easy” route. You will be glad that you did. These lakes were well worth the hike up and the views were worth the effort to hike the “less easy” trail.


Banff

Zach Elseman Photography: Canadian Rockies- October 2017 &emdash;

We arrived in Banff at dark and drove straight to our first campground of our trip, Tunnel Mountain 2. We camped at Camp “2” because it was officially winter season in Canada. The entire campground is huge (600+ RV sites) and I can’t imagine what this place looks like during peak season. Most of the facilities were on and in good condition, but our “campsite” was literally a parking spot with a plug-in. My expectations for RV living probably needed to be adjusted a bit.

Travel Tip #1: If you are traveling in an RV in the late Fall or Winter FILL UP WHENEVER POSSIBLE! Every chance that you get to dump your grey water, fill your fresh water, fill propane, or fill vehicle fuel, do it! You never know who will have fresh water in the next town on the map. 

When we woke up we saw a rig parked across from us that was unique and had some branding on the side of the RV. The rig belonged to the Symons, a family living full time in their RV and travelling all over Canada. You can learn more about them at http://symons4everonroad.over-blog.com.

Zach Elseman Photography: Canadian Rockies- October 2017 &emdash;

If you have never been to Banff, there a few things that you need to see first. The Fairmont Hotel, Cave and Basin Historical Sight, and Bow Falls are a few that come to mind. These are iconic sights that are beautiful and fun to experience. We spent half of our first day in Banff visiting these locations. We parked in town and walked the impressive trail system from one side of town to the other and back around for lunch.

Zach Elseman Photography: Canadian Rockies- October 2017 &emdash; Zach Elseman Photography: Canadian Rockies- October 2017 &emdash;

Zach Elseman Photography: Canadian Rockies- October 2017 &emdash;

Zach Elseman Photography: Canadian Rockies- October 2017 &emdash;

For coffee or to get on the web for a while, we recommend Whitebark Café. The café is in a hotel lobby, so it is comfortable, has a public restroom and Wi-Fi plus the coffee was some of the best that we had in Alberta. If you are in an RV or large vehicle, we recommend parking at Wolf St and Lynx St near the Banff Canoe Club or at the Central Park Parking Lot on the South end of town. Central Park has public restrooms and is across the street from Banff Public Library (free Wi-Fi). Both parking spots are near the Bow River and make a quick walk to downtown.

One of my favorite businesses in Banff was the All in the Wild Gallery on Banff Ave. Jason Bantle is an excellent photographer and his work is on display and for sale in his downtown gallery. To see more of his work, check him out at www.bantlephoto.com . –Zach

I really enjoyed the walkability of Banff in that you could park in the FREE public parking and walk to anywhere in town. It was nice to not have to move the RV to go do something different.” -Rachael

Zach Elseman Photography: Canadian Rockies- October 2017 &emdash;


If you have an afternoon in Banff, take the time to drive to Lake Minnewanka. It is a long and winding road to get to the lake, but be sure to cross the lake and complete the loop alongside Two Jack Lake. The views of the lakes and forest along the road are beautiful and we saw quite a bit of wildlife on this road, including some rutting bull elk that were locking antlers when we arrived.

Zach Elseman Photography: Canadian Rockies- October 2017 &emdash;

Zach Elseman Photography: Canadian Rockies- October 2017 &emdash; Zach Elseman Photography: Canadian Rockies- October 2017 &emdash;

If you are leaving Banff and heading toward Jasper, travel on HWY 1A instead of the TransCanada HWY, the Bow Valley Parkway is much more scenic and much less traveled. The road leads you to a destination called Johnston Canyon. Do not skip Johnston Canyon! There were more waterfalls and cascades scattered along this canyon than any other location in Alberta. To read about Johnston Canyon and the rest of Banff National Park, you will need to keep an eye out for our next blog post: Bow Valley Parkway and Lake Louise.

Zach Elseman Photography: Canadian Rockies- October 2017 &emdash;

Thank you so very much for taking the time out of your day to read about our adventures and view our photos. If you haven’t yet, please take a couple more minutes to follow us on Instagram and subscribe to our channel on YouTube. Take a look around our website and if you see anything you like or have any suggestions, please let us know by commenting or e-mailing us at okienomads@gmail.com.

Gluten Free: 5 Tips for Eating GF on a Road Trip

One of our biggest challenges on road trips is eating healthy and gluten free. Rachael has a gluten intolerance that makes digesting wheat a truly miserable experience for both of us, but mostly her. I can eat Gluten, but my digestion is greatly improved when I kick wheat out of my diet. So how do we do it? We travel all over the country staying in campgrounds, Air BnB’s and backcountry campgrounds in the middle of nowhere and we always have to eat.

Below are some tips that will help you eat Gluten Free on the road or in the woods:

  1. Use Gluten Free Apps- There are countless apps that are available for free or cheap on Android and iOS that will point you in the direction of GF restaurants in your area. The app we use most is Find Me Gluten Free. It has over 100,000 downloads from the Google Play Store and it has been very accurate for us. Simply type in the location that you are searching and navigate the list or map for results. Be advised that in very large cities like, the results can be overwhelming; try zooming in to your neighborhood or street for accurate results.
  2. Embrace the Art of Cooking- If you are new to a Gluten Free lifestyle, you will need to embrace the fact that you will need to learn how to cook. Eating out is not only less healthy, but it is extremely expensive. It is especially expensive when you are on a road trip budget. Before we get setup at any campsite or take off on any trip into the backcountry, we create a menu and meal prep. Keep an eye out as we will be posting Gluten Free recipes very soon on the blog.
  3. Zach Elseman Photography: Buffalo River, AR: September 2016 &emdash;  Shop Before You Leave- If you know that your regular grocery store stocks GF bread and all of the ingredients that you will need to make your favorite camp dish, don’t wait until you get to Pond Creek, OK to see if the 7-Eleven attendant has any idea what Gluten is. Plan your meals ahead of your departure and buy your potentially hard to find items before you embark.
  4. Pack Snacks- Not only is eating small meals throughout the day a healthy choice, but it gives you some flexibility when it comes to eating Gluten Free in unfamiliar places. By packing a snack such as fruits, vegetables, or trail mix, you give yourself a back-up plan in case you can’t find a meal on the road. On our most recent trip to Canada, we flew with a 5LB bag of Kar’s Trail Mix and ate it over the course of two weeks in the Great White North; we didn’t have to worry about getting glutened by a mystery trail mix in Yoho National Park. To see more from that trip, check out our post about the start of that trip here.Zach Elseman Photography: Canadian Rockies- October 2017 &emdash;
  5. Take Your Time & Stay Longer- In my limited time traveling and living with a person that has a gluten intolerance, I have found that the less rushed we are and the longer we stay in a particular area, the more likely we are to find quality Gluten Free offerings and the more accommodating grocery stores in an area. Conversely, the more that we rush while traveling or in our day-to-day, the more we slip up on eating well.

Thank you for taking the time out of your day to visit our site and to read our content. We greatly appreciate it and we want to hear from you. Please leave us a comment on the blog, send us an email at okienomads@gmail.com, or find us on Instagram, Twitter, and YouTube @okienomads.

error

Enjoy our content? Help spread the word! ;)

Follow by Email
YouTube
YouTube
Instagram