Please subscribe to our YouTube Channel!

Your eyes haven’t betrayed you, IT IS snowing in Baja! We housesitting off-grid in the mountains of Baja California, Mexico and we received 6″ of snow in a 24 hour period. In this episode we walk you through some of the systems and planning that we use to be comfortable during a white out!

Is Off-Grid Living For You?

Please follow us on Instagram and Facebook to stay up to date on our travels and to know when new content is posted. 

Facebook- www.facebook.com/okienomads
Instagram- www.instagram.com/okienomads

Off-Grid Living Might Not Be For You If…

100% Off-Grid Home in Mexico

We have settled in to the off-grid lifestyle at a housesitting assignment in the remote mountain wilderness of the Sierra de San Pedro Mountains in Baja California, Mexico. We have spent 6 weeks living in a completely off-grid house 70 kilometers from civilization and have experienced record snowstorms, temperatures below freezing, as well as mechanical malfunctions and so much more in our short time here. After this article you should have a better idea if off-grid living is for you or if you should avoid moving to a cabin in the woods.


You Are High Maintenance

You might say, “I am not high-maintenance”, but how many showers have you had this week? Was your water really hot? Did each shower last longer than 5-10 minutes? If you take a shower every day, want your shower to be the same temp as the sun, and want to scald your flesh for 20 minutes or more, you are likely not ready to live on limited water in an off-grid home. That is not to say that you can’t enjoy a hot bath on occasion, but you have to plan ahead and insure that your bath isn’t going to deplete your drinking water supply for next week. 

Are you accustomed to modern HVAC and are used to having your living space at a comfortable 72.5 degrees? Unless you are using a very sophisticated solar setup, modern heat and air is an unrealistic comfort. Learning to be comfortable in an off-grid home is often a matter of planning ahead (see below) and layering up or down. If you are cold in the winter, grab a jacket or sweatshirt. Hot in the summer? Run down to the stream for a quick dip to lower your body temperature. Small adjustments like these are a major part of living off the grid. 

Driving in 3 Weeks Worth of Groceries


You Can’t Plan Ahead

The Boy Scouts of America motto has never been more relevant to us as it has while living off-grid. Being prepared for anything is vitally important when living away from the security of society in an off-grid home. You must make the most of your trips to town and make sure you are bringing back enough fuel, food, and supplies for anything that might happen before the next trip to town. 

We have developed a schedule of resupplying every 2-3 weeks. We could easily resupply once a month, but we really enjoy fresh produce and seeing the sights of Baja. On our last resupply trip we topped off fuel, visited the hardware store, fish market, electronics store, Walmart and two grocery stores in a matter of 24 hours. Lists and discipline go a long way when shopping for a month’s worth of groceries and the process was a real adjustment for us compared to keeping 4-5 days of food in our bus and literally camping in grocery store parking lots on occasion. 

You Need Instant Gratification 

If you need to exist in a world where you must have fast food, fast internet, and fast traffic, off-grid living might not be for you. Although this isn’t the case in all off-grid applications, in our case we are 70KM’s from a town (a small town at that) and over 2 hour’s drive from the nearest market. The closest McDonalds is over 200 kilometers away, a 4 hour drive! 

Your average work on an off-grid property will likely not be instantaneously rewarding either. Consider a garden, you will need to wait through an entire season of hard work and dedication before you ever see a reward from your labor. However, once you enjoy the spoils of fresh produce the work will be some of the most rewarding you have ever done. Parts for repairs are hard to come by in a timely manner, fuel is a long drive away and wood piles don’t cut down, split and stack themselves. At the ranch we are on, mail is delivered to Ensenada for pickup, near the closest Big Mac which you will remember is 4 hours of driving at minimum. Amazon 2-day shipping doesn’t apply here.

If you think there is a chance that you are going to have an urge at 2AM for a cheeseburger, hopefully you read there first point about being prepared and you have some ground beef in the freezer and cheese in the fridge and not have to rely on the minimum wage employee to greet you at a drive-thru window with your sustenance. 


You Aren’t Mechanically Inclined and Won’t Learn

Do you often break something in your house and immediately call a repair man or relative for help? Do you refuse to learn new skills and techniques to fix things yourself? If so, off-grid living might not be for you! Off-grid homes are built on systems, often times redundant systems so that if one fails, you aren’t out of water, electricity or heat. So what do you do if the nearest plumber is at least 2 hours away and you have a toilet that is running or a water filter that is clogged? You learn how to fix it yourself. Most things in life, on or off grid can be fixed with common sense and hard work. The same is true when living off the grid. 

In our limited time on the ranch we have replaced toilet fill valves, replaced PVC pipe, rebuilt a water sump pump, and have repaired a few roads and trails to avoid washouts from the seasonal rains. I had never repaired a sump pump before, but by following the owners manual and paying attention, I was able to restore our drinking water supply.

The Solar Panels Aren’t Going to Clean Themselves Off

You Are Afraid of Hard Work

Similarly to above, if you don’t like working hard and don’t want to learn how, off-grid living is likely not for you. Between managing a garden, livestock, firewood supplies, house and property repairs, vehicle repairs and more, the work of an off grid property can seem like an endless endeavor. If you are able to put in the hard work early and often, the work is manageable and satisfying. Similarly to life, if you procrastinate and let up, you are often the one suffering because of it. 

We have experienced a colder (and wetter) than normal winter in Baja,  and therefore we have needed more firewood than expected.  This means that instead of kicking back and binging Stranger Things on Netflix, I have to load up the chainsaw and tractor and bring back wood for the rest of the season. This is not an inconvenience if you plan ahead and work hard early in the season to maintain a large back stock of firewood, but if you let it get out of control, you can be left in a very cold house. 

Thank You for reading along on our travels and adventures. Hopefully you were entertained, enlightened, or otherwise felt like the last few minutes reading this post was a worthwhile investment of your time. If you enjoyed our content, there are a few ways that you can help promote what we do and keep us on the road a little longer:

  • Follow us on social media platforms likeYouTubeFacebook, and Instagram. The more viewers, subscribers, likes and comments, the better our pages rank. 
  • Share this article or our website with others that you think might enjoy it. 

Oregon FREE Camping-Boondocking in the Beaver State

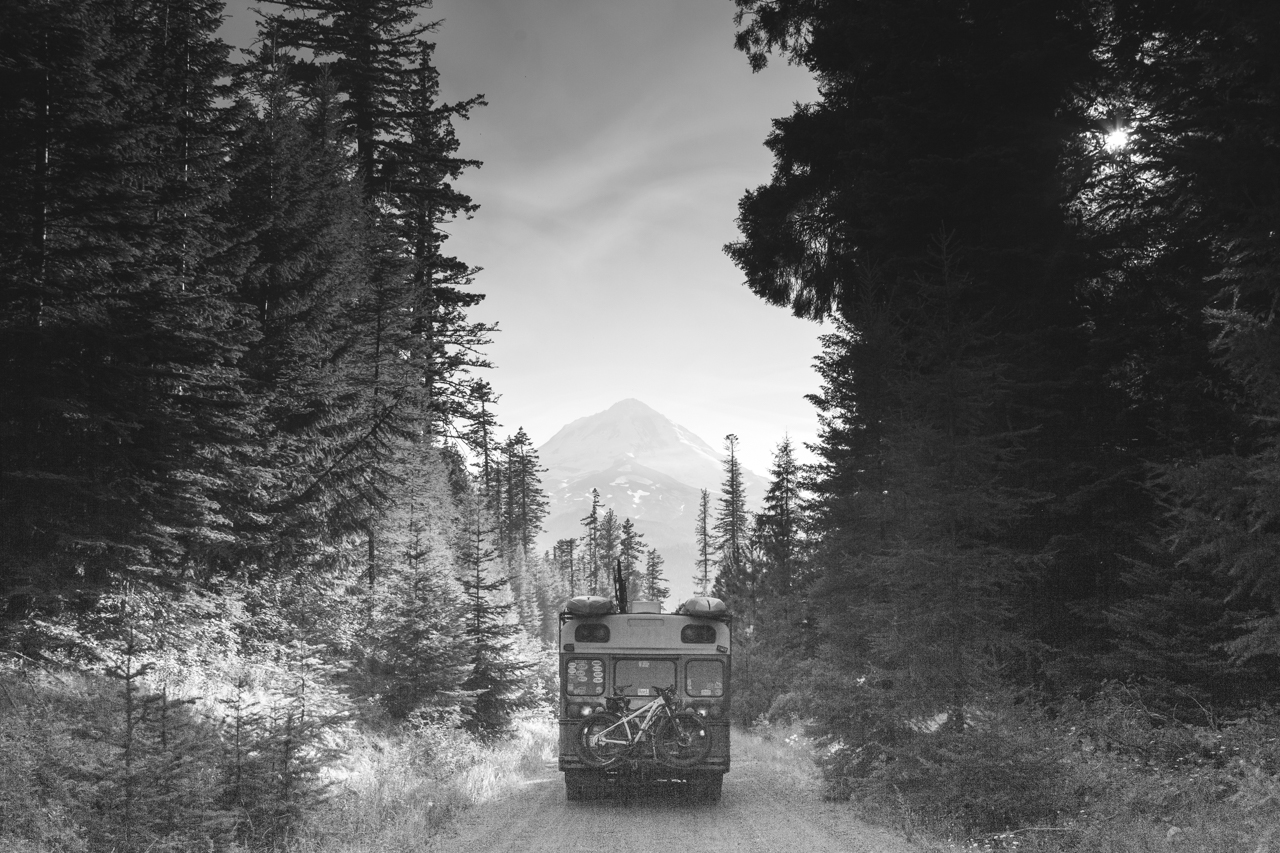
Free Camping in Oregon was as easy as we expected but not nearly as beautiful as we had thought. These campsites, however, allowed us to explore so many different parts of this amazing state without ever paying for a campsite. One thing to consider in Oregon is that the beach is public land, if you can get to it, it’s free game for boondocking. We are not equipped for driving through deep sand, so we avoided the beach. Your mileage may vary.

Coquille River Boat Launch

Bandon, OR

GPS: 43.163189, -124.362145

Nestled back in the corner of quiet Bandon, this boat launch parking lot is a perfect spot for a good night’s sleep and exceptional wildlife viewing. We were 1 of 3 rigs parked here on a Sunday night and all was quiet. A government research boat was parked there when we were and it looked to have been there a while. Seemed like a very safe and calm spot to boondock.

There are vault toilets and picnic tables near the launch and great access to the Coquille River a few miles before reaching the coast. We used this spot to investigate the nearby mountain bike trails close to Bandon.


Dorena Mining Camp

Dorena, OR

GPS: 43.627432, -122.703511

This little pull-out along a scenic back-road was a peaceful spot to relax and prepare for entering Eugene. Miners use this pull-out to pan and dredge for gold and black sand and have left several deep pools in the creek that are perfect for swimming.

Campsite on Arrival

The site was in poor condition when we arrived with shell casings and trash everywhere. We picked up and you should to. Trashing out such a beautiful area is really sad. We left it better than we found it as did the locals that hung out for a while.

Campsite at Departure


Phil’s Mountain Bike Paradise

Bend, OR

GPS: 43.970190, -121.513552

The heart of Bend’s Mountain Bike Mecca is the Phil’s System and there is Forest Service Camping all around the area! This spot was right off of the trail and really pleasant. This is a true boondocking spot with no services, but we really enjoyed getting to ride and explore this area.


Oakridge Green Waters Rest Stop

Oakridge, OR

GPS: 43.739128, -122.459006

This is a rest stop with flush toilets and river access. This lot is near the highway, but the noise wasn’t bad. The facilities were clean and this location is in close proximity to town and nearby mountain biking trails.

We tried several boondocking spots near Oakridge and got an uncomfortable vibe from most of the locations, near the railroad tracks. The rest stop was well lit and seemed much safer. There is a park adjacent that hosts music festivals in the Summer and Fall.


Evergreen Air & Space Museum

McMinniville, OR

GPS:  45.204028, -123.142602

Talk about a unique camping spot! Dry camping is offered for free in the back lot of the Evergreen Air & Space Museum. Parking is amongst airplanes and helicopters in a quiet corner of the property. Bathrooms are open during business hours and there are no facilities after the museum closes.


Hood River Dispersed Camping

Hood River, OR

GPS: 45.419751, -121.530729

Hood River is a treasure trove of dispersed camping! We found a spot out in the middle of nowhere and we really enjoyed our time there. It was quiet, wild, and fairly easy to get to.

Remember to Pack-it-in and Pack-it-out when wild camping in National Forests and insure that your campfires are fully out.


Lumber District Sand Dunes

Coos Bay, OR

GPS: 43.400069, -124.288338

This campsite is one of those instances where 4×4 and recovery equipment would have been ideal. The sand dunes near Coos Bay are beautiful and vast, plus entirely unreachable by our Skoolie. We camped at the trailhead and walked around the are. It was fairly quiet until the timber company down the block started work at 5:00AM.

There are no facilities here and it can get busy and full on the weekend. Some cars were left overnight with no problems. Much better and more affordable than the $75 KOA a few miles away.

Fresh Paint…Maintenance Monday on YouTube

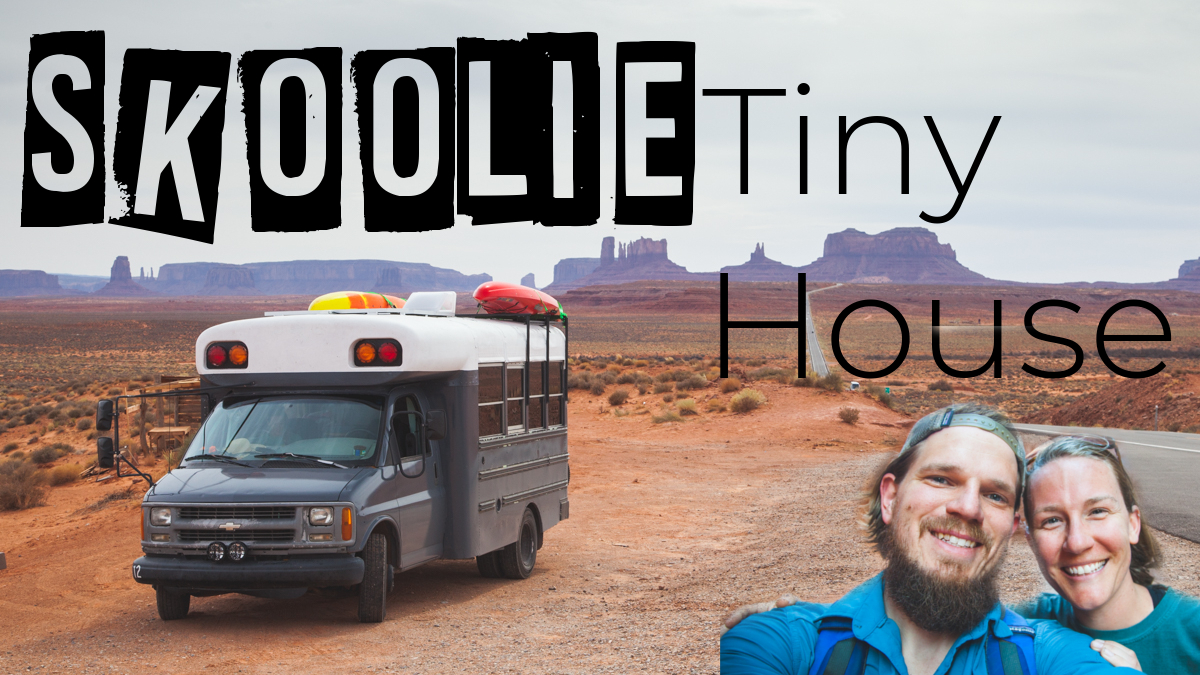
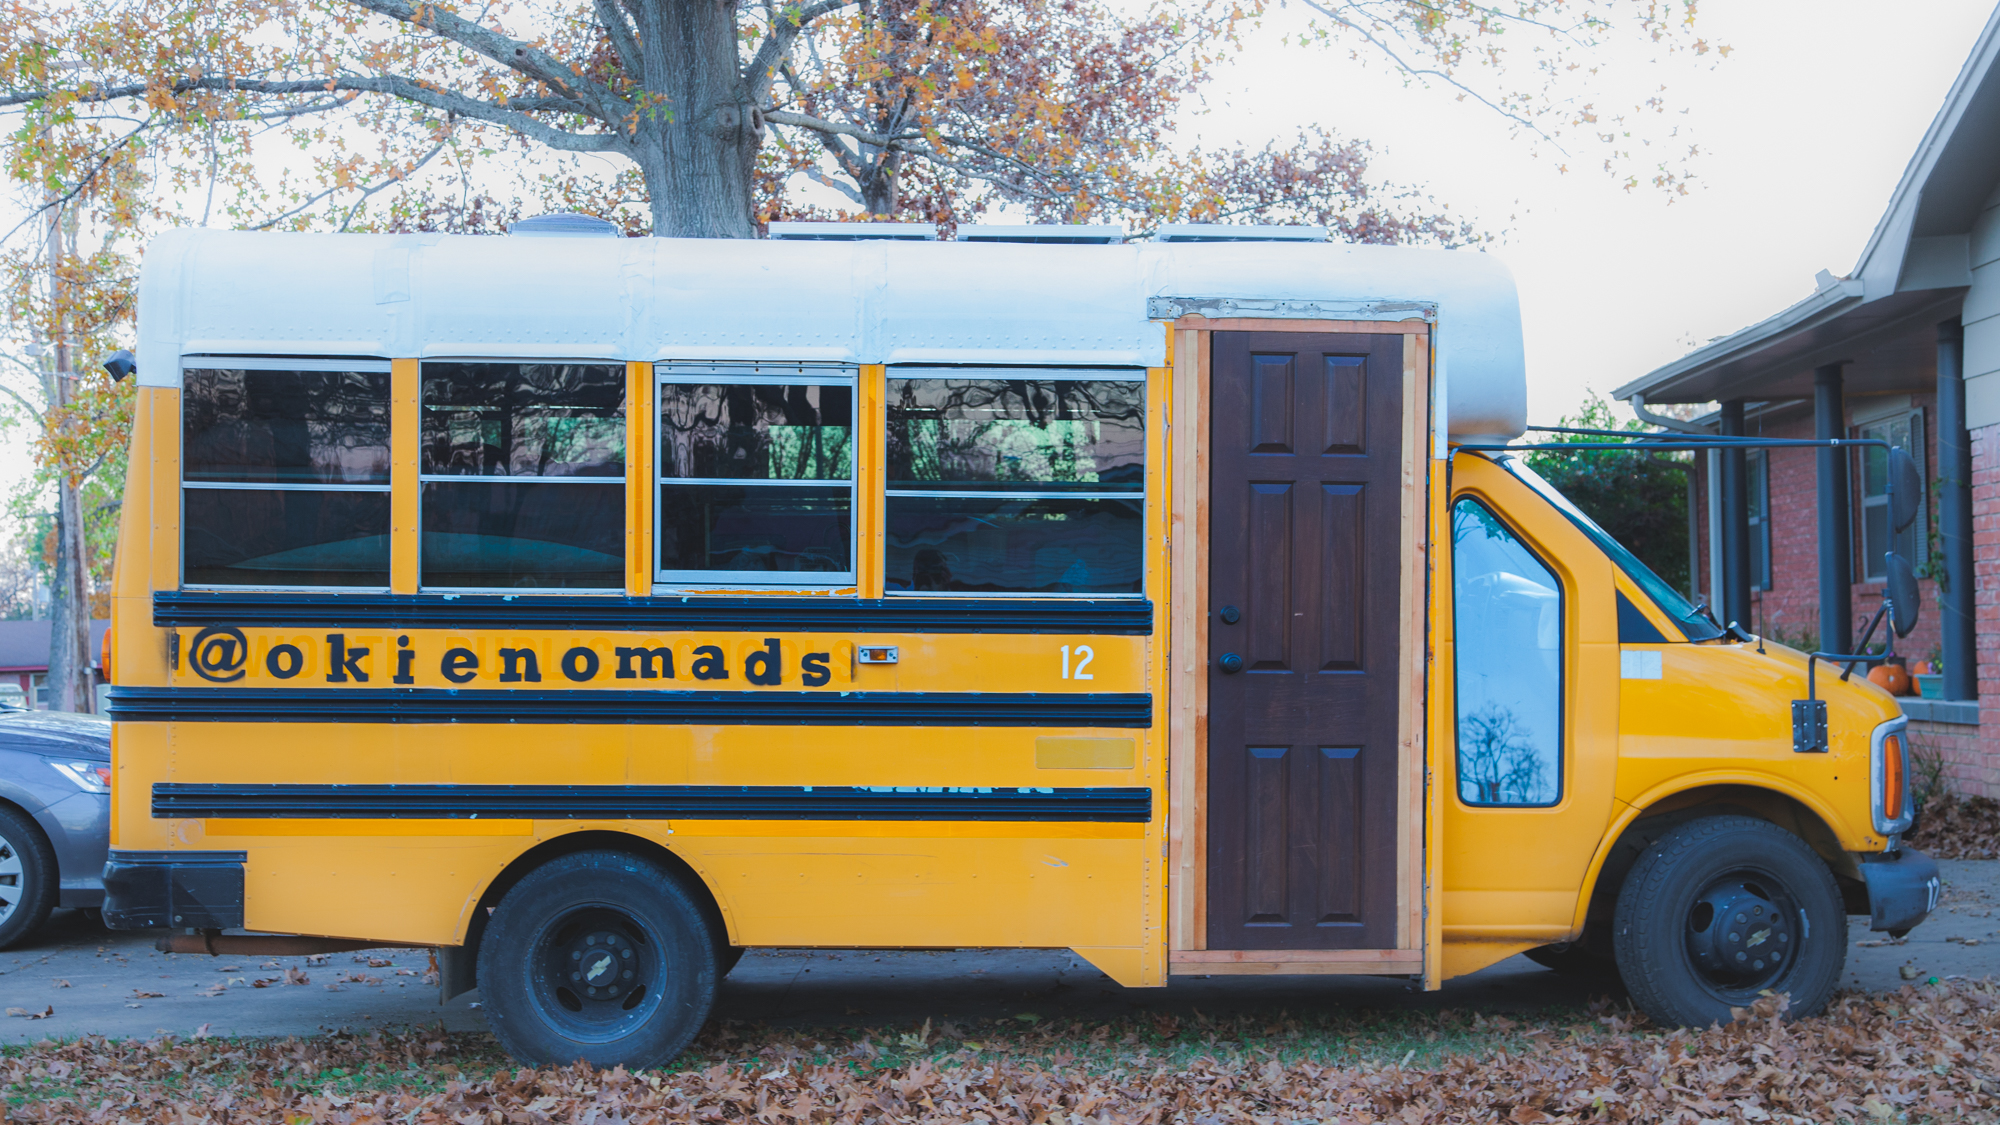
We painted our bus in a hurry and ended up with a really good looking paintjob thanks to help from my grandparents, parents and Rachael’s parents. It was a team effort and it transformed the bus from a creepy former school bus to a shiny adventuremobile.

Before


After

Unfortunately, we left without finishing the paint job on the bus and left the front grill ugly and grey. We found a little time to repaint the grill and we posted a video showing you how we did it. This process will work for most plastics on cars, trucks, and RV’s.  Check out the video below!

If you enjoyed our video, please subscribe to our channel, it means a lot and the subscriptions help us stay on the road longer. Be on the lookout for more videos soon!


FREE Camping in Southern California

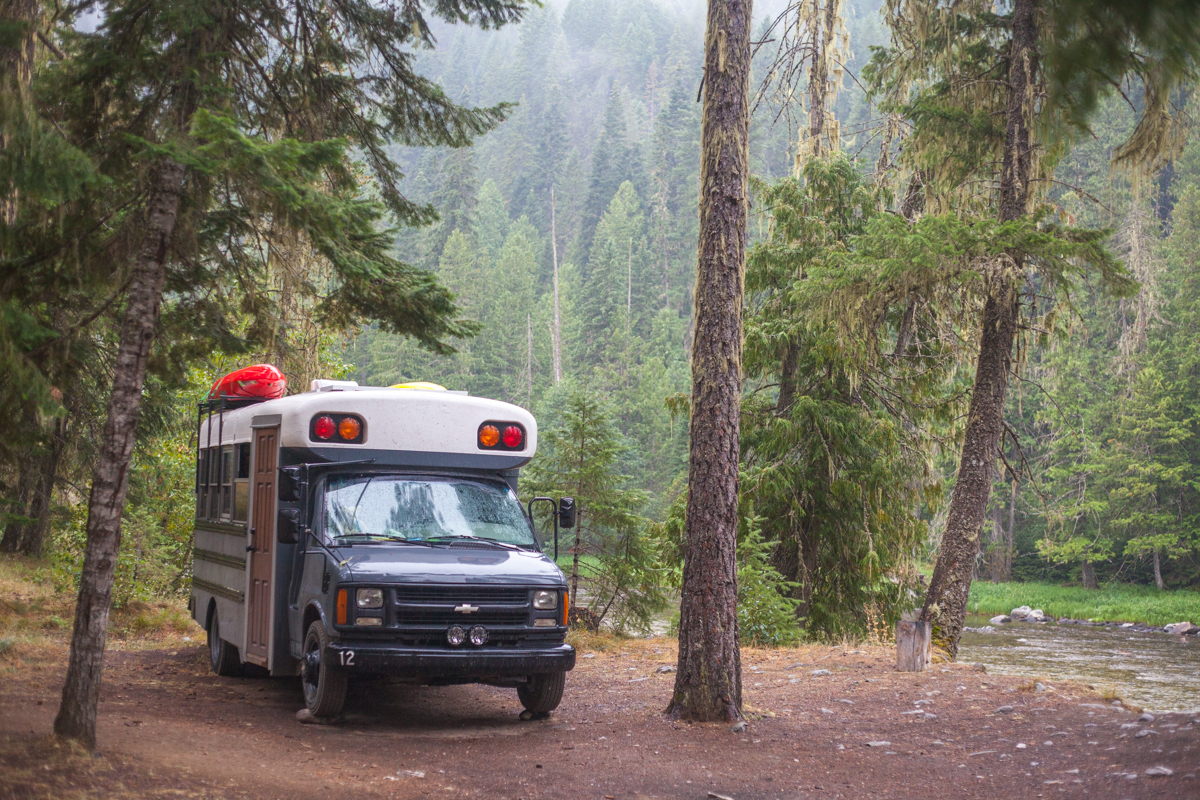
We were pleasantly surprised to find more than enough FREE camping SoCal and we didn’t have to camp in a Wal-Mart parking lot! Below are some of our favorite sites from our time in Southern California.

Laguna Mountain

Julian, CA

GPS: 32.977978, -116.524818

We end up in trailhead parking lots a lot of the time because they are well-traveled, have access to trails, and normally have toilets. This spot was simple, had a great view of Anza Borrego in the distance, and was right on the Pacific Crest Trail.

There are quite a few level spots here and a vault toilet is available. Take a walk on the nearby Sunset Trail for beautiful views at the foot of the Sierras.


San Diego River Preserve

San Diego, CA

GPS: 32.76000856, -117.2250726

This site is a pull-out along the San Diego River in the heart of SD. There is bound to be a fair bit of traffic noise and potential conversations with homeless people living nearby, but you can’t beat the location for a quick night’s sleep and 5-minute drives to Sea World, Ocean Beach, and much more.

This can be an intimidating place to park, but we left our rig here for 4-5 hours at night and rode our bikes to Ocean Beach to have dinner and drinks and enjoy the ocean. There are plenty of runners and cyclists that use this abandoned road day and night, so we never felt unsafe here.


Law Street Beach

San Diego, CA

GPS: 32.8025916, -117.2595628

This section of curbside next to Pacific Beach is one of the best FREE camping spots we have ever had. The view of the Ocean is magnificent and the amount of active people around was very refreshing. There is not a lot of solitude here, but there is plenty of ocean to share.

This site had bathrooms and showers nearby and one only had to make sure not to park here during street sweeping, one day per week.


Thomas Mountain

Anza, CA

GPS: 33.5792566, -116.6241575

There are loads of pull outs and campsites along this OHV trail/road near Anza, CA. The road can be a bit rough and steep, so we stopped short of the top and had a great view of the valley below.

Vehicle with low-clearance should really try somewhere else, this road is rutted and rocky in places and could be hard to navigate in a rig larger than 24 feet.


North Joshua Tree BLM

Joshua Tree, CA

GPS: 34.172932, -116.224663

If you are looking for a peaceful escape from the modern world, this is not it. This is a dry creek bed that is used heavily for off-roading, dirt biking, and any other loud vehicle driving that you can think of. The lake bed is beautiful and very flat, but don’t plan on going to sleep until dark.

This is a perfect overnight spot before entering Joshua Tree National Park. The West Entrance is just minutes away and has a bathroom and brochure station for the park.


Sawtooth Canyon (New Jack City)

Barstow, CA

GPS: 34.670395, -116.98423

We recently (March 2020) added this campsite as we traveled to LA for work and this made a perfect stopover from Northern Arizona.

This campground is managed by the Bureau of Land Management and is very busy in the climbing season (October-March). There is a ton of climbing available in this area and something can be found for climbers of all skill levels. This site has toilets but they were full when we visited, there was also zero occupancy when we arrived on a Wednesday night in March-arrive early. All in all, it wasn’t a bad place to stopover on the way to LA. Be sure and hike to the top of the ridge and check out the views looking toward Big Bear.

We had some of our most unique campsites of our whole summer in So Cal and we think you will enjoy them too! Did we miss any spots along our route? E-mail us and let us know!

New VLOG Episode: 1 Year Bus-iversary: Skoolie Build Update

We have a new VLOG episode live on our YouTube channel. In this episode of our Vlog, we catch you up on our progress on our Skoolie build. We relocated our inverter and charge controller away from the water under the sink and built cabinets all over the bus!

Please follow along on Instagram

Please subscribe and comment on YouTube

Stay tuned for our next episode and subscribe to our channel so you can watch as we take our bus on the road in April 2018!

Our Bus Has a House Door!

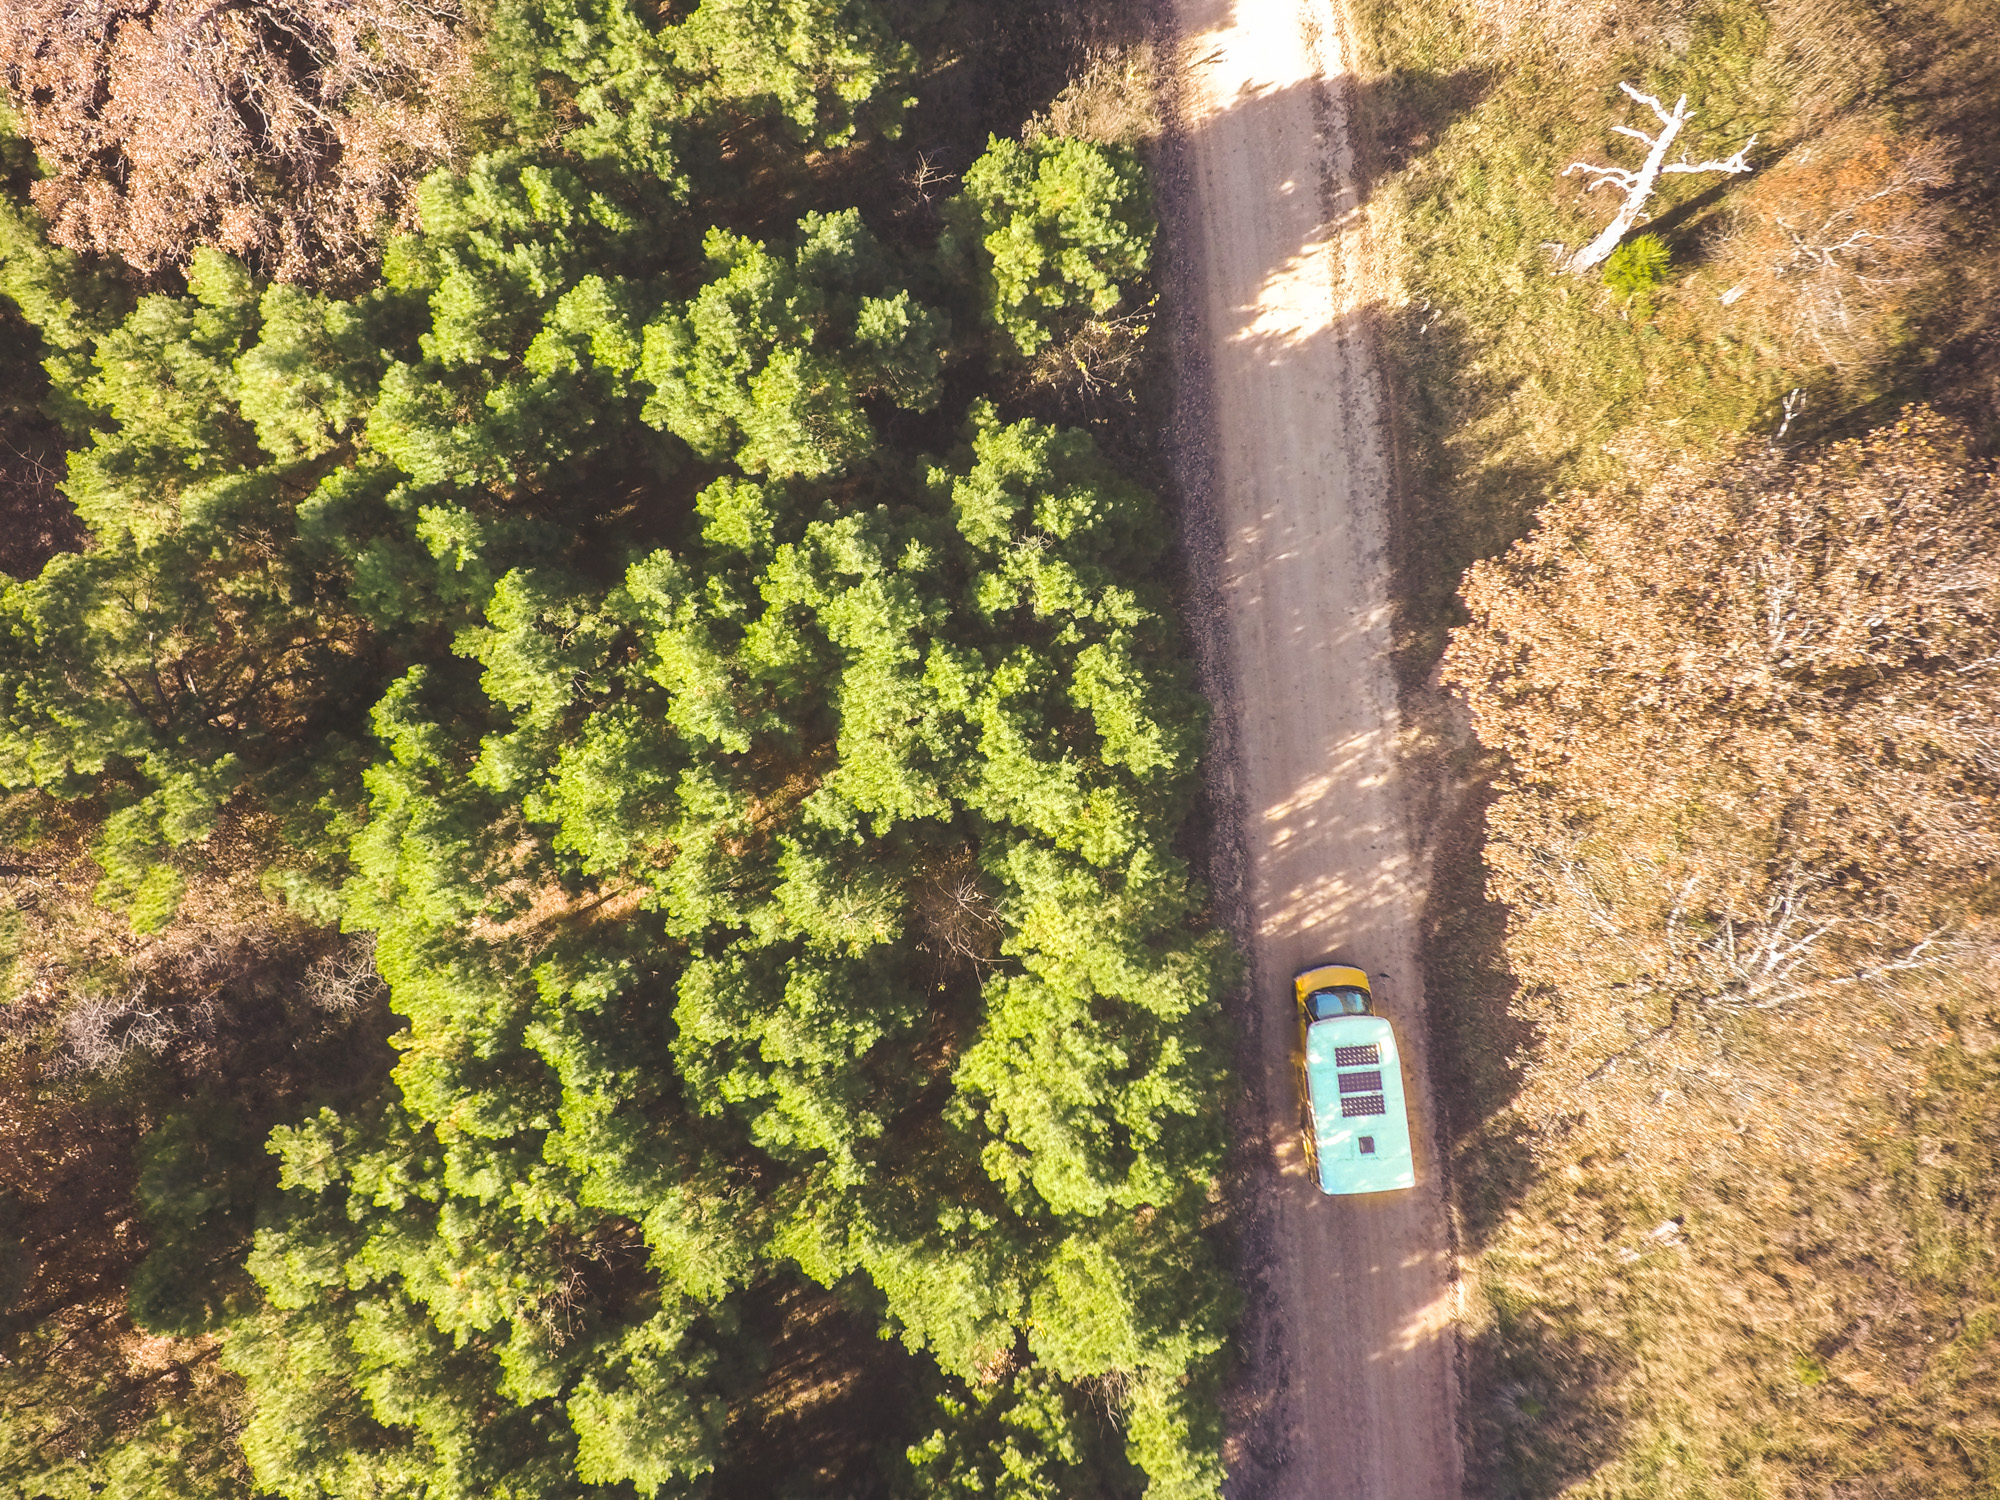
Some of our most dedicated readers might remember that right after we purchased our bus in Fall 2016, we traveled 1500 total miles with Rachael’s family to go skiing at Monarch Mountain, near Salida, CO. The drive was incredibly helpful in figuring out how the bus drove on the interstate (i70 is fun), what kind of gas mileage we could expect, and any potential issues that might arise. The most annoyingly obvious problem that our fun little bus had was a drafty front door. The bifold doors had seen better days and let in all sorts of noise, cold air, and probably critters. My wife and I wanted a house door for the appearance, security, and heat/cool retention, so a house door was going to happen.

Skoolie Tip # 002: Always check your tires! By check, I don’t mean kick a couple of times and look at the tread. I mean jack the vehicle up and look at the rotation of the wheel and tire. We had a flat spot on our two front tires (likely from sitting) that were causing a very obvious shake in the steering at 62.3 MPH that was discovered on our first long trip in the skoolie. We replaced our front tires in Wichita, KS and the rest of the trip was smooth. 

Like many of our projects, it starts with me, Rachael, and/or her father finding something of interest in a thrift store, dumpster, or Habitat for Humanity Restore and bringing it home. On this occasion, Rachael and her father found a solid wood door on one of their adventures and brought it home to be used on the skoolie. The door was significantly narrower than the bus opening, so some building was required.

I created a frame out of 2×4’s and mounted them into the steel frame of the bus with self-tapping screws. The screws hold very tight, but if necessary I will reinforce the frame with bolts through the exterior of the bus. Next, I chiseled out slots for the hinges on the door and the frame and installed the hinges. As with most of our bus build pictures, I remember to take pictures of the easy stuff and not the hard stuff.

I hole sawed out the holes for the door lock and handle and installed those promptly after. Everything fit as expected and the lock secures the door as desired.

There was a certain rush in getting the door hung as we were about to leave for a two-week trip to the Canadian Rockies and didn’t want to leave the bus unsecured in our absence. If you want to read more about our trip to Alberta and BC, check out a couple of links below:

BANFF, AB: OKIENOMAD’S TRIP THROUGH CANADA’S OLDEST NATIONAL PARK

THE ICEFIELDS PARKWAY: PROMENADE DE GLACIERS

All done! Well not quite. We still need to trim out the inside of the door frame to stop the door from closing too far, insulate the small imperfections and gaps, and trim out the the interior and exterior of the door. I will update this post when we get that completed, but until then our bus is secure and looks 100x better than the old bifold doors.

If you have any questions about the door addition or comments, let us know! We love hearing from people that are following our adventures and progress.

Thank you so very much for taking the time out of your day to read about our adventures and view our photos. If you haven’t yet, please take a couple more minutes to follow us on Instagram and subscribe to our channel on YouTube. Take a look around our website and if you see anything you like or have any suggestions, please let us know by commenting or e-mailing us at okienomads@gmail.com.

New VLOG Episode: Build Updates & Drone Footage

We have a new VLOG episode live giving an update of our progress on the bus conversion. We are roughly 50% done with the bus and it seems like projects keep getting easier and faster as we go.

*The GoPro on the drone had an SD card error on the first battery flight, so there isn’t as much footage as I would have liked, but you get the idea.

Enjoy!

Please follow along on Instagram

Please subscribe and comment on YouTube

Stay tuned for our next episode, a gear review.

7 Tips for an Overnight Paddling Trip

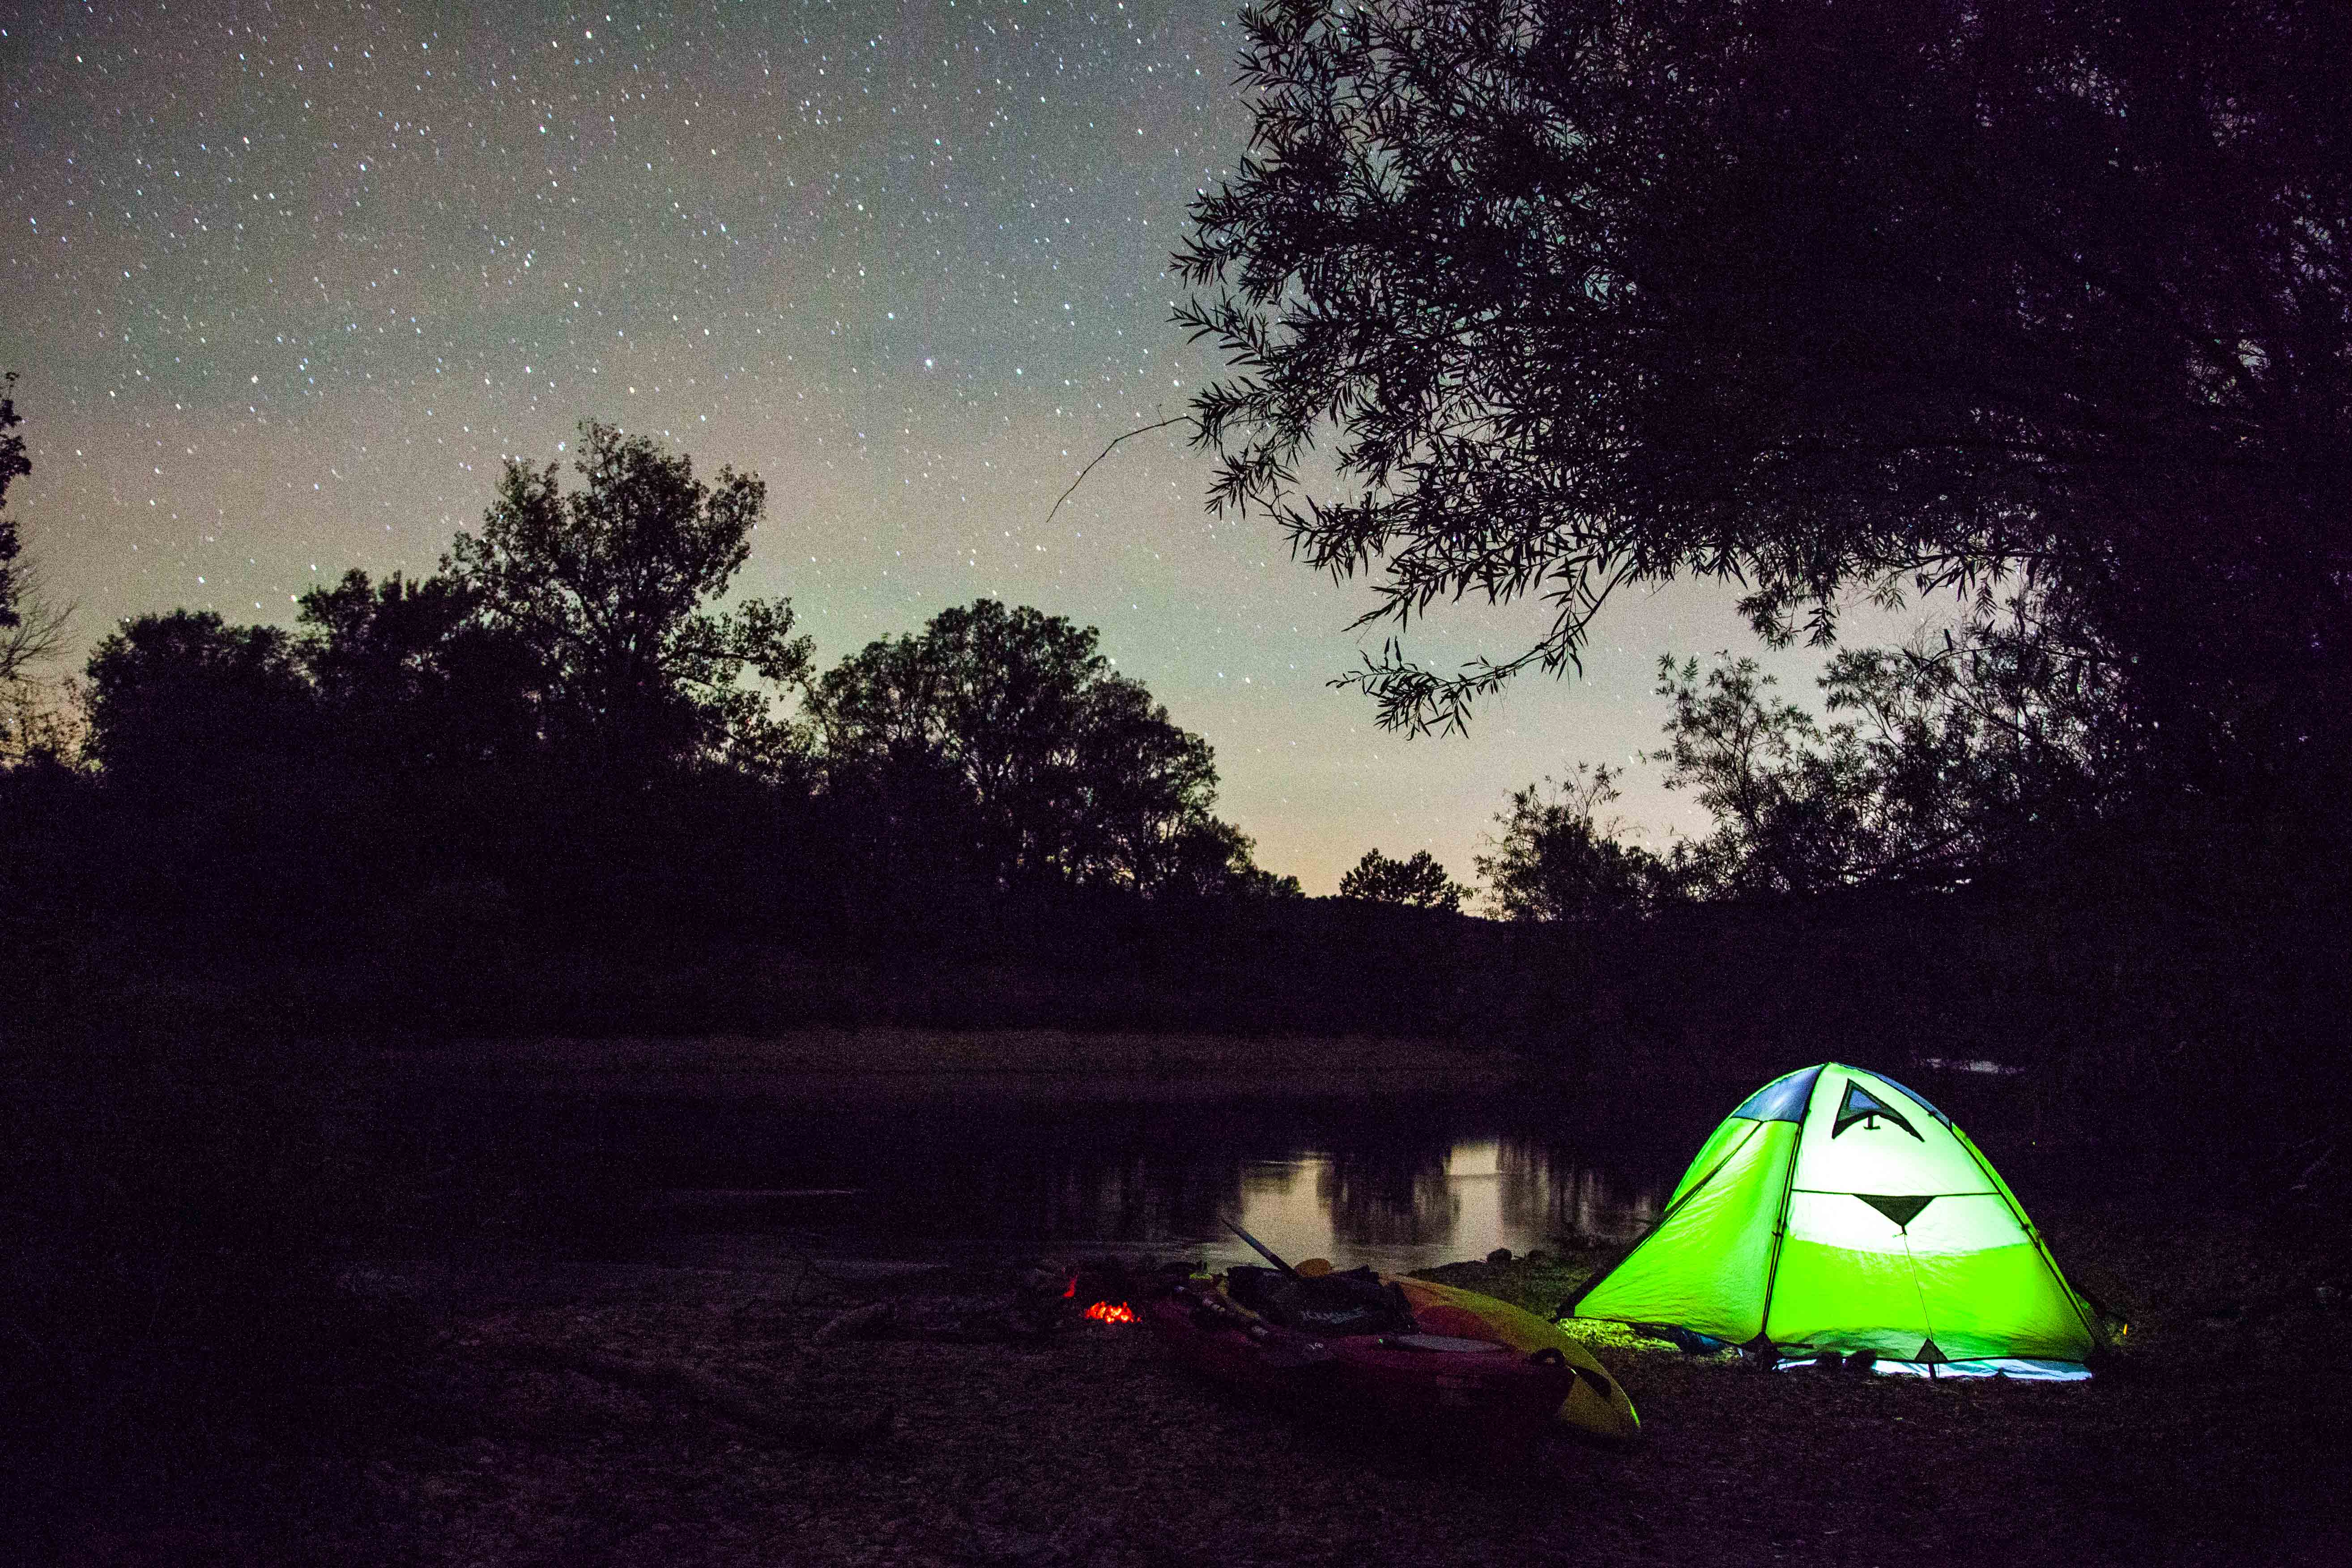
We recently took off on a 2 night, 3 day trip on the Scenic Illinois River in Northeast Oklahoma. We floated from the Arkansas border to Tahlequah, OK. Check out the VLOG episode here! One of the most challenging aspects of an overnight trip is packing. I am going to show you 7 tips for how to pack your boat for a great trip on the river. This article will include how to’s, gear recommendations, and more so check it out.

1. Start with a Reliable Vessel

Insure that your boat is in good working order and that if you are going to experience large rapids that you have the necessary equipment like a spray skirt and a throw bag. The river that we floated has very few rapids and none of them are over class-1, so the throw bag can stay at home. We brought our spray skirts simply because we were expecting rain.

A trip can go awry very quickly if you have a boat failure. A boat that takes on water or doesn’t navigate properly can mean capsizing or getting pinned on riprap. Pay attention to the weight limit of your vessel as well. I do not hold manufacturer recommended weights as the final decider, but I was about 25 pounds over my recommended weight and that was about as far as I am willing to push it. I was sitting pretty low.

*Craigslist is a great place to find a gently used kayak for a much cheaper price than buying new. Good touring yaks can be had for under $1000. That is a steal!

2. Remember the Basics

The basic needs for survival are food, water and shelter, not necessarily in that order. A human can survive over 3 weeks without food, but will perish without water in 3-5 days. Shelter is important to maintain body temperature and protect from exposure and the elements.

  • Water- We always bring plenty of water in addition to a means of purifying freshwater. We use the STERIPEN and it has never let us down in harsh environments. A helpful tip when harvesting water from a stagnant source, use a bandana or buff to filter out floaties before treating with the UV light.

Due to the river having fairly clean water, I normally carry 2-32 ounce Nalgene bottles. These bottles are nearly indestructible and make using the STERIPEN super easy. Each bottles takes 1 minute of UV exposure to produce drinkable water.

*If a precarious situation such as a thunderstorm keeps you in your tent, the Nalgene makes for an effective pee bottle too. 

  • Food- Pack extra food. Even if you are a super-ultra-lightweight hiker and you carry a scale to the trailhead to make sure you’re not carrying too much, an extra couple of CLIF bars could be the difference in you having enough energy to swim, run, or hike to a nearby road or home for help.

For a river trip, we normally stick with a small ice chest or cooler bag for items like chicken breasts, bacon, and other easily packable perishables. This time, we brought along eggs, bacon, and hash-browns for breakfast. For lunch we brought bread, lunch meat, and trail mix. For dinner we did fish, chicken, sausage and veggies.

*Helpful Tip- Make Hobo-style meals ahead of time in aluminum foil and store them in freezer baggies in the cooler. Once you get to camp, throw them on the coals and enjoy. Once you’re done, put the cooled aluminum back in the freezer bag for easy disposal.

  • Shelter-Always carry some kind of shelter, regardless of the length of your trip. A simple solar blanket and fire bag can keep you warm and dry in a bad situation.

The last time that we didn’t pack shelter on a trip was Land Run 100 in April of this year. We assumed that since it was a bike race, shelter would not be needed. FALSE. We found ourselves completely exhausted and borderline hypothermic at mile 34 in the middle of rural Logan County Oklahoma with nothing but soaked clothes and spotty cell reception. Had we packed a simple lighter and 2 space blankets (minimal weight), we would have been much more pleasant in the root cellar that we hunkered down in for 45 minutes waiting on help to arrive.

On this trip, due to the chance of rain and the unavoidable onslaught of mosquitos, we opted to pack a backpacking tent sans stakes. The same coverage could be achieved for one person with a hammock and a bug net/tarp setup. Stakes are imperative when the chance for rain exists. Fancy backpacking tent flies aren’t designed to be used without stakes. We know, because we left ours at home and paid for it with soggy tent walls.

*An ultralight tarp such as the Hennessy Hex can be used as a shelter in a pinch with just a couple of stakes and some tracking poles or paddles. 

3. Stay Dry

This one seems obvious, but most floaters don’t take precautions to stay dry. Even some that know better, can get caught with their pants down. It is imperative that all of your dry gear and supplies (warmth, fire, and food) stay dry. If you are traveling with camera gear, it obviously needs to stay dry too.

On this trip, I took every precaution advised and secured all dry goods in dry bags, properly closed and stored in the water-tight hatch on the rear of my boat. After paddling most of the first day, I was told that my boat was riding low in the water. I pulled into our campsite and found my rear hatch completely full of water. I later found out that the skeg cable sheath had come undone and was leaking water into the hatch. My dry bags weren’t all that dry. Especially the bag with my DSLR camera, lenses, and memory card in it. I pulled the dry bag out of the hull to find water visibly inside the bag. I released the dry bag only to find the camera bag completely soaked. When I opened the Lowepro Camera bag the contents were dry as a bone. I received that bag when I bought my camera and the seller didn’t have anything else to send it in. Thanks Lowepro! The cheap dry bag has been moved to “mostly dry” duty for items like a tarp or rain jacket.

*Hypothermia can occur in very warm temperatures with the quick arrival of a summer storm, or prolonged periods without the ability to make a fire.

4. Pack Small

Most kayaks come equipped with small watertight hatches, so it is important to pack a lot of small dry bags instead of big ones. For a sit-in like my Jackson Rogue or Rachael’s Pyrahna Fusion, the biggest dry bag I would suggest is a 10L bag. If you have a sit-on kayak or a canoe, you can probably get away with bigger bags, however, you will wast a considerable amount of space.

*If you must pack a large dry bag in a small kayak, place the half-packed bag in the spot where you want to pack it first, then fill items in until it fills the space, then roll it shut.

5. Pack Smart

I mentioned total weight earlier. Where you place the weight is extremely important as well. Too much weight in the bow or stern and the boat will not handle properly and may be more susceptible to rolls. Place heavier items near the middle of the cockpit and place your light-weight items toward the ends of your boat. Remember that lateral placement can effect handling as well. If you are heavier on the port side, remember that when you have to roll back over.

*If your creek/crossover kayak is equipped with a bulkhead and you are not floating whitewater, remove it for the additional storage space.

6. Flip Your Boat

Flipping your boat at night is helpful for a lot of reasons. First, it keeps your seat and cockpit dry, whether by dew or rain, no one likes a wet seat. Second,it discourages critters from crawling into your boat for the night and surprising you in the AM. Also remember to move your boat and paddles up and out of the water. Waking up to a missing boat is absolutely no fun and you float buddies with thank you for not having to taxi you down river.

*I make a habit of banging on my boat with a paddle when I approach in the morning to make sure there are no creepy crawlies waiting for me inside. 

7. Know Your Limits

Overnight paddling trips are one of my favorite ways to see new places and enjoy nature like most don’t get to. However, multi-day trips open you up to possible fatigue and injury. Make sure that you are physically able to tackle the 15-20 miles per day that you plan to float in order to get back to your job by 8AM on Monday morning. It’s often hard to call in to work from the river valley, only because of spotty cell service.

*Start with a few small day trips or over-nighters and slowly work your way up to longer expeditions. This way you will know what gear you need and how much you can handle.

Thank you so very much for taking the time out of your day to read along. We post all kinds of articles like this almost every week. Stick around and check out the pictures from our travels and check out our YouTube Channel for more content not published on the blog. We are always looking for brands and creators to partner with, please reach out if you are interested- okienomads@gmail.com.

As always, God Bless and be safe out there!

error

Enjoy our content? Help spread the word! ;)

Follow by Email
YouTube
YouTube
Instagram