FULL DISCLOSURE: Rachael and I had about 0% to do with the construction of our 4Runner roof rack. Rachael’s dad Vic is the mastermind behind most things that are custom on our vehicles and he knocked this one out of the park.
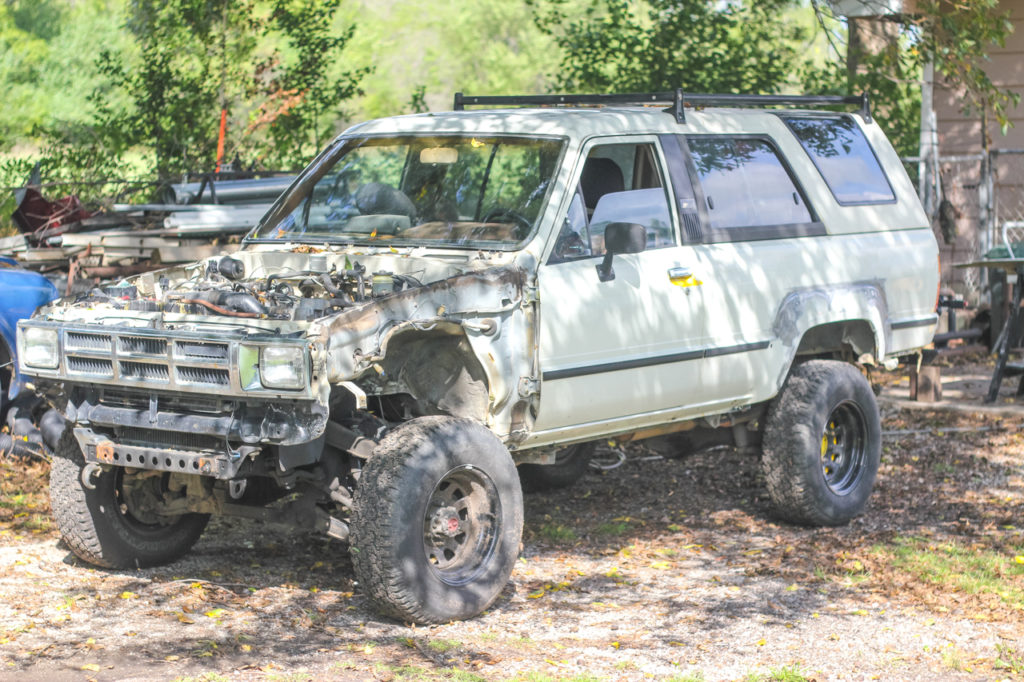
Before
After
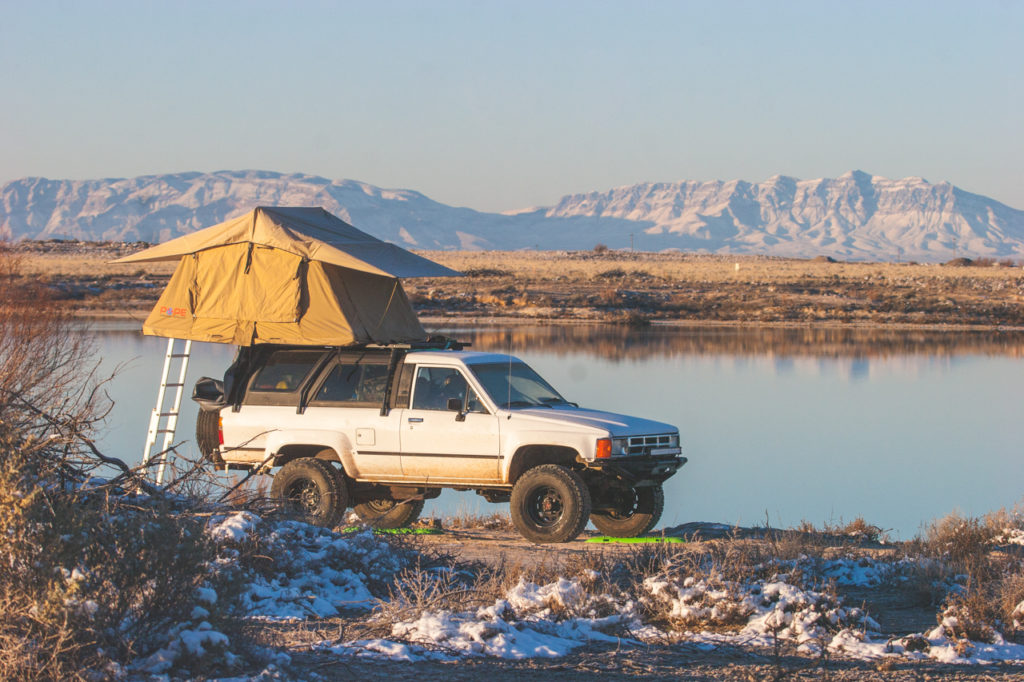
In the article below we will walk you through the planning and design and the building of the roof rack that we use on our 1st Generation 4-Runner. The 1st Generation 4Runner is an iconic SUV, mostly because of its classic style and removable hard-top camper.
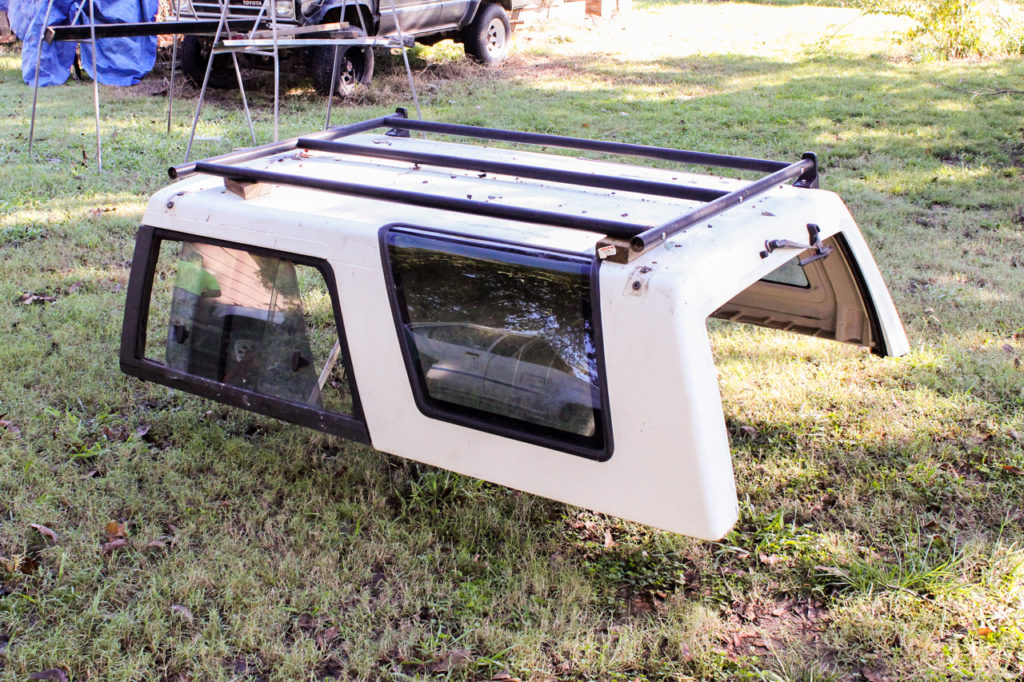
The topper section is fiberglass and slides off to allow us to still use our 4Runner as a truck when needed. The fiberglass topper presents its own set of challenges as the topper is not designed to support a lot of weight. Horror stories circulate the interwebs and 1st generation owners groups about cracking toppers from adding roof racks and additional storage up high. For these reasons, we designed a roof rack that avoids contact with the fiberglass and relies on the strength of the bed rails for its support.
The Design
We sought to imitate the mechanics of a contractor ladder rack with uprights that are bolted to the bed rails. The design involves 3 uprights from each side, following the lines of the topper to maintain some of the characters from the classic sliding windows that are so recognizable on our truck. We had some conditions for our rack that we wanted to make sure the design addressed:
-
- No contact with the topper- While cruising down a dirt road in Baja, the last thing we want to worry about is a fiberglass failure causing a leak or structural deterioration. The design needed to wrap around the topper in an upside-down “U” shape with the only contact being the bed rail mounts.
- Strength- The rack had to be stable enough to hold our gear kinetically: roof top tent (100 lbs) and our rooftop gear box (50lbs). The rack also had to hold the weight of Rachael and I statically in the tent at night.
- Retain stock functionality- We wanted to still be able to remove the topper and retain our rack and still be able to access all of the stock functions of the topper such as the side windows, rear window, etc.
The Build
Vic set off with the idea in his head as we watched patiently, trying to remain helpful by holding metal or grinding cuts. Vic came up with the idea to retain the use of the middle section of the rack that was on the truck when we bought it. The rack was made by Northwest Off Road (NWOR) and although the gristly man that answered their customer service calls was really convincing when he said “It can hold tons of weight,…roof top tent no problem!” I doubted the structural integrity of rubber grommets inside 20-year old nutserts. The middle “H” section was completely stable and rather robust and made for a cheap and easy way to tie the two uprights together.
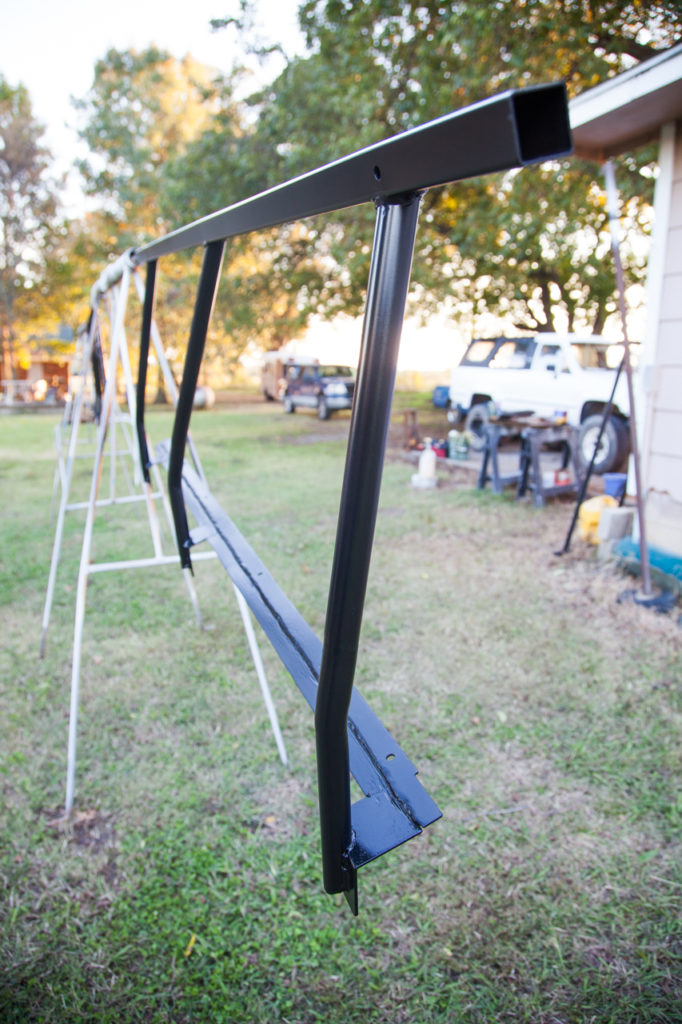
The uprights were made in three sections: bases, posts, and tops. The tops were simple square tubing sections that provided a flat area for the H section to attach to.
The bases and posts were quite complex. The bases started as flat stock that was cut into skinnier sections then welded together at an offset to account for the ridge of the bed rails. Once those were cut and welded, the posts could be measured and tacked on to test fit the angles. Once the angles were confirmed, all of the pieces were tacked together to ensure fitment and function.
Everything looked good, so Vic went to work on welding the structures together for each side. After he was finished, Rachael and I made ourselves useful by grinding the welds and prepping for paint. After a coat of flat black, the rack looks like it was made by Toyota.
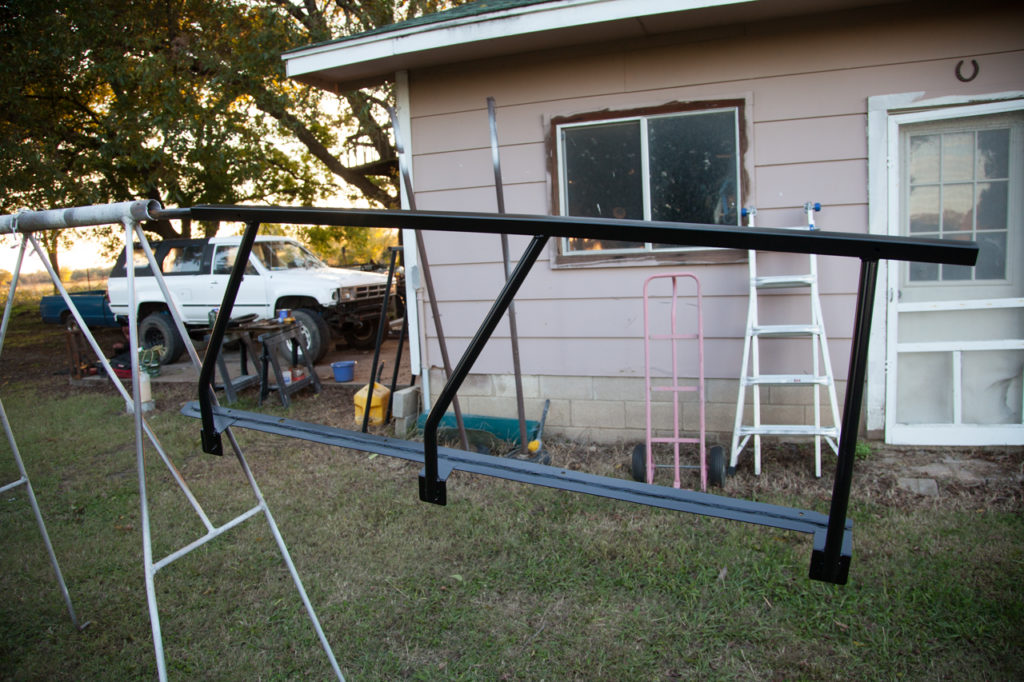
Once painted, the uprights were slid under the topper and secured to the bed rails using the existing hardware. We made sure to drill a hole for the stock “pin” that sticks up from the bed rails and gives the topper a place to sit. The NWOR H section was bolted to the new uprights using some hardware laying around the shop and everything fit really well. We bolted the tent on and secured our roof top box for a winter full of adventure.
The Finished Product
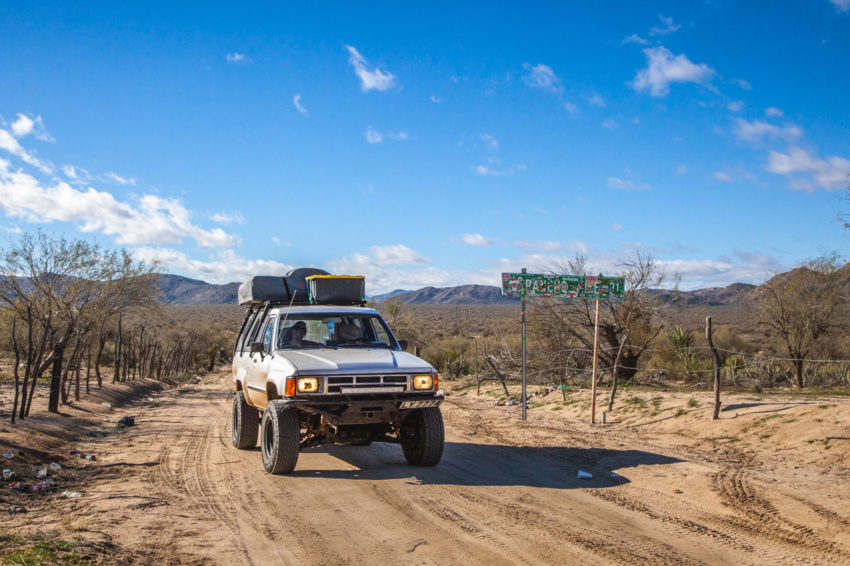
The result is a fully functional and visually appealing rack that has served us well thus far down the road. It has endured rough roads, rock crawling and crazy winds and it still holds together and does its job. Due to the required flat bar needed for the topper to sit flush on the bed rails, the rack “racks” a little side to side. We have remedied this by installing pipe insulation on all 4-corners and it seems to have mitigated the tippiness quite a bit.We will likely add more pipe insulation to 2 other posts to further protect the top.
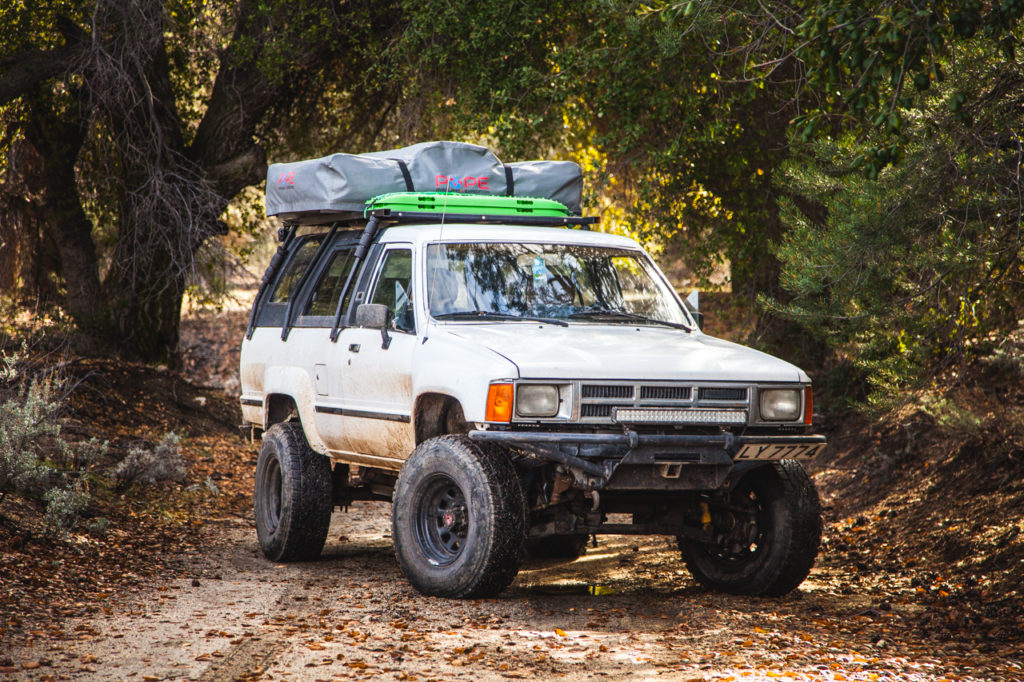
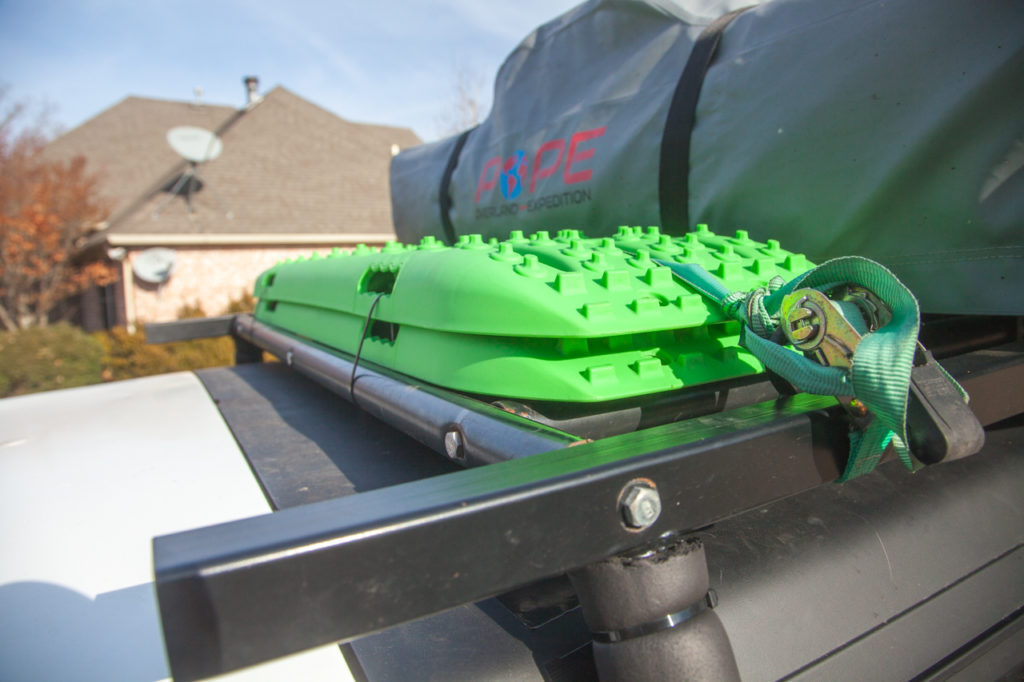
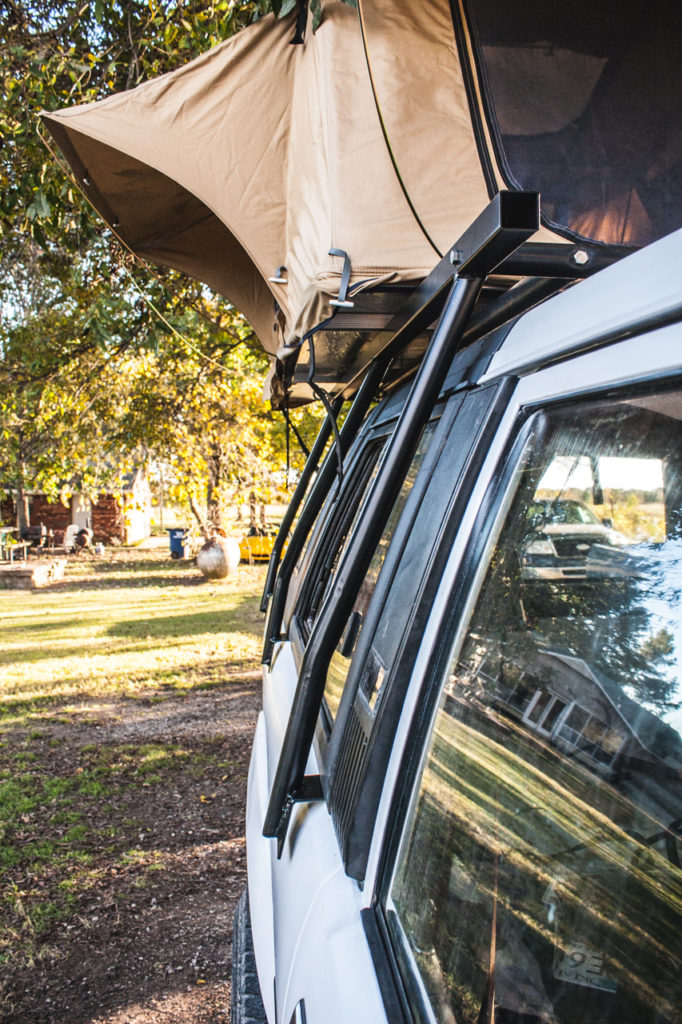
An area that we might improve on later is adding some expanded metal to the area in front of our tent so we can stack firewood, camp chairs, or whatever else comes up. Other than that, we plan to really enjoy the functionality of a usable roof on our 1st Generation 4Runner.
As always, thank you for reading along on our travels and adventures. Hopefully you were entertained, enlightened, or otherwise felt like the last few minutes reading this post was a worthwhile investment of your time. If you enjoyed our content, there are a few ways that you can help promote what we do and keep us on the road a little longer:
- Follow us on social media platforms likeYouTube, Facebook, and Instagram. The more viewers, subscribers, likes and comments, the better our pages rank.
- Share this article or our website with others that you think might enjoy it.
Just bought an 87 4Runner with a soft top, and this looks perfect for me.
Do you have any specifics on dimensions that I could use to build one?
Thanks, and great job!
I wish I could provide those to you, but we travel full-time and the truck is in storage in Oklahoma. I can likely get you some measurements this Winter, but we are on the other side of the country currently.
Great design! I an 88 4Runner and wanted to design something similar so i could still be able to slide the hard top off and have the option to run without to or with my soft top under. It’s great to see what you’ve done. You two are inspiring! Keep it up! I plan on spending lots of time on the road with mine once my build is done.
Thanks! We are glad this is helpful for your build. We love our little Toyota and it just keeps on ticking! We are taking it with us out and about this year as well as our bus so we will have a lot more 4Runner stuff coming!
I watched your build video somewhere but can’t find it again. I am about to start on a very similar project, and would love to look through your work again. Can you direct me to the video?
Did you guys make a video covering this?
This might be the closest thing that we have: https://youtu.be/N18C0ZIv0i4
You should make these and sell them!!
Unfortunately, there isn’t enough demand to make these. We were approached by KTT Killer Top Toys and decided against it. Seems like he has produced something very similar to our design, so you could check him out. Or you can buy my 1st gen and the rack comes with it!
Are you interested in selling the rack? I’d offer a couple hundred bucks for that! I can’t find anything for my 1st gen, and I don’t have welding experience D:
I have since sold the rack with the 4Runner. Just an FYI, a couple of companies went to market with a similar rack concept costing closer to $1000. Hopefully, that helps you track down something that works for you.