Lexus GX470 Off-Road Lighting by DENALI Electronics

Lighting is one the most overlooked and frankly, scoffed at elements of a serious overland vehicle build. Honestly, we try not to drive at night when we are in new places or foreign countries. But getting stuck out after dark DOES happen and being prepared for low visibility is much easier with proper lighting. 

Full disclosure, I have been employed by DENALI Electronics for several years and I get an employee discount. With that said, I would still use DENALI even if I were paying full price and I hope you understand why after you see our setup.

GX470 offroad lighting DENALI Electronics

Driving Lights

We had a couple of conditions when picking out forward-facing auxiliary lighting. First, the lights had to be discreet and as subtle as possible. Second, the lights had to be rugged enough to survive hundreds of miles of washboard and rough roads. Lastly, the product had to perform. We didn’t want an entire Christmas tree worth of lights across our roof line if a nice set would perform at the same level. 

DENALI D7 Driving Lights

The DENALI D7 Driving Lights are “face of the sun” bright. With over 15,000 lumens per pair at 1 lux, they are one of the brightest 4.5″ lights available on the market. I wrote up a review of the DENALI D7s here for a more in-depth look. 

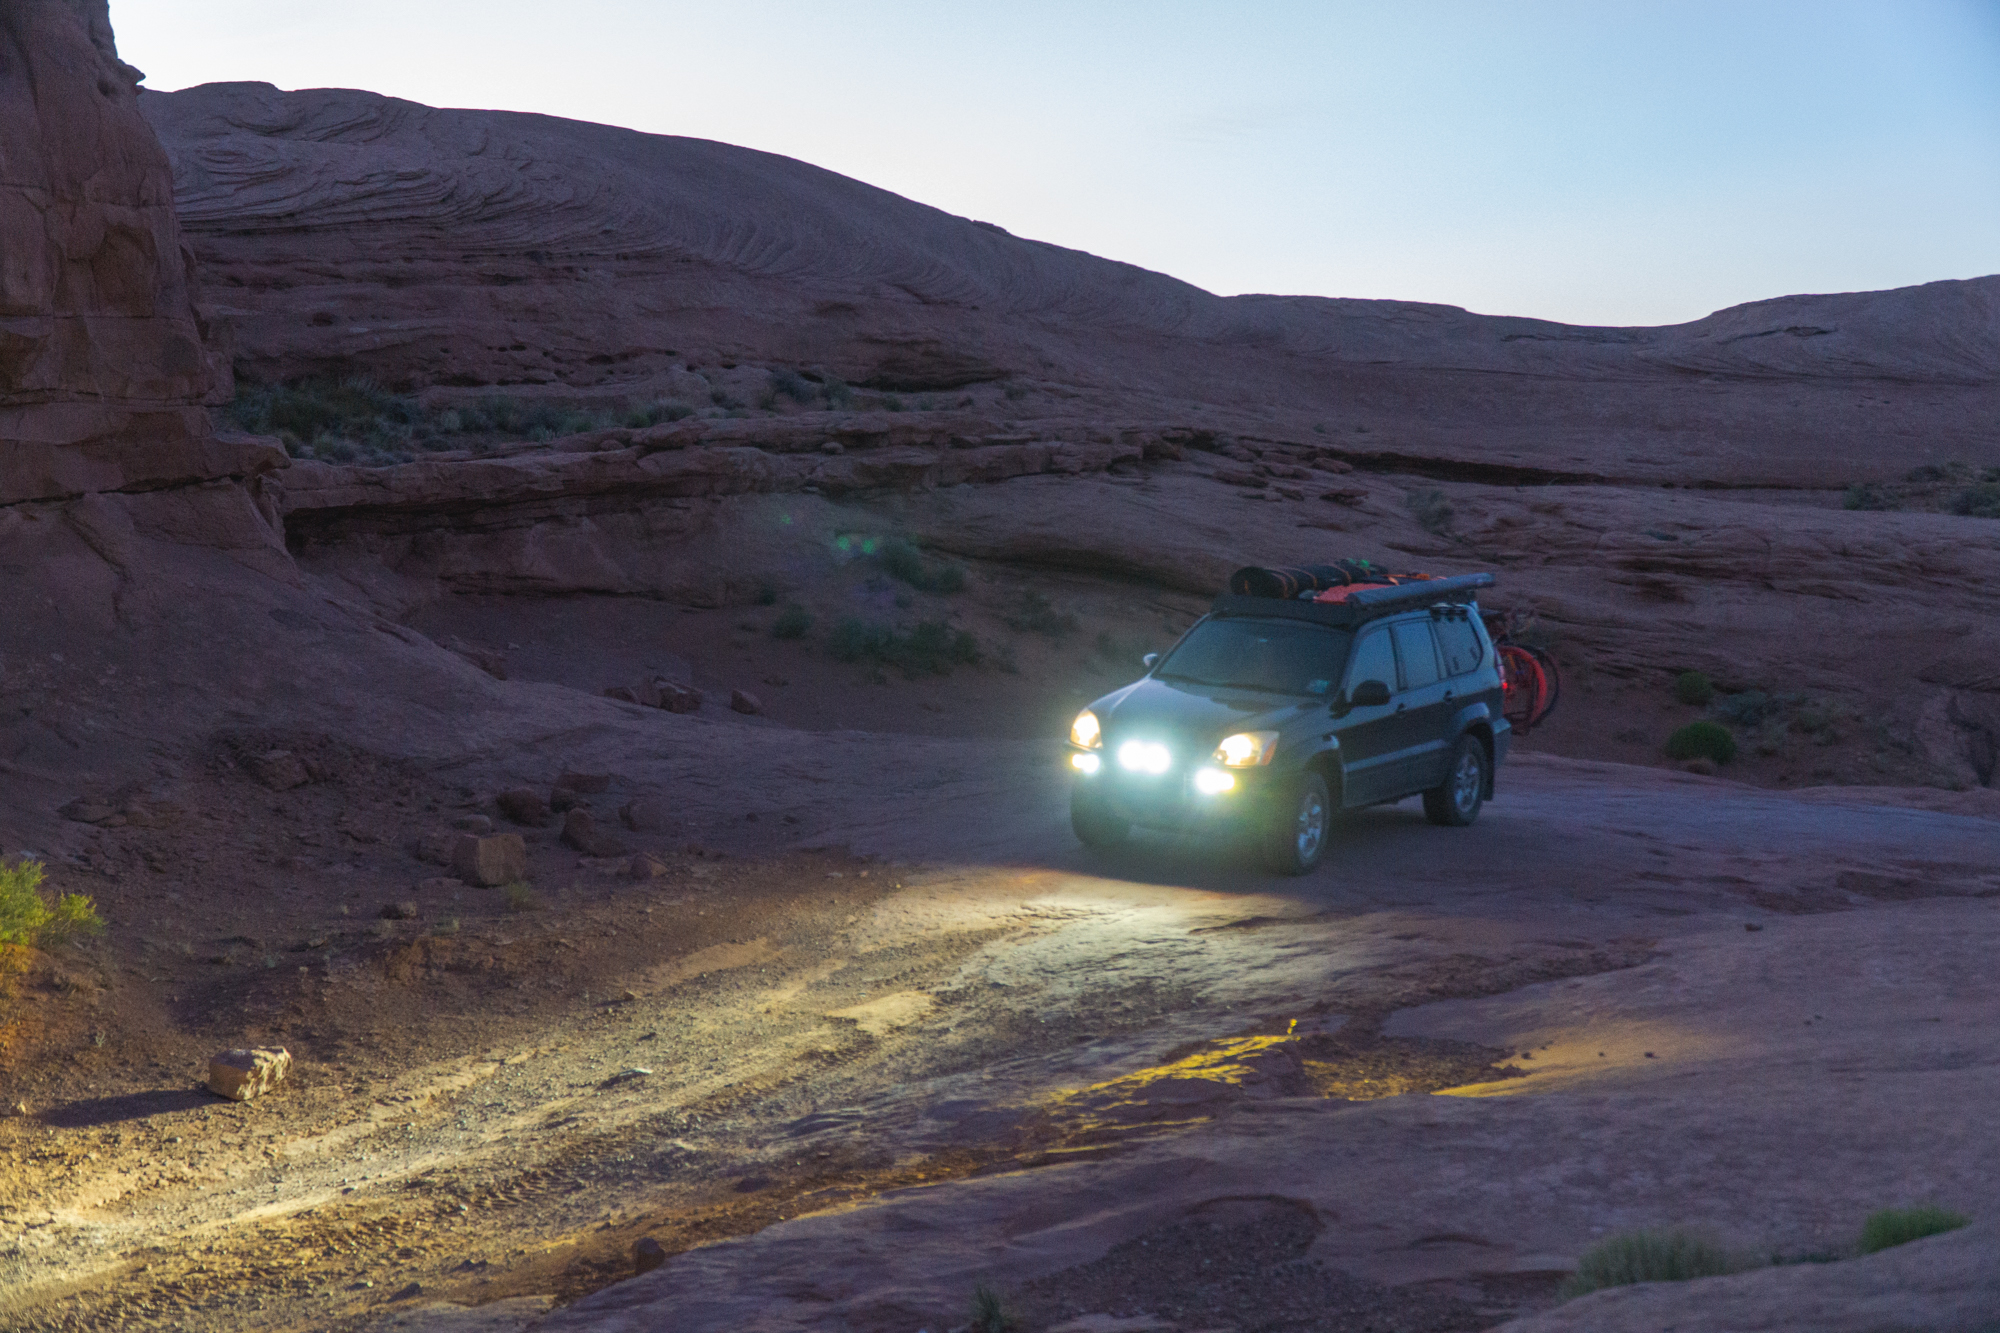
The D7s have lived in various locations on the GX and even spent a little time on a previous rig. They have found their forever home in the center of our steel bumper as the lights we turn to when it is really dark and there is no one else on the road. The beam pattern is obviously far-reaching, but is also wide and full. The pictures don’t do it justice, but it is worth a shot.

DENALI D7 + D3 Fog in the Utah Desert

We have had more than a few occasions where we would have been in trouble without our D7s. A  couple of years ago, a surprise thunderstorm in Moab created conditions that were extremely difficult to see in and I am not sure how we would have made it back without all of the extra light. 

DENALI D7 Driving Lights at DENALIElectronics.com

DENALI D3 Driving Lights

I will confess, adding the DENALI D3 Driving Lights to our bumper was mostly a cosmetic choice. Not because the D3s aren’t impressive, they are. We simply had too many spaces in the bumper and wanted to make sure it looked good. The D3s have turned out to be one of the light sets that we use the most because it is not as intense as the D7s but it still shines over a thousand feet! 

The D3 is my go-to light when I need to see, but there is a chance that a car could round a corner or that my lights might swing across a tent in a campground. When driving on the interstate at night, the D3 Driving Light with hybrid lens is my choice because it is plenty bright, but it is easier on my eyes than the D7s. Signs reflecting 15,000 lumens can become very distracting. 

DENALI D3 Driving Lights at DENALIElectronics.com

Fog Lights

The importance of a great fog light is often overlooked because the majority of OEM fog lights are weak and poorly designed. Most manufacturers aren’t even including fog lights, instead, they are opting for obnoxious and trending daytime running lights in big swooshes and gills in front of the radiator.  I am a fan of a true fog light and DENALI has a great option for just about any vehicle or motorcycle.

DENALI D3 Fog Lights

My favorite light in the DENALI lineup at the time of writing this is the DENALI D3 Fog Light. The D3 Fog is a DOT/SAE-compliant fog light that has an ultra-sharp cutoff and a crazy wide beam pattern. I elected to mount mine with amber lenses because I want to run it as a true fog light for foggy and rainy conditions and as a conspicuity light that is on all the time without blinding other motorists. 

ISOLUX chart showing D3 Fog Light Spread

One of my favorite aspects of how DENALI designs and sells products is that the design team always shares the ISOLUX testing of each product. This allows the consumer to know exactly how a particular light performs and ask for the same chart from other brands for an apples-to-apples comparison. DENALI could simply list raw lumens like everyone else, but it is the little things that set the brand apart. 

As you can see, the D3 Fog is extremely wide (300 feet) and still shines an impressive 450 feet in front of you, which is impressive given the DOT/SAE compliance. The best part of the D3 Fog is the razor-sharp cutoff that allows us to run this light 100% of the time without distracting other drivers. We have had these for over a year without a single flash from another motorist. 

DENALI D3 Fog Light at DENALIElectronics.com

Scene & Camp Lighting

Scene lights are one of those things that you don’t want to mess with until you actually need them. For us, our headlamp batteries typically die right after we pull into an extremely dark campsite. Effective scene lighting allows you to setup camp, assess your surroundings, and even deter unwelcome guests. 

DENALI Daytime Running Lights (DRLs)

The Daytime Running Lights from DENALI are one of the most versatile lights in the catalog. The DRLs are slim, easy to mount and draw a tiny amount of power (0.5 amps at full power). The DRL is available in amber, white, or red and can be wired at 50% and 100% brightness. We have two DRLs mounted on the driver’s side and two mounted on the rear of the roof rack. We will likely add a DENALI B6 Brake Light (a DRL with red LEDs) to the center of the roof rack as we often have a bike rack blocking the brake lights. 

The most interesting use for the DRLs is when something brakes on our vehicle and we need to work on it in the dark. Whether trailside or in our apartment parking garage, the DRLs really light up the space and they should because each pod puts out nearly 900 lumens of broad flood light. 

DENALI DRLs at DENALIElectronics.com

DENALI SoundBomb Horn

The DENALI SoundBomb Airhorn is one of those modifications that you didn’t know you needed until you used it for the first time. It is EXTREMELY LOUD. Clocking in at 120 decibels, the SoundBomb is twice as loud as a standard car horn. The compact design allows it to be mounted in a variety of places on almost any vehicle and the performance is unbelievable. 

Like most overland travelers, we can’t afford to travel year-round and much of our driving is commuting in cities. In traffic, an effective horn can mean the difference between being seen and not. We use our SoundBomb liberally in traffic and it has kept us out of more than a few scrapes. Plus, it’s really fun to honk at the texters in front of you when a light turns green. 

The DENALI SoundBomb Horn at DENALIElectronics.com

July Travel Update

July has been an interesting month, to say the least. We said goodbye to family in South Dakota and began our slightly mad journey to the East coast. The journey was mad only because we chose to do it in the hottest month of the year in a bus without air conditioning. July was also a lot of driving and not a lot of enjoying locations on the map, hopefully August will slow down and cool off a bit. We are still on track to visit all 49 driveable states by 2020 and we knocked several off of the list in July.

A North Dakota National Park

We are on a journey to see all 50 states together and to take our bus to 49 of them, so a side trip to North Dakota was needed. ND gets a lot of hate from the other states and it is pretty obvious why…there is not a lot there. One place worth mention and a visit if you are close is Theodore Roosevelt National Park. Unfortunately for us, our vehicle was too big to pass through the construction area on the road in the park so we only got to see a portion of Teddy’s park.

Wild Horse herd at Theodore Roosevelt National Park.

The claim to fame of the park is its wild horse herd, which we were lucky enough to see in our short time there. These some 1000 horses roam free here and are truly something to behold. Like most of the plains, there are a ton of prairie dogs and bison to see roaming the banks of the Missouri River. The landscape and horses make a visit to this park the MOST interesting thing that one could do when visiting North Dakota, and I say that in the nicest way possible. 

Headwaters of Big Muddy

Due to the time of year that we are crossing the country, most of the things that we would like to do in Minnesota are in the far-north and simply not an option right now. We have plans for a Boundary Waters trip someday that will allow us to explore Minnesota more in-depth. An attraction that we did get to visit in Minnesota was Itasca State Park near Bemidji. Lake Itasca is the start of the Mississippi River and at the headwaters Big Muddy is a simple 8-foot wide stream. 

The Mighty Mississippi starts here!
Itasca State Park is riddled with bike trails

The park is extremely nice and we gladly paid for camping to have access to the showers and water fill up. The bike trails that run through the park were also a super nice way to go check out the mighty Mississippi without having to move the bus.

Caves in Iowa?

 Another state on our list that was relatively close to our route was Iowa. Although we would have loved to hang around for RAGBRAI (on our bucket list for sure) the only other thing that we found of interest to do in Iowa was to go caving. You read that right, we found a cave to explore in IOWA! It would be unfair to compare these caves to the caves we just explored in South Dakota as they are completely different types of caves and these are not nearly as elaborate or as well-preserved as the caves in South Dakota.
We hiked all over the small Maquoketa Caves State Parkand had mostly free rein of the some 10-12 caves in the valley. We were pleasantly surprised by the lack on any real rules or regulations in the park and it was pretty much chaos compared to the National Park managed caves that we visited in June. Would I travel across the midwest to walk around these caves in East Central Iowa? No. But I would stop in on my way to other places on the East Coast. 

This was THE only cool place to hang out in Iowa

Iowa was also a really good stop to get my stitches removed from my misadventure in SD with a table saw. It cost $2500 to stitch my finger in South Dakota and only $97 to remove the stitches in Iowa. 

Newest US National Park in Indiana

I too have been seeing the buzz all over social media about Indiana finally having a National Park, Indiana Dunes National Park. Previously designated a Lakeshore, the National Park Service has simply slapped a Nat’l Park sign on the entrance and has neglected to do much of anything else. We spent the day hanging out on the beach and attempting to enjoy the waves of Lake Michigan lapping on the sand. In true National Park style, there were thousands of people in the park and no accommodations had been made for extra trash or more porta-potties and parking at 8AM was a nightmare for a 22-foot long school bus. 

We still had a good time as we tend to do just about anywhere, but we hope the NPS invests in Indiana before the next time we visit. The BEST part about our trip across the midwest was getting to meet up with a bunch of Rachael’s extended family, most of whom I (Zach) had never met. We were welcomed in to the air conditioning, thankfully, and we got to go out to lunch with most of the Fort Wayne cousins. It was an absolute treat and we now have a reason to come back to Northeast Indiana!

Bay City Bust

We made a mistake- We should have driven the West Coast of Michigan and explored the Upper Peninsula for a couple of weeks while a heat wave attacked the midwest, but we didn’t. Instead we wanted to explore part of Ontario so we drove through the least pretty and most boring section of Michigan, the Southeast. I had visited Bay City as a kid and remember it being a type of coastal town with pretty boats, I was twelve after all. We made the drive to Bay City to find a ghost town. Shops were closed in the middle of the day, streets were empty, and it just seemed like nothing had happened here in a long time, perhaps since I was there as a twelve year old. 

We hung out by the river and got some work done but soon made plans to escape Michigan and head to Canada, at least we would have Tim Hortons to console us. And console us it did. Although Tim Hortons sold to the company that owns Burger King, we will still continue to patronize them as long as they continue to serve delicious crullers and affordable coffee.

Shortest International Visit EVER

Entering into Canada north of Detroit was a really smooth border crossing. Something that always happens in our bus, people tend to think we smoke weed, which we don’t. No huge political stance or moral objections to it, it’s just not our thing. The border agent seemed to think we looked like drug users and informed us several times that weed was legal in Michigan and in Canada, we simply needed to declare it, only we had nothing to declare. Ahh the joys of living in a school bus and having long hair!

We spent a few days in Canada lounging along the North Shore of Lake Erie in the little town of Port Stanley. This town was the perfect place to charge the batteries and sit in the cold lake while record highs smacked the Midwest and Northeast. We found public camping near a beach and road our bikes or walked all over town and worked in a nearby coffee shop when we needed to. It was a pleasant couple of days. 

Niagara Falls was the other reason that we wanted to cross Ontario and we were not disappointed. Although Niagara is a haven for tourists, the falls are still beautiful, especially from the Canadian side. After exploring around the falls, we prepared for another breezy border crossing back into the states and we suddenly found ourselves in New York!

Upstate New York

Upstate New York is a really interesting place to visit. The bulk of attractions in Upstate revolve around the lakes region of the Finger Lakes, Lake Champlain, and Adirondack Park. New York is also home to the Number 1 State Park in the United States, Letchworth State Park and was the site of the Winter Olympic Games in the 80’s.

As is the case with most of the Eastern US, public land is rare, but we found several good camping spots and explored the North end of the state, one of which was next to a retired fire tower. Unfortunately, we did not have a ton of time to spend in New York and hopefully we can come back and spend a bit more time when the weather is cooler.

Vermont and New Hampshire

 Despite the challenges of camping for free in VT and NH, we still managed to see some sites like the Ben and Jerry’s. Factory, the Green Mountain National Forest, White Mountain National Forest, and beautiful landscapes of dense green forest along the way. We found there were simply too many people touristing for our speed. Also, the heat was a bit much. The temperature was in the 90’s during the day and high 70’s at night and in a bus with no AC, that is simply too hot. 

We will likely make a weekend trip to Vermont and New Hampshire in the fall some day, but for now we are heading North!

How to Improve the Handling, Steering, and Ride Quality of Your Van, Skoolie, or RV

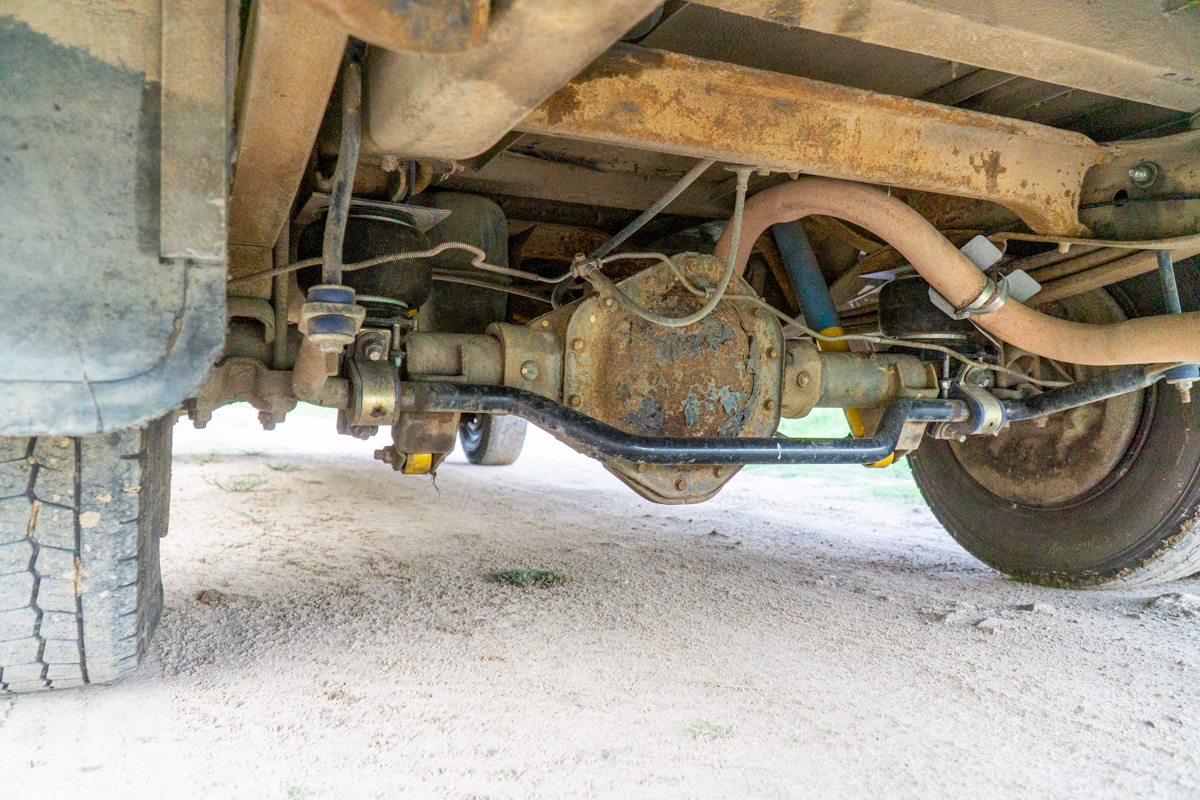
Originally our skoolie handled like a boat, it stills does. But now it handles like an appropriately nimble boat. We were constantly having to take turns much slower than we should have to prevent the entire bus from feeling like it was tipping over. Off-road the bus was a mess. Although it is built on a similar chassis to the Express Van and Silverado, it behaved oddly off-road with a 10,000 lbs GVWR. Every obstacle (think small rock or pothole) on forest service roads would create a lean and sway that was annoying, dangerous, and really inconvenient to handle behind the wheel. After a long day of driving like this, the person driving is completely spent which defeats the purpose of traveling in the first place. This will be a simple article walking you through how we improved the handling in our short skoolie conversion without breaking the bank.

Continue reading “How to Improve the Handling, Steering, and Ride Quality of Your Van, Skoolie, or RV”

Welcome to Cave Country: Exploring the Caves of South Dakota

The Black Hills of South Dakota are known for a few things including Mt. Rushmore, the Crazy Horse Memorial (insert link) and some of the most beautiful scenic drives in the country. What most don’t know about Western South Dakota is that it is home to not just one, but two MASSIVE cave systems. We took the plunge (see what I did there?) and took tours at both Wind Cave National Park and Jewel Cave National Monument, both near Custer, SD. 

Wind Cave National Park

During our time in the Black Hills, we had a day with really bad weather in the forecast so we opted to visit Wind Cave National Park, about 22 miles south of Custer, SD. Arriving at the park from the North, we were greeted into the park by a regularly occurring herd of bison near the park entrance. The Wind Cave herd is one of only 4 bison herds in North America that is relatively pure and walks freely on public land. The number of bison in the Wind Cave herd are 250-400 strong and a large portion of the herd spends most of the summer along Highway 385, near the Visitor Center. It is rumored that the herd will even perform a “South Dakota Car Wash” of your vehicle in the spring if your vehicle is carrying delicious salt on the exterior of your vehicle, by licking the salt off of your car.

Bison grazing in the grassland of Wind Cave National Park

The park Visitor Center is very mild and boasts standard amenities such as bathrooms, a gift shop, and a small naturalists display of wildlife and history from the area. Despite the beauty of the grassland above and the size of the bison herd, the main attraction to the park actually lies below ground, within its 150+ miles of discovered cave passageways. 
The passageways of Wind Cave are unique for a couple of reasons.

First, Wind Cave contains over 95 percent of the world’s boxwork formations. Unlike formations in other popular cave systems that rely on water to drip down the rock and deposit minerals, boxwork was already present in the rock and was simply refined by the water of a once present underground lake. The result, a beautiful lace-like mesh network of sediment that makes Wind Cave one of the densest caves in the world. 

Detail photo of boxwork formation

Second, Wind Cave is the 7th longest cave in the world even though the footprint of the cave system is contained within only a couple of square miles. While navigating the passageways you realize the scale of the cave and how the distance is accomplished, tunnels veer in every direction from the main tunnels and rooms. It is easy to understand why some of the cave is still not explored even to this day. 
The best part about a visit to Wind Cave National Park is getting to tour the caves themselves!

For more information on tours, visit the National Park Service website.

The largest room on our tour of Wind Cave

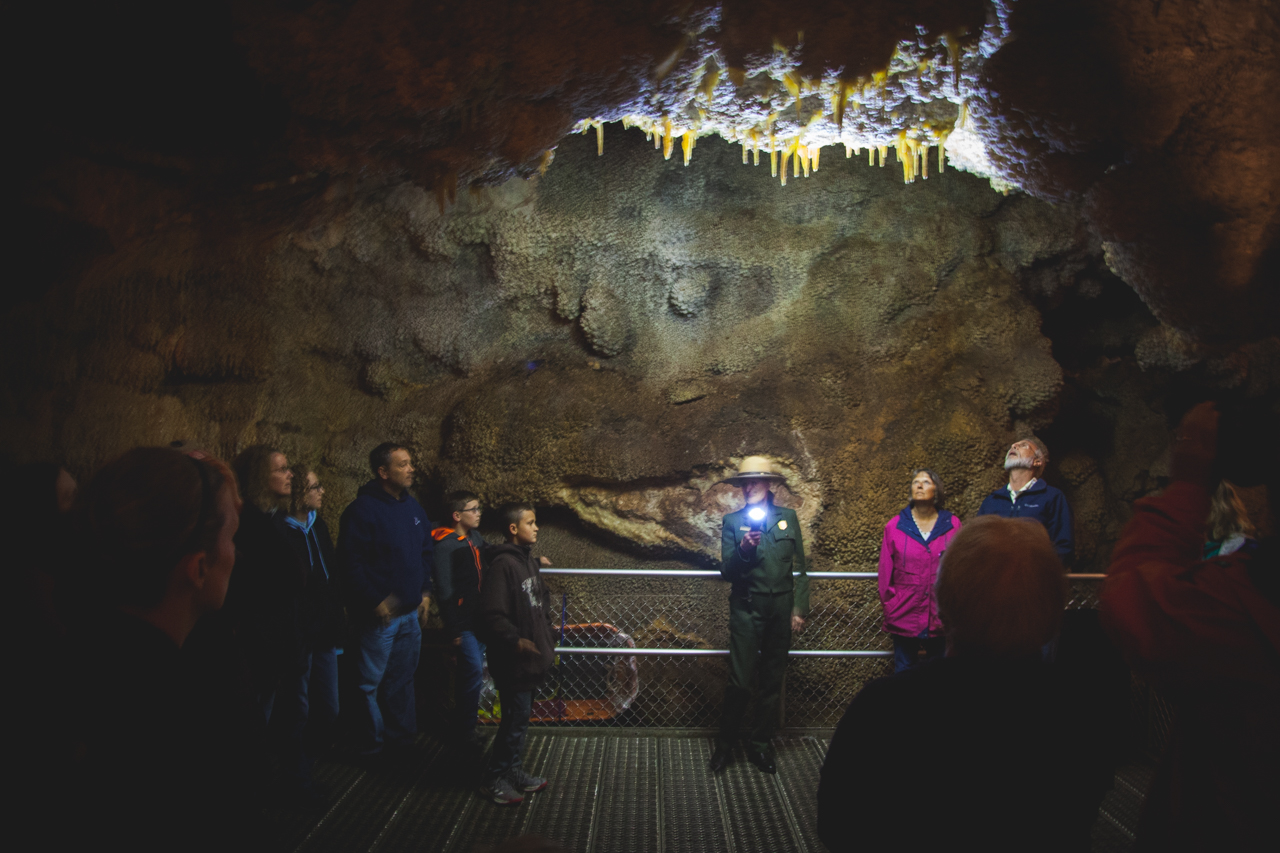
We chose the Fairgrounds Tour and were really happy with our choice. Our tour guide, Ranger Justin was excellent and had a very well-rounded knowledge of the cave and its history. On our tour, we meandered around the cave, crouching but never crawling, and had the opportunity to see the infamous box formation and multiple instances of frostwork. This cave was pretty tight in some places, so those that get claustrophobic should probably stay about ground. Interestingly enough there was a major lack of the two things that I expected to see in the cave: bats and water. The bats apparently hang out around the natural entrance because food and navigation is easy. Water is missing from the majority of the cave due to the lowering water table and at one point, the entire cave was filled with water.

Jewel Cave National Monument

Different from Wind Cave in about as many ways as two caves can differ that are in the same county, Jewel Cave was a very different experience after visiting Wind Cave. Jewel cave is longer and much more cavernous than Wind Cave. Jewel Cave is also longer than Wind Cave at a length of over 200 miles of discovered caves passageways. The National Park Service hosts tours that allow you to explore different areas of the cave and you can check those out on the NPS website

Boxwork formations line the ceiling of Jewel Cave

The cave was discovered in 1909 when prospectors felt cool air blowing out from the cave and tours began in 1939, hosted by the NPS. 
The geologic features are not nearly as rare as those that occur in Wind Cave, but there is still a few instances of box work and frost work. The most predominant crystal feature on the walls of Jewel Cave is the Spar Crystal. The Spar Crystal formations cover most of the cave that we saw on our tour with the occasional appearance of flowstone, frost work, and box work throughout. We even got the chance to see some “Cave Bacon” which is a cave feature often found in caves in the Eastern US.

Cave Bacon is prominent in one section of the cave tour.

Our tour guide was exceptional and had a deep knowledge (see what I did there) of the cave and it’s history. We took the Scenic Tour that lasts approximately 1 hour and 30 minutes and navigates 723 stair steps. The tour is listed by the park service as moderately strenuous, which translates to easy if you are in decent physical shape. 

Okienomads Travel Tip- Arrive at Jewel Cave when it opens to purchase your tour passes first thing for later in the day, then take off to Hell Canyon (Black Hills National Forest) just down the road for a pleasant stroll through the canyon that lies above the surface of Jewel Cave. 

As always if you haven’t seen our YouTube channel or Instagram page, head over and give us a follow and subscribe!

Gear Review- Oveja Negra 1/2 Frame Bag

The simple things in life tend to make the most joy. I was skeptical of the usefulness of bike packing frame bags for a long time before riding with my uncle in South Dakota last Fall on his Salsa Warbird equipped with a Revelate Tangle 1/2 frame bag. I had a flat about 20 miles into our ride and my uncle wanted to show off his new tire pressure gauge (also awesome but more on that later), he reached into his frame bag and it was like a scene from Mary Poppins…stuff just kept coming out. He pulled out his air gauge, a Clif Bar, and I caught a glimpse of the rest of his kit stuffed in there and I was a little impressed. That awkward dead space above a traditional bottle case setup was now useful!

I started shopping around using the following criteria: the bag had to be made in a small shop (think not sweat shop), it had to be a spacious 1/2 bag, and it needed to be at least water resistant. I quickly came across my selection, the Oveja Negra 1/2 Frame Bag. Oveja Negra is a relatively small shop in Salida, CO and they make truly cool products in a seriously cool place! 

Below are the bag specification from the Oveja Negra website:

  • Full zip main compartment (drive side)
  • Half zip tool pocket (non-drive side)
  • Hook & loop closure hydration/wire port 
  • Adjustable/removable Velcro® One-Wrap® top tube straps allow for a more customized fit
  • YKK® Uretek water resistant zippers
  • X-pac® VX21/VX42 water resistant face fabrics
  • Cordura® abrasion resistant fabric along tubing
  • MIL-SPEC webbing and binding
  • High Density closed-cell foam padding along down tube
  • Reflective Oveja Negra logo
  • MADE IN THE U.S.A. of domestic and imported materials

Build Quality & Design

The craftsmanship of this bag is really high quality and it shows right out of the box. All of the zippers and fabrics are water-resistant and look/function great! I opted for MultiCam Camo as the color matches my Revelate Designs seat bag, but there are 6 other colors available and if you reach out, I am sure Oveja Negra could whip up something custom. The zippers pull and function as they should and the placement of the zippers is really well-thought out and accessible from the saddle. 

One of my favorite features of the 1/2 frame bag is the high-contrast interior fabric that really stands out compared to the outer fabric and the interior items that you will be reaching for. I was unsure about the bright green initially, but after using it once it made perfect sense!

Extra Touches

There are several pieces of the bag that really set the Oveja Negra bag apart from the rest of the pack. First, it looks really good! The reflective Logo and adjustable velcro make the bag really look good and function well on the bike. Second, the inclusion of a bike pump/tent pole strap in the bottom of the bag is a big deal. My old school long frame pump fits perfectly in the straps. The zippers have covers where they close for extra moisture resistance and there is even a hydration bladder port for running a large bladder in the frame bag. So many extra touches made this bag really stand out. 

An extra large size bag fit my 62cm Surly Disc Trucker really well and the adjustability of the velcro one-wrap makes this bag extremely adaptable for other bikes that I ride including my single speed. I am beyond excited about this bag and after almost 200 miles of use, I will not ride another gravel, touring, bikepacking or commuting bike without one of these bags strapped to it! 

To purchase or see more specs/measurements head over to the Oveja Negra website.

FREE National Geographic Quadrangle Maps

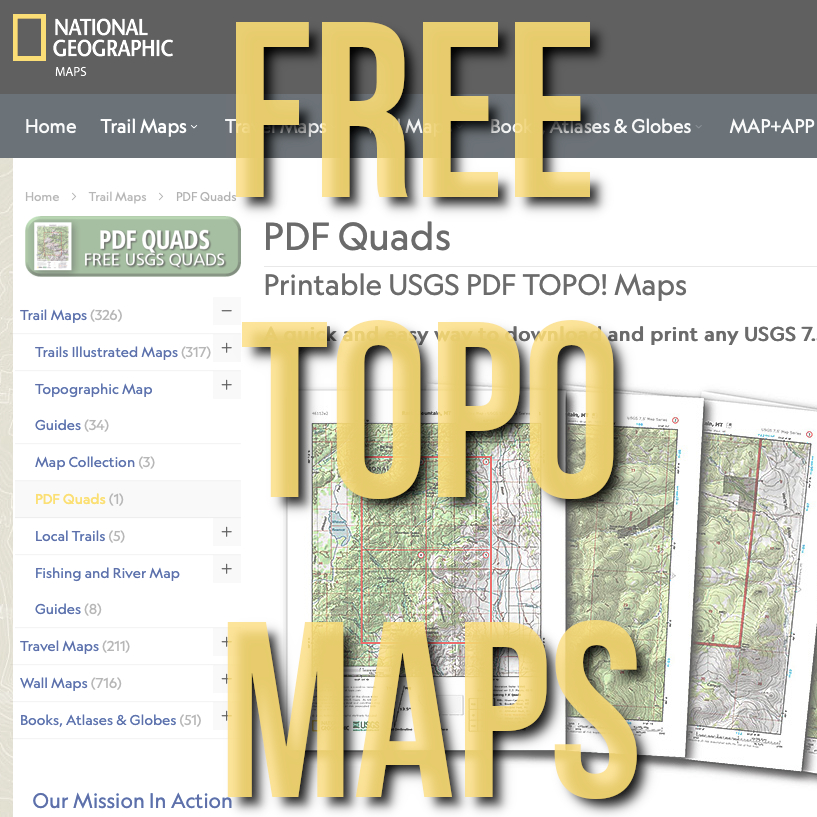
If you are like us, you spend a fair bit of time in the woods and often times a good map of the area that you are exploring is hard to find. We use GPS often, but sometimes we enjoy route planning on a good, ole fashioned paper map. A good practice that we have started its when taking off into the woods is to keep a paper copy of our map stuffed in a ziplock baggy somewhere on our person in case of GPS failure, dead batteries, etc. One of our favorite maps is the National Geographic Quad and now you can download them for FREE!

 The Nat Geo 7.5 minute quad is a highly detailed topographic map style that was created and used by the United State Geological Survey for decades. These maps are available for anywhere in the continental US and did we mention they are FREE.  Keep in mind that the USGS hasn’t updated these maps in a few years, so some landscapes may have changes a bit, but how much can a landscape really change?

How to Download Free Nat Geo Quad PDF’s
To download, navigate over to the National Geographic PDF Quads Page.
Enter an e-mail address to sign up, nothing is FREE anymore! You can always unsubscribe when they start sending you e-mails.

Find the area you want to explore on the map or search for a particular area.

Click a red box to open a new window which will contain an overview map of the 4 quads that your selected red box borders as well as the 4 individual quads themselves. 

That’s it! A super easy and extremely helpful tool for route planning and backcountry exploration. We are already planning out some backcountry routes for 2019 and you should too! 

If you found this article helpful and informative, please let us know by subscribing to our e-mail newsletter, following us on Facebook and Instagram and subscribing to our YouTube channel.

Please subscribe to our YouTube Channel!

Your eyes haven’t betrayed you, IT IS snowing in Baja! We housesitting off-grid in the mountains of Baja California, Mexico and we received 6″ of snow in a 24 hour period. In this episode we walk you through some of the systems and planning that we use to be comfortable during a white out!

Is Off-Grid Living For You?

Please follow us on Instagram and Facebook to stay up to date on our travels and to know when new content is posted. 

Facebook- www.facebook.com/okienomads
Instagram- www.instagram.com/okienomads

Building a Roof Rack for a 1st Generation Toyota 4Runner

FULL DISCLOSURE: Rachael and I had about 0% to do with the construction of our 4Runner roof rack. Rachael’s dad Vic is the mastermind behind most things that are custom on our vehicles and he knocked this one out of the park. 

Before
As we bought the truck, NWOR rack barely holding on
After
New custom roof rack supporting our tent in Alamogordo, NM

In the article below we will walk you through the planning and design and the building of the roof rack that we use on our 1st Generation 4-Runner. The 1st Generation 4Runner is an iconic SUV, mostly because of its classic style and removable hard-top camper.

The topper section is fiberglass and slides off to allow us to still use our 4Runner as a truck when needed. The fiberglass topper presents its own set of challenges as the topper is not designed to support a lot of weight. Horror stories circulate the inter webs and 1st generation owners groups about cracking toppers from adding roof racks and additional storage up high. For these reasons, we designed a roof rack that avoids contact with the fiberglass and relies on the strength of the bed rails for its support.

The Design

We sought to imitate the mechanics of a contractor ladder rack with uprights that are bolted to the bed rails. The design involves 3 uprights from each side, following the lines of the topper to maintain some of the character from the classic sliding windows that are so recognizable on our truck. We had some conditions for our rack that we wanted to make sure the design addressed:

  • No contact with the topper- While cruising down a dirt road in Baja, the last thing we want to worry about is a fiberglass failure causing a leak or structural deterioration. The design needed to wrap around the topper in an upside down “U” shape with the only contact being the bed rail mounts. 
  • Strength- The rack had to be stable enough to hold our gear kinetically: roof top tent (100 lbs) and our rooftop gear box (50lbs). The rack also had to hold the weight of Rachael and I statically in the tent at night. 
  • Retain stock functionality- We wanted to still be able to remove the topper and retain our rack and still be able to access all of the stock functions of the topper such as the side windows, rear window, etc.

The Build

Vic set off with the idea in his head as we watched patiently, trying to remain helpful by holding metal or grinding cuts. Vic came up with the idea to retain the use of the middle section of the rack that was on the truck when we bought it. The rack was made by Northwest Off Road (NWOR) and although the gristly man that answered their customer service calls was really convincing when he said “It can hold tons of weight,…roof top tent no problem!” I doubted the structural integrity of rubber grommets inside 20-year old nutserts. The middle “H” section was completely stable and rather robust and made for a cheap and easy way to tie the two uprights together.

“H” Section remaining from the NWOR rack

The uprights were made in three sections: bases, posts, and tops. The tops were simple square tubing sections that provided a flat area for the H section to attach to.

The bases and posts were quite complex. The bases started as flat stock that was cut into skinnier sections then welded together at an offset to account for the ridge of the bed rails. Once those were cut and welded, the posts could be measured and tacked on to test fit the angles. Once the angles were confirmed, all of the pieces were tacked together to ensure fitment and function.

Everything looked good, so Vic went to work on welding the structures together for each side. After he was finished, Rachael and I made ourselves useful by grinding the welds and prepping for paint. After a coat of flat black, the rack looks like it was made by Toyota. 


Once painted, the uprights were slid under the topper and secured to the bed rails using the existing hardware. We made sure to drill a hole for the stock “pin” that sticks up from the bed rails and gives the topper a place to sit. The NWOR H section was bolted to the new uprights using some hardware laying around the shop and everything fit really well. We bolted the tent on and secured our roof top box for a winter full of adventure.

The Finished Product

The result is a fully functional and visually appealing rack that has served us well thus far down the road. It has endured rough roads, rock crawling and crazy winds and it still holds together and does its job. Due to the required flat bar needed for the topper to sit flush on the bed rails, the rack “racks” a little side to side. We have remedied this by installing pipe insulation on all 4-corners and it seems to have mitigated the tippiness quite a bit.We will likely add more pipe insulation to 2 other posts to further protect the top. 

An area that we might improve on later is adding some expanded metal to the area in front of our tent so we can stack firewood, camp chairs, or whatever else comes up. Other than that, we plan to really enjoy the functionality of a usable roof on our 1st Generation 4Runner. 

As always, thank you for reading along on our travels and adventures. Hopefully you were entertained, enlightened, or otherwise felt like the last few minutes reading this post was a worthwhile investment of your time. If you enjoyed our content, there are a few ways that you can help promote what we do and keep us on the road a little longer:

  • Follow us on social media platforms likeYouTubeFacebook, and Instagram. The more viewers, subscribers, likes and comments, the better our pages rank. 
  • Share this article or our website with others that you think might enjoy it. 

Travel Video: Montana from the Air

Check out our newest video showing some of our favorite places in Montana. Big Sky Country is a fascinating place with mountains, lakes, waterfalls and enough beautiful scenery to keep you busy for a long time. The views are so unique from the drone and we were fortunate to see all that we did in Montana.

Please subscribe to our YouTube Channel: https://www.youtube.com/channel/UCRVDfzibhxyN1I-niylEiKg

Although there was a ton of Montana that we didn’t get aerial footage of, we are okay with that because a lot of the state is protected by Wilderness Areas and National Parks. We have done our best to respect the laws and regulations related to flying our drone.

You can learn more about our travels and where we have been, here: https://www.okienomads.com.

Please follow us on Instagram and Facebook to stay up to date on our travels and to know when new content is posted. 

Facebook- www.facebook.com/okienomads
Instagram- www.instagram.com/okienomads

Housesitting 101

What is Housesitting?

Thousands of people around the world have purchased homes and at some point they find that they don’t want to live in their home but they aren’t quite ready to sell it and either aren’t able to rent it or don’t want to rent it. Some are retirees that spend six months of the year visiting warmer climates in an RV and the rest of their time is at their “home”. Most folks would rather have someone living in their home than board it up. Others have a home on the market to be sold and know that it has a much better chance of selling if someone is actively living in it and keeping up with the house.

Off grid Mexico estate
Our housesitting gig in early 2019: Off-Grid Ranch in Baja, Mexico

How Do I Find Housesitting Gigs?

Build Your Housesitting Portfolio

If you are serious about housesitting, the first step should be to build your portfolio of references from people that you have housesitted for in the past. Most strangers on the street aren’t going to let someone they don’t know into their home for any period of time. However, if you had a list of credible references, your chances of being selected to house sit increase tremendously.

Offer to housesit for family or close friends when they go on vacation. Do an excellent job, let them know that you would love to housesit for them again, and ask if you can use them as a reference for future housesitting gigs. Now you can maintain a “resume” of your housesitting experience and use it as a bargaining chip with potential clients.

Create an Online Presence

The next step is likely the most important, creating an online presence. This can be different depending on the part of the world you wish to housesit in, but at minimum you should create a profile on a housesitting websites such as Trusted House Sitters and/or Luxury House Sitting.

Similar to filling out a job application, create a profile that is inviting and appealing to the particular type of assignment that you are interested in. Your profile photo should be high-quality, up to date, and accurate to your appearance as well as inviting. Don’t use a mug-shot as your profile photo on a housesitting website. Have someone proofread your profile for grammatical errors and try to be as professional as possible.

Remember that in a digital age, your online footprint means as much as your reputation did in 1950’s small town America. As soon as a potential client sees your name as an interested house-sitter, they will likely scour your social media and web presence to help determine if you are a credible applicant. The obvious solution to this predicament is to maintain social media as a decent human being and don’t post hateful, rude, racist, or overly political content. A less obvious way to avoid missing out on houses because of your meme addiction is to set your social media accounts to private.

Insider Tip Perform a “web audit” of yourself every 6 months or so to insure that you have a spotless web identity. If you do find something negative or defamatory, make steps to have it removed. 

Provide a Quality Service

Like any industry, it doesn’t matter if you land the biggest client of your life if you can’t deliver a high-quality product. Once you get a housesitting gig, no matter the size, do the best job possible. Oftentimes going above and beyond your responsibilities as a house-sitter can yield glowing reviews online and excellent recommendations when someone calls. Similar to the rest of life, being excellent at what you do will net rewards continually over time.

Standard Duties of a House-sitter

The duties required in your housesitting agreement (yes, you need to sign a housesitting agreement) can vary depending on the geographic location of the house, the style of property (ranch, condo, apartment, etc.) and the reason that the owner requires a house-sitter. If the owner needs a house-sitter to make the home look inhabited, it’s probably best if you know how many hours per day you should be around the house.

In our 2019 housesitting agreement we signed on to live at an off-grid ranch in the remote mountains of Baja Norte, Mexico. We were interested in this assignment because it’s in Baja and because we are extremely interested in living off-grid someday and this was a perfect way to try that lifestyle without a huge commitment. Our duties at the ranch included the following:

  • Cleaning the main house and income property and preparing the income property with linens, supplies and a warm welcome if someone were staying.
  • Tending to the flower beds, gardens, and fruit trees on the property.
  • Feeding the dog, Pepita!
  • Monitoring the off-grid systems like satellite internet, solar power, and water.

Your responsibilities at a house might be very different and may include things like walking a dog or washing windows or dusting furniture. There is no right or wrong set of responsibilities as long as you are getting as much value out of the arrangement as the home owner. If you are staying in a 10’ x 10’ room with no windows and the owner of the house has you painting the exterior, reflooring the living room, and building on a garage, you have made a mistake. Remember that the home owner is seeking a housesitter for reason. 


A House-sitter signs a Housesitting Agreement

A written document agreed upon between the owner or manager of the home and the house-sitter is vital to a mutually beneficial arrangement. This document should be signed and dated by both parties and outline the term of the arrangement, responsibilities of the house-sitter, any compensation involved, and how to handle expenses paid out of pocket by the house-sitter. 
Final Tips for Housesitting
To sum up our experiences looking for housesitting jobs and apply for many, the golden rule applies as much to housesitting as it does to the rest of our lives. Treat other people’s homes how you would want someone to treat your home and be the applicant that you would hire if you were looking for a housesitter. Happy hunting and let us know if any of our tips helped you land a gig!

A written document agreed upon between the owner or manager of the home and the house-sitter is vital to a mutually beneficial arrangement. This document should be signed and dated by both parties and outline the term of the arrangement, responsibilities of the house-sitter, any compensation involved, and how to handle expenses paid out of pocket by the house-sitter. 

Final Tips for Housesitting

To sum up our experiences looking for housesitting jobs and apply for many, the golden rule applies as much to housesitting as it does to the rest of our lives. Treat other people’s homes how you would want someone to treat your home and be the applicant that you would hire if you were looking for a housesitter. Happy hunting and let us know if any of our tips helped you land a gig!

As always, thank you for reading along on our travels and adventures. Hopefully you were entertained, enlightened, or otherwise felt like the last few minutes reading this post was a worthwhile investment of your time. If you enjoyed our content, there are a few ways that you can help promote what we do and keep us on the road a little longer:

  • Follow us on social media platforms like YouTubeFacebook, and Instagram. The more viewers, subscribers, likes and comments, the better our pages rank. 
  • Share this article or our website with others that you think might enjoy it. 
error

Enjoy our content? Help spread the word! ;)

Follow by Email
YouTube
YouTube
Instagram