#Vanlife Solar System: 300 Watts Solar, MPPT Controller, and Pure Sine Inverter
Know What You Need and How You Will Use It
The house electrical system of any conversion or RV is a pretty daunting and scary adventure for a first timer. To get the right system, a user has to know their current needs for electricity and how those needs will change when they are on the road. The best way to figure out how much electricity generation and storage a particular system will need to generate is to invest in a small device called a Kill-a-Watt. This device plugs into a standard 110V home outlet and has a female plug for the appliance that you seek to understand.
By keeping a spreadsheet of all of the appliances that you wish to use on the road, the amount of time you plan to use them and their perspective amps drawn, you can get an idea of how much storage (battery) and generation (solar or generator) you will need.
Our needs were simple and below is a table of the regular appliances that we use with our system:
| Appliance | Amps |
| Whynter 62 Qt Refrigerator | 4.5*.25 hours * 20 hours=22.5A |
| Fantastic Fan | 2*8 hours= 16A |
| Sureflo Water Pump | <1A |
| LED Puck Lights | <1A |
| Macbook Air | 4.3A*2 hours= 8.6A |
| Cell/Cam Batteries | 1A*2 hours= 2A |
| Total | ~51.1 A |
A second consideration when designing an electrical system is knowing how you are going to utilize the system. For example, if you planned to spend the entire Fall in the Pacific Northwest as a camp host in a campground, you wouldn’t want to rely on a solar system that needs 4-8 hours of direct sun per day. Likewise, if you plan to park in Quartzite, AZ for the Winter, it would be silly to not take advantage of all of the direct sunlight.
We landed somewhere in the middle and knew there would be days that we would be tucked back in the woods and weeks at a time would be spent in the desert. We needed the ability to store some juice for the day or so that we wouldn’t have sunshine, but also be able to use the vehicle alternator to charge the house batteries in a pinch if needed.
Okienomads Solar Electrical System
Below is a diagram of our electric system. All components are listed below with links to where we purchased them. If you have any questions about why we chose a particular part over another, e-mail us at okienomads@gmail.com and we will answer in the best way we can.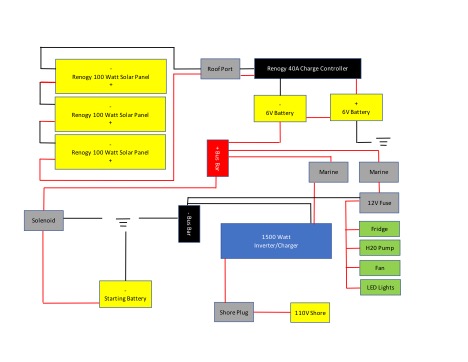
We wanted as many options for power generation as possible in case our situation changed or if we needed to hunker down somewhere for the winter and wanted to add a generator to the system or utilize shore power (power sources are shaded in yellow). If we needed to add a generator, all we have to do is plug into the shore plug on the side of the bus.
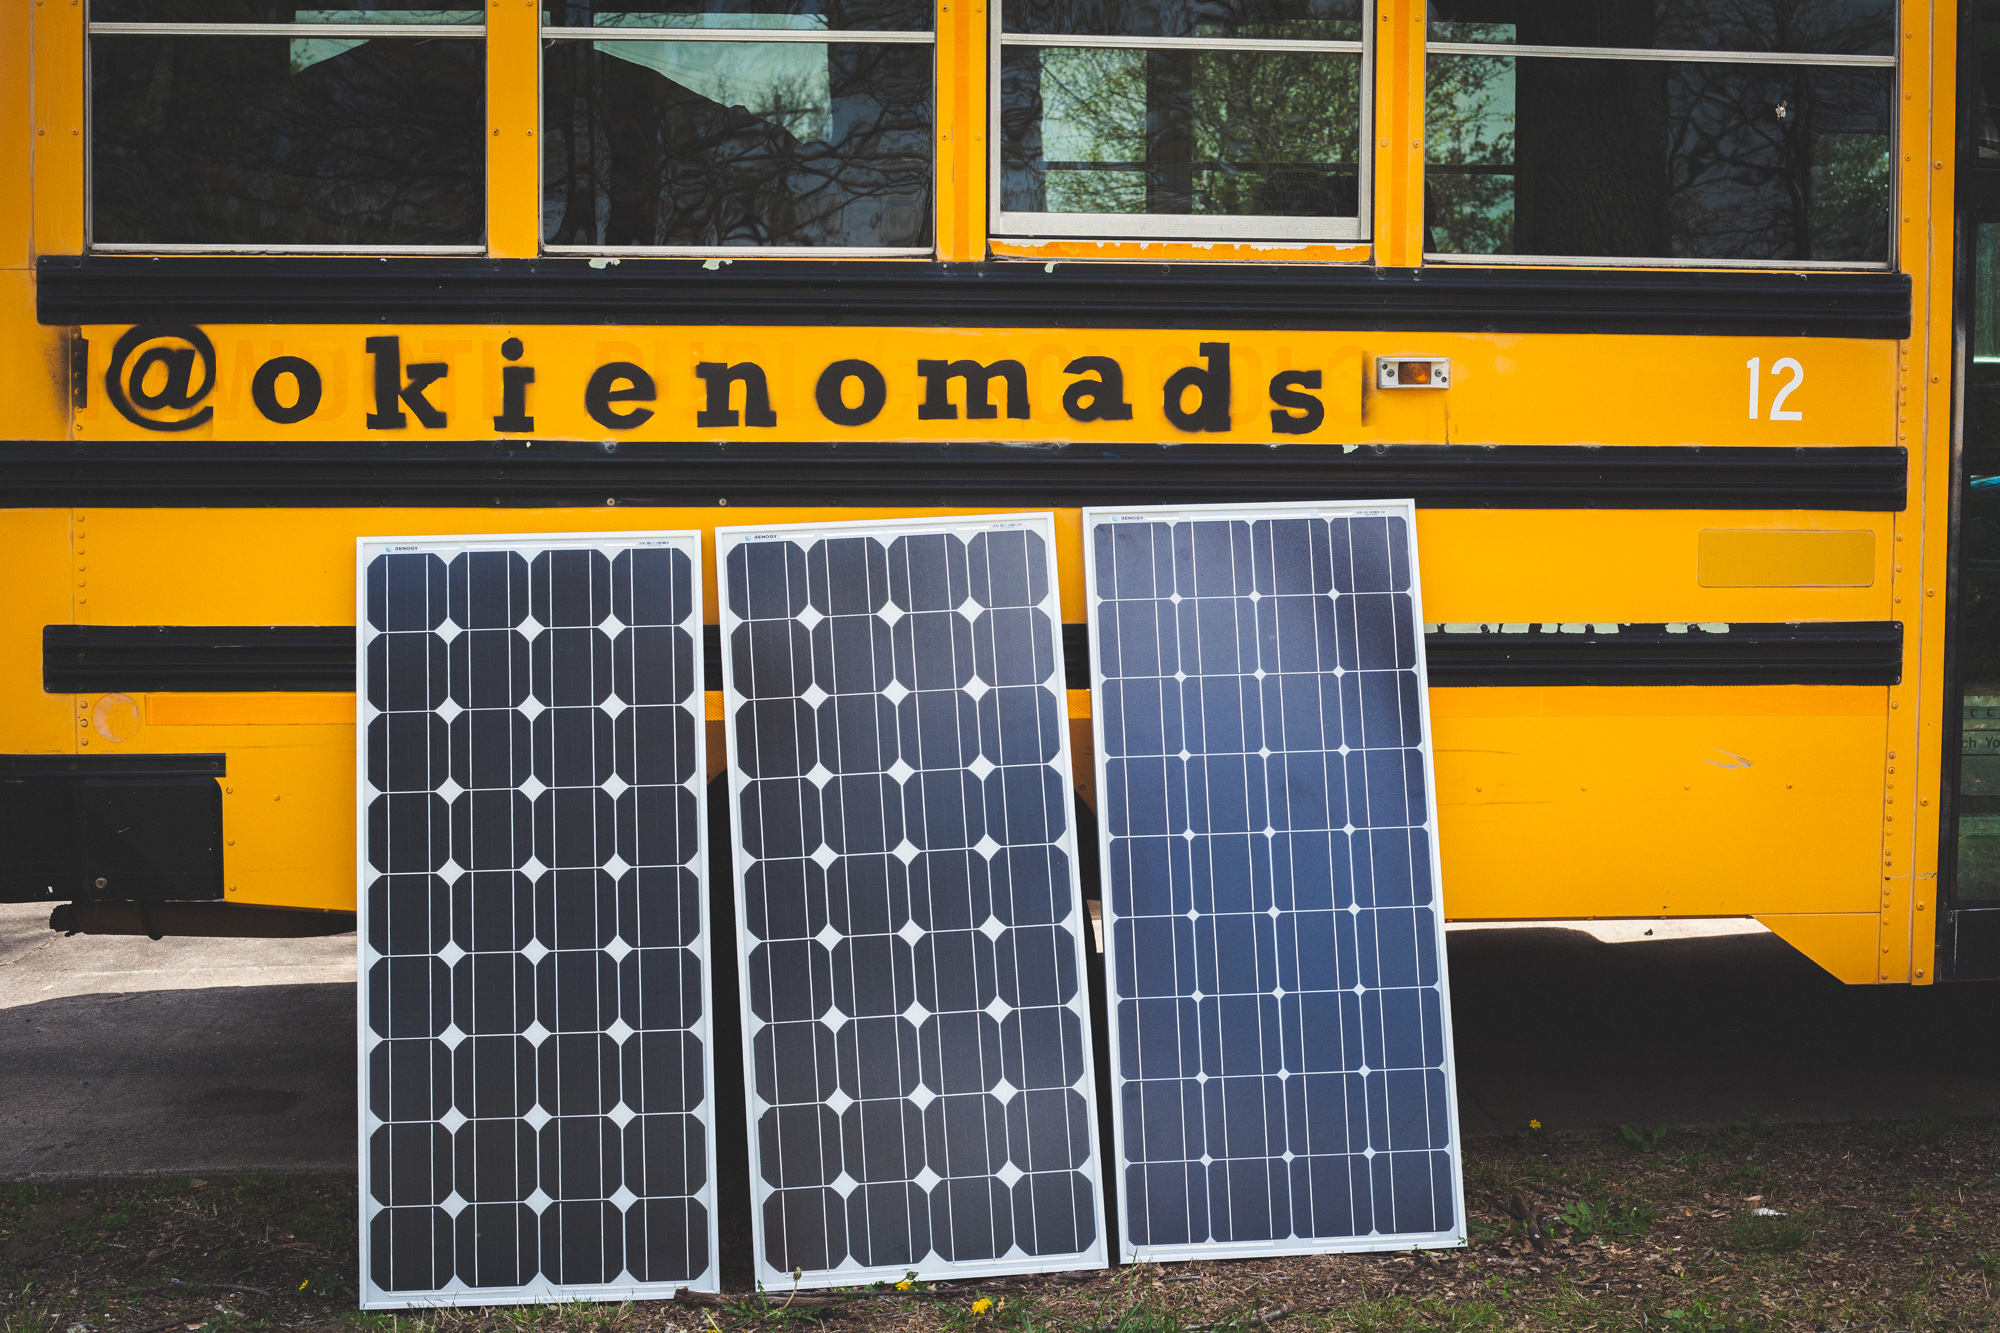
Solar Panels
We were extremely green to solar systems (see what I did there?) when we started and opted to purchase a kit from Renogy Solar as opposed to piecing our system together and potentially missing something or purchasing incongruent parts. This kit included (3) 100-watt panels, a 40A charge controller, and most of the wiring needed to hook up the panels to the controller. We wired our solar panels in a series (see diagram above) to be able to pull solar even if the panels weren’t seeing a full 12 volts. This also allowed us the ability to run longer cable at smaller sizes than if we wired in parallel. Renogy Solar has an excellent page describing the different setups available.

Charge Controller
We opted for the Renogy Rover 40A MPPT controller for the option of wiring our panels in series and harvesting solar all day instead of waiting on 12 volts to hit the panels.
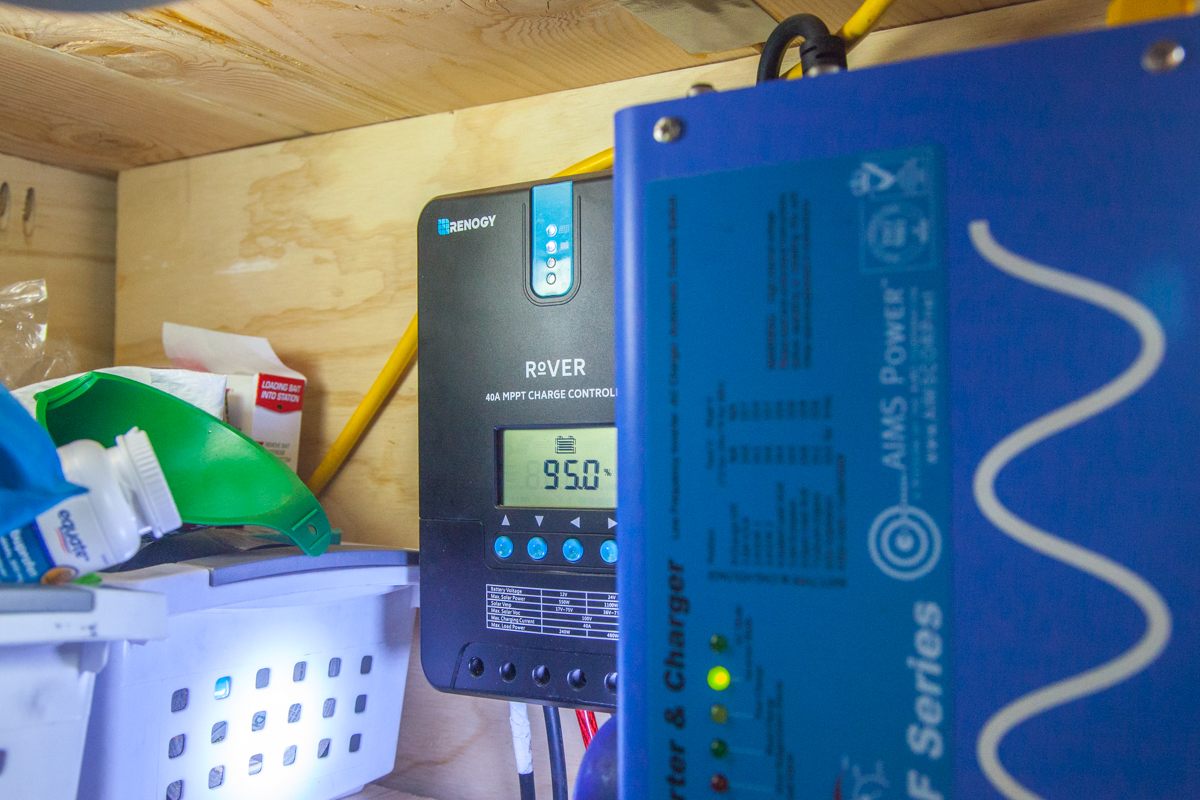
A smaller PMW charge controller would have worked for our needs, but would have limited the amount of solar we can grab and the options for expanding our system later if our bus turns into a more stationary fixture (think tiny cabin).
We searched for a cheap and easily expandable battery for our bank and landed on the Duracell GC-2, 6-volt golf cart battery wired in a series to create a 12v battery with 200 amp hours. These batteries are flooded, lead acid batteries that require checking the water levels from time to time. Although AGM gel batteries, common in cars and trucks, are sealed and require less maintenance, they are not made to be discharged heavily over and over like the golf-cart batteries.
Inverter Charger
Like with the rest of our system, we wanted to select an inverter that would grow with our needs. As of right now, the only appliances that we are running is a MacBook Air and the occasional food processor (in direct sunlight). We wanted to have an inverter that would be sufficient if we needed to run a couple of appliances down the road as we transition the bus to a tiny house and less of an adventure mobile.
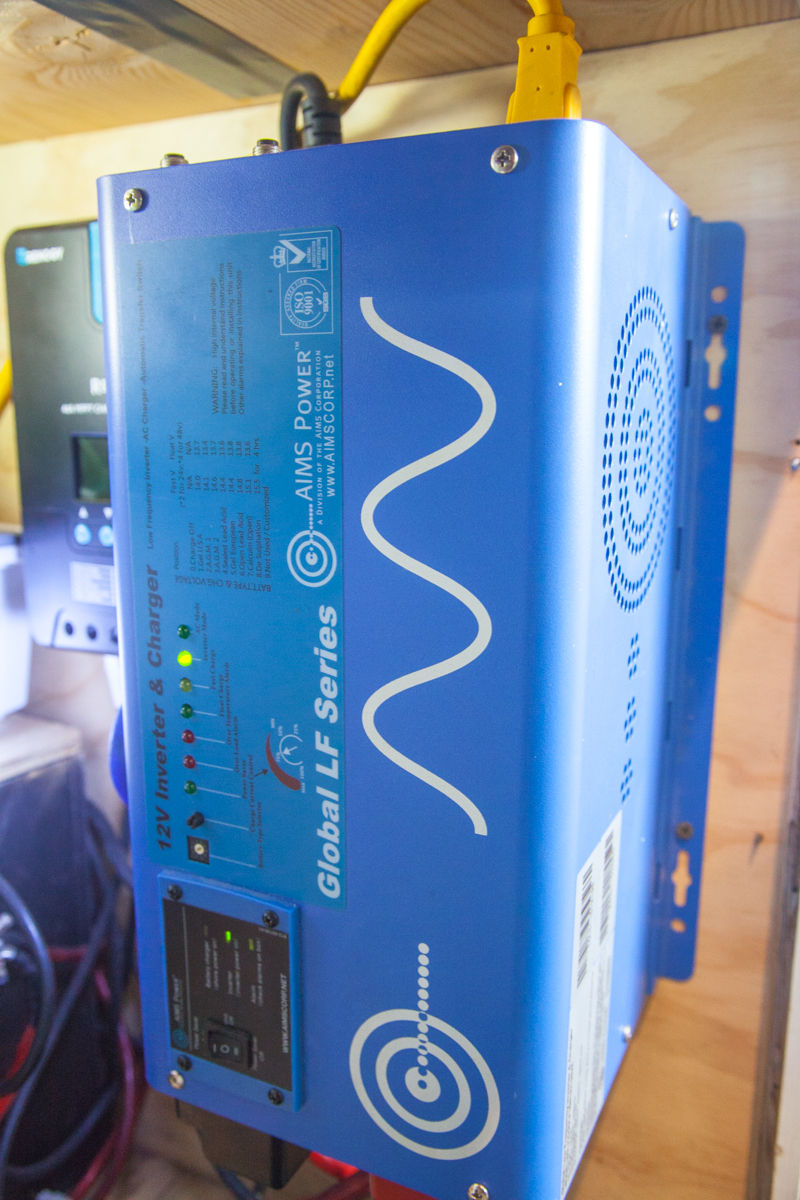
The AIMS 1500-Watt (2000 peak) Pure Sine Inverter and Charger fit the bill perfectly. The built-in battery charger not only allows us to plug in to shore power, but it also charges our batteries at the same time. The pure-sine wave that our inverter uses is also safe for charging the more sensitive electronics like lithium-ion laptop batteries.
Manual Solenoid
This inexpensive fixture is meant for use in mobile audio applications, but works perfectly for what we needed. The solenoid allows us to utilize the current from the starting batteries to supplement our house battery bank when we park in the trees or on cloudy days. At the flip of switch, our bus alternator churns out enough energy to top off our house batteries. We rarely use this feature, but for the price it is good insurance. Plus, in a pinch, you could jump start you starting batteries from your house batteries if needed.
Miscellaneous Fixtures
On the graphic above there are a few fixtures that make the system work that are mostly replaceable with most other brands and the only thing you should ensure is that your breakers, bus bars, and other electrical components are rated for the amount of current you are sending through them. Below is a list of the components that we used and we have had good luck with them. There are obviously always better components, but these fit our budget and system needs well.
Blue Sea Systems 187 Circuit Breaker
Safety Considerations
Always disconnect your batteries and/or cover your solar panels before doing any work on your system. Electrical fires are a real possibility when working with these systems and you should have your setup inspected by an electrician before going live. After inspected, remember to keep a fire extinguisher handy. When living in a van, Skoolie or truck you never really know what could happen. Be prepared.
As we always strive for transparency when displaying aspects of our nomadic lifestyle you should know that all of the links included in this article are affiliate links through Amazon.com. For every purchase that you make from one of these links, we receive a small amount and you don’t pay any extra. These links are one way that stay on the road longer, so thank you for your support of our adventures!


Great info Zach!
I’m in the process of negotiating a deal on a shorty that I’d like to do or have a similar conversion that you’ve done.
I’m going to have to unfortunately hire out labor as I’m in a wheelchair & some things are beyond my physical capabilities. (Installing solar on roof!).
Not sure if you’ve upgraded or changed anything in your electrical system since the above was posted? Thinking ahead on what your future elec. needs would/could be was good planning. That is exactly what I’d like to do, as it’s always easier and more cost effective to over engineer a system installation than have to go back later and remove old under rated and/or add higher grade components when it all could have happened during the initial build.
We have really enjoyed our system so far and have logged almost a year of travel with it working really well for our needs. The only thing that we would add is another set of batteries. We could go a couple of days with clouds, but want to stretch that out to 4-5 days of electric storage and will be adding a pair of batteries this summer. We bought our charge controller and inverter to be able to grow our system if we needed to. We can add more panels and more batteries with ease on this setup!