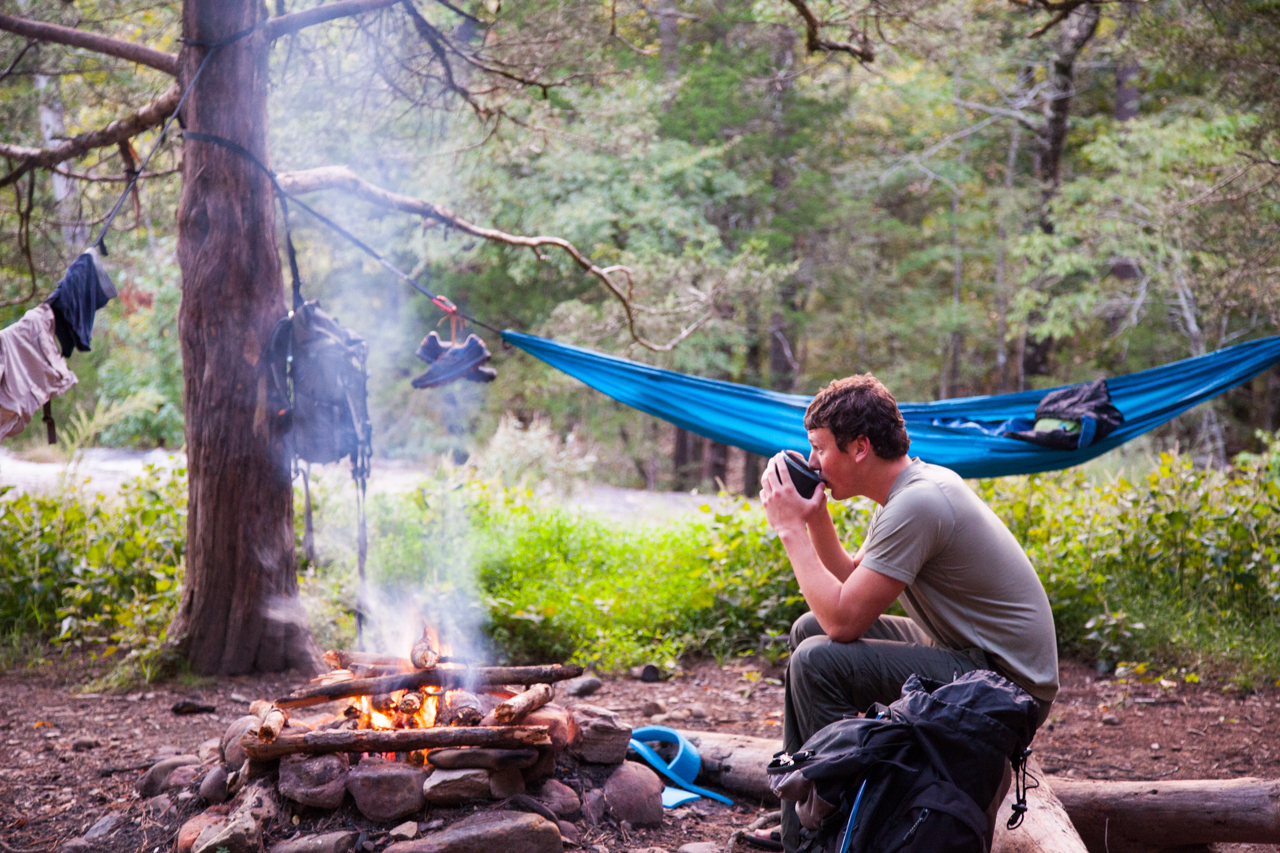
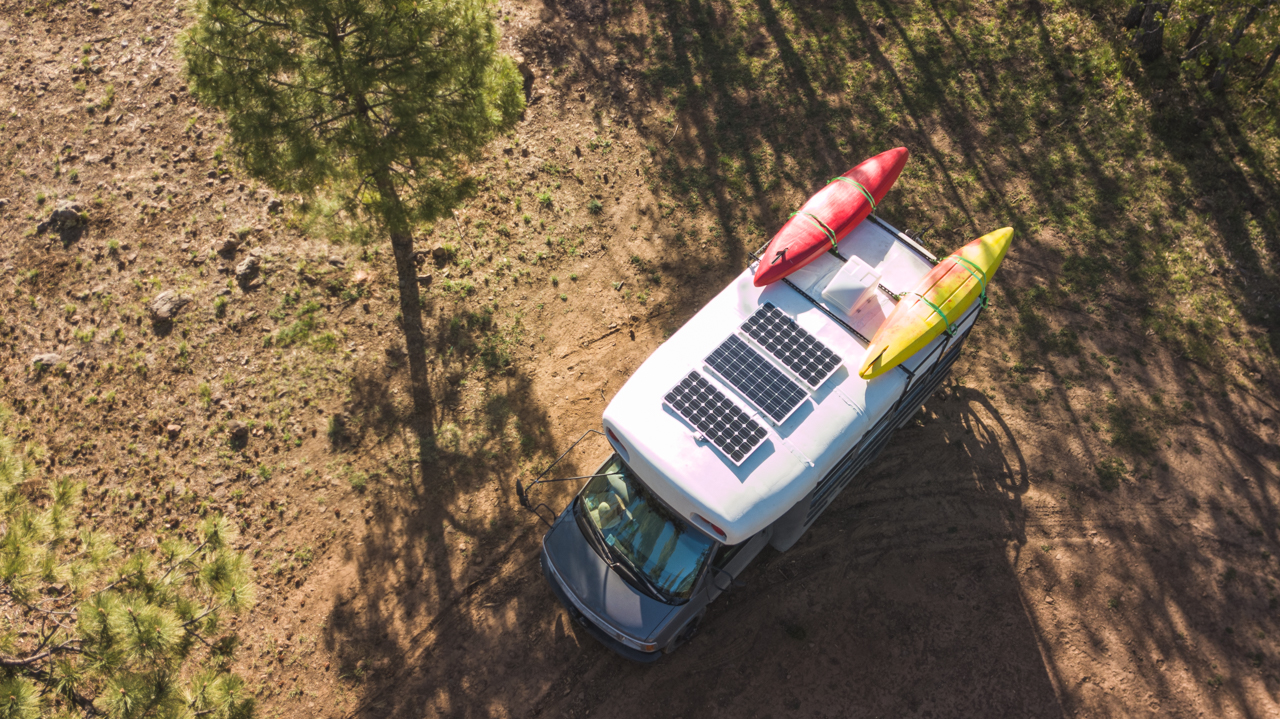
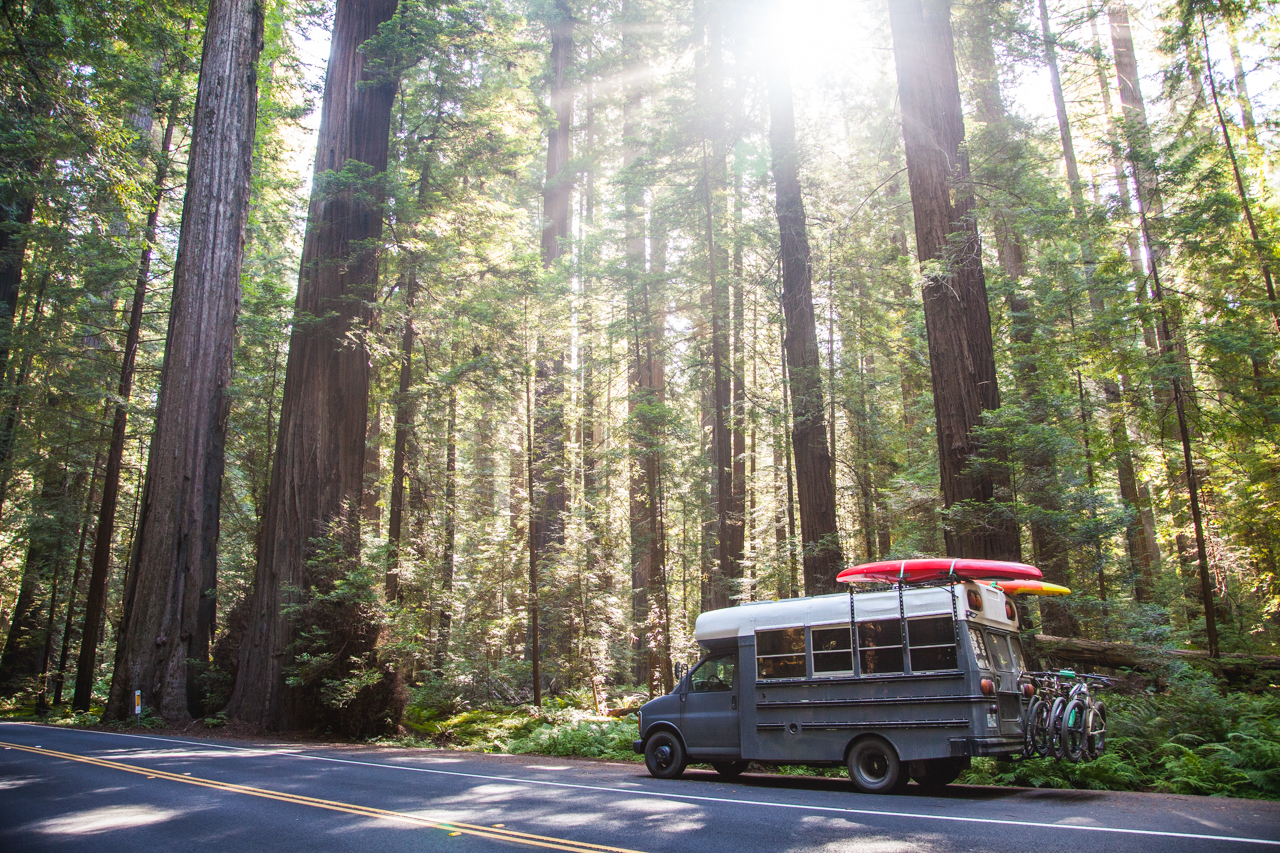
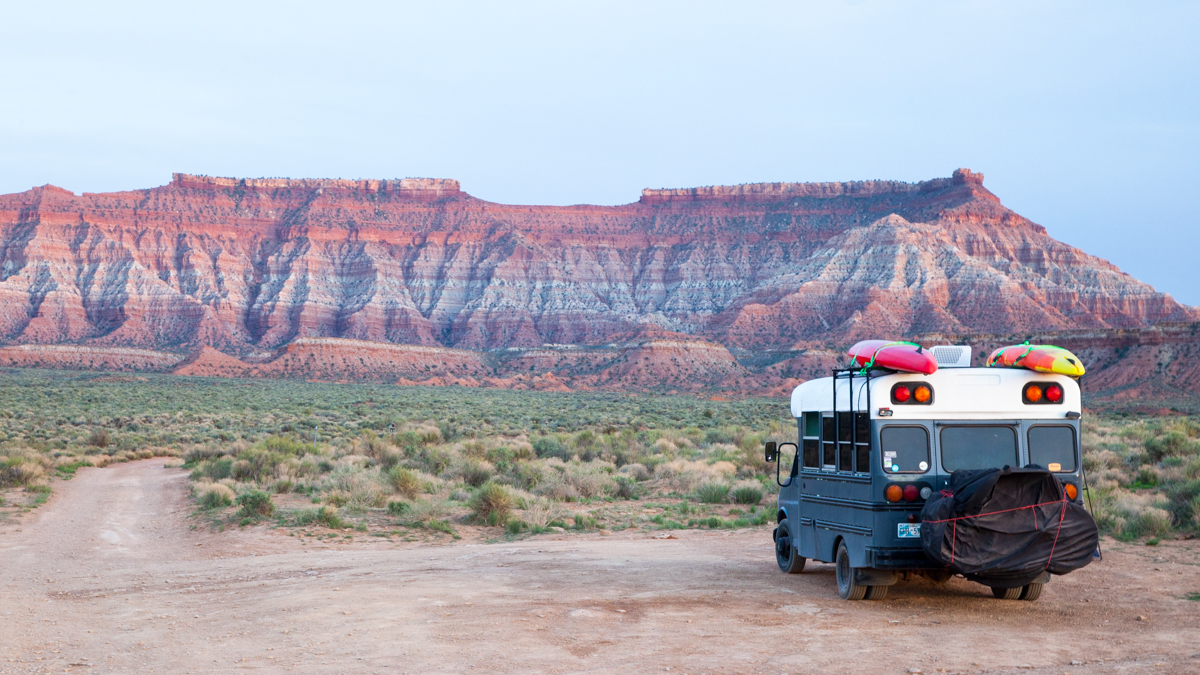
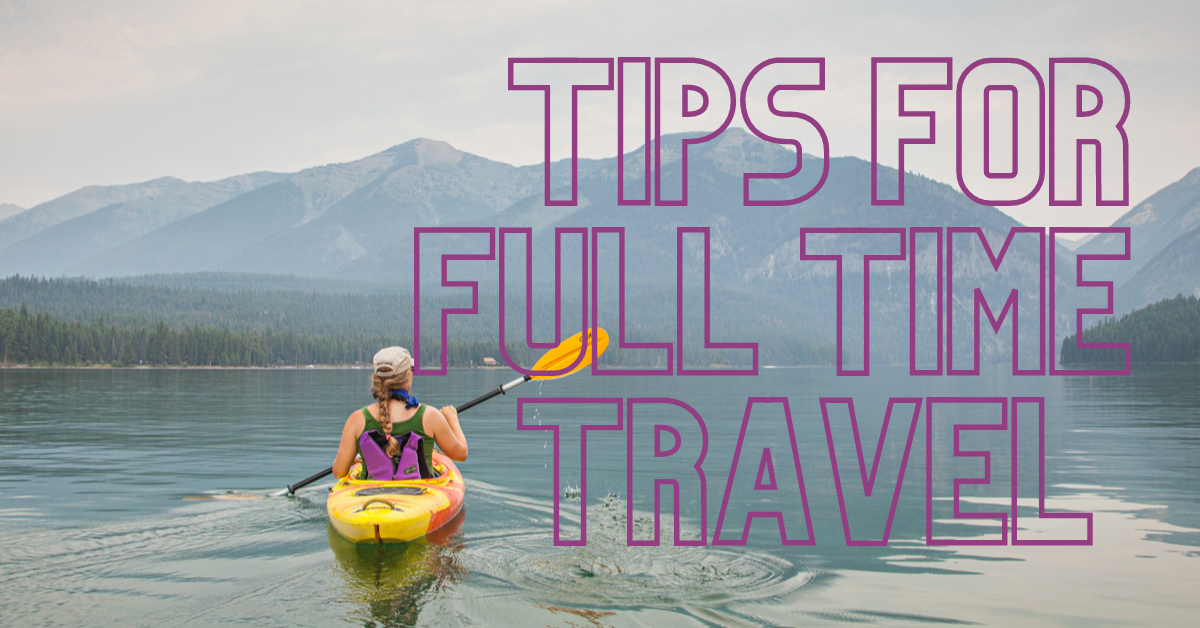
I can’t say when it happened, but somewhere between meeting my now-wife Rachael and when we got married, we decided that full-time travel was right for us. I can’t say what started the conversation or what the final deciding factor was for us to quit our jobs and travel full time. I can, with a fair amount of confidence, give advice about leaving your stable life and embarking on a life of full-time travel. Here are five tips that everyone should see before hitting the road.
Okienomad’s Holiday Gift Guide for the Vanner in Your Life
This is a guide for those that have a van-lifer in their family or friends that are building or hope to build a van, skoolie, or overland vehicle. We own most of these products and can attest to their usefulness in a mobile lifestyle.
This is not a guide of things that we want for Christmas! We already have a ton of stuff and we have whittled down what we own to fit into our little bus and everything works really well.

Sea to Summit X-Pot
This thing is so useful that we have replaced our standard kitchen pot with the 2L size. The silicon sides make handling the X-pot a dream and the vented lid lets moisture escape the pot and also works as a handy strainer for pasta dishes. The best feature in our opinion is that the X-pot collapses to about 2 inches thick which makes it a storage dream. We have been using the X-pot for two years almost daily and it is still crushing it!

Viair 88P Air Compressor
Every vehicle needs a portable air compressor to keep in the trunk for low tires. We have used our portable air compressor more times than we can count. From airing down in Baja to topping off our bus tires after sitting for a while, the 88p does everything we ask it to. With the purchase of an adaptor we have even been able to air up our stand up paddle boards with the 88P. If you run bigger tires, VIAIR makes many different models and we wouldn’t hesitate to throw money at anything with the VIAIR name on it.

Blue Sea Systems 12V USB Outlet
One of our favorite additions that we made to our skoolie was a couple of 12V charger ports on each end of the bus to charge our phones, camera batteries, GPS, and anything else that uses USB to charge. We originally cheeped out and bought Chinese knock-offs and that was a bad idea because one has already died after being in use for a very short time and it was replaced with the Blue Sea unit. Blue Sea Systems sells a fast charge version of their USB outlet that will crank out enough juice to charge your iPad or cell phone in no time.

Helinox Chair One XL
Had you told us two years ago that we would be using $100 lawn chairs, we both would have laughed in your face. What we have learned is the saying “Buy once, cry once” is a real thing and definitely applies to camp chairs. Our hand-me-down fold out camp chairs from Wal-Mart were beginning to succumb to the hundreds of uses in creeks and sandy beaches as well as bouncing around in the rear of the bus and truck for some 50,000 miles of travel. Once one chair became too derelict to use, we chucked it and put the other in deep storage as there was a new chair in town: the Helinox. The stored size is perfect for any number of cubby holes and the chairs are truly top notch quality. We expect to use these chairs for a long time!
Rand McNally Road Atlas

Rand McNally Paper Map
There are times that we feel like old-folks…when we go to bed at 6PM and read until we fall asleep with a book on our faces and when we use paper maps to navigate. Our jobs take us around some of the most hi-tech navigation setups in the overlanding world and we still rely on a cell-phone with offline maps and a paper atlas. There is something soothing and adventurous about following your navigator’s finger on a map instead of a dot on a screen.
Just a head’s up: this page contains affiliate links. If you use one of the links scattered throughout this page, a portion of your purchase price will help fund our adventures (at no cost to you). Thanks for reading and shopping with our links!
A Case for Traveling with a Paper Map
If you were as fortunate as we were growing up you had the opportunity to go on a few road trips before the cell phone was invented. I remember riding in the trunk of our 90’s Chevy Astro Van on a trip to South Dakota and the navigator was armed with three tools at their disposal: a bag phone that was astronomically expensive to make voice calls on, an AM/FM radio that played cassette tapes, and a paper road atlas. Consumer GPS and Google Maps were still at least a decade away and the only way to get from point A to point B was to follow the map.

To this day, we still travel with a paper map for a few reasons. First, technology is fickle. Although phones, tablets and computers have come a long way since they became commonplace in most every American home, there are still times where batteries die, maps don’t load, and phone GPS beacons simply don’t work. Once while exploring the four corners region of the Southwest US, our phone started giving us wonky directions. More than wonky, it was telling us to go South when our destination was clearly North. We opened the Apple Compass app and sure enough, the compass was pointing the opposite magnetic direction that we were traveling.
We use paper maps when we are backpacking, bike touring, or exploring in our kayaks too! Follow the link below to find out how we download and print National Geographic Topographic Maps:
Download FREE Nat Geo Topo Maps
A second reason that we prefer traveling with a paper map is the value that we place on the big picture. By looking at an entire state you have options- when you work remotely and you don’t always plan where you will be at the end of the day, it’s nice to have a big picture view of where you are off to next.

The third and most important reason that we keep paper maps in our bus is the tangible feel associated with a paper map. Similar to a good soft cover book or journalling on high-quality paper, holding a map in your hands is warm, simple, and relaxing. Technology is cold and brings along all of the other distractions of email and application notifications that are normally the reason why we are navigating out to the wild in the first place. A paper map is honest and true (if it’s current) and it doesn’t present you with the fastest route or a way to avoid traffic, it takes you where you want to go with as much true adventure as a piece of paper can generate, and that’s very valuable to us.
One of the best gifts we received from our wedding was a Rand McNally print atlas that we still travel with today. We plan with it, we real-time navigate with it, and we will only give it up when it is too torn up to use.
Just a head’s up: this page contains affiliate links. If you use one of the links scattered throughout this page, a portion of your purchase price will help fund our adventures (at no cost to you). Thanks for reading and shopping with our links!
FREE National Geographic Quadrangle Maps
If you are like us, you spend a fair bit of time in the woods and often times a good map of the area that you are exploring is hard to find. We use GPS often, but sometimes we enjoy route planning on a good, ole fashioned paper map. A good practice that we have started its when taking off into the woods is to keep a paper copy of our map stuffed in a ziplock baggy somewhere on our person in case of GPS failure, dead batteries, etc. One of our favorite maps is the National Geographic Quad and now you can download them for FREE!

The Nat Geo 7.5 minute quad is a highly detailed topographic map style that was created and used by the United State Geological Survey for decades. These maps are available for anywhere in the continental US and did we mention they are FREE. Keep in mind that the USGS hasn’t updated these maps in a few years, so some landscapes may have changes a bit, but how much can a landscape really change?
How to Download Free Nat Geo Quad PDF’s
To download, navigate over to the National Geographic PDF Quads Page.
Enter an e-mail address to sign up, nothing is FREE anymore! You can always unsubscribe when they start sending you e-mails.
Find the area you want to explore on the map or search for a particular area.


Click a red box to open a new window which will contain an overview map of the 4 quads that your selected red box borders as well as the 4 individual quads themselves.

That’s it! A super easy and extremely helpful tool for route planning and backcountry exploration. We are already planning out some backcountry routes for 2019 and you should too!
If you found this article helpful and informative, please let us know by subscribing to our e-mail newsletter, following us on Facebook and Instagram and subscribing to our YouTube channel.
1st Generation 4Runner Suspension Replacement│Old Man Emu Dakar (MED)│Bilstein 4600
The suspension on our ’86 was tired, rusted, and inappropriate for the type of travel that we enjoy. The previous setup was an old heavy leaf pack, a 4-inch lift block, and really worn out shocks. The shocks were so rusted that you couldn’t tell if they were Old Man Emu’s or Monroe AutoZone specials. The leafs were flat and miserable to drive. We are planning to have quite a bit of weight in the rear cargo area of the 4Runner, the new springs should really make a difference with a full load.
The simplicity of these old trucks makes for a really easy suspension replacement. The front torsion bars are still in good shape and have already been cranked to compensate for the rear lift. The lift height on the rear should end up really similar to the previous height only the new setup will be much more comfortable and will work much better off-road.
I got to work pulling the front shocks and getting the new Bilstein 4600’s swapped in. This process was very straight forward and went off without a hitch. Remove the bottom shock mounting bolt and the top bolt and the shock slides right out. I am confident that you could still pull the shocks from the front of this truck with the wheels on the ground.
The new shocks are in up front and the temporary wheels are thrown on for the time being. Once we get a chance, we will switch all of the 31″ tires to the black wheels. Until then, they will be mismatched.
A little word on the shocks that we chose for this build. I have run Bilstein shocks on all of my previous builds for good reason. They are well made shocks with impressive support. The shocks offer a slightly stiffer ride over stock with much better rebound over rough terrain and they have a lifetime warranty.
The rears were a little bit more involved, since we are replacing the rear leaf springs and shocks. It is still overly simple, but the bolts are a little rusted and the suspension has been extremely mistreated. We soaked the bolts for a few days leading up in penetrating oil to try and loosen them up. I suggest having access to an impact or at least a breaker bar.
I don’t know what the previous owner had in mind with the yellow brake drums, but they had to go quickly. I used flat black paint to protect most everything under the wheel wells from further rust and deterioration. Getting the old shocks off was a breeze and removing the springs from the rear shackles was painful. Literally, blood was drawn while trying to get the springs out of the seized bushings. A big hammer and some patience and the rear suspension was in pieces.
The shackles were almost impossible to get off without dropping the rear tire. I went to drop the tire and found the bumper installed by the previous owner hindering my access to the spare.
We got to work pulling the bumper and setting it aside for our swing-out bumper project. Once the bumper was out of the way, the spare came down with ease, hopefully to never be hung in that spot again.
The new suspension went in without much issue and looks so much better already. The spring angle is 100% better and the 4600 shocks are perfect for the mild OME lift with one small issue. The OME lift is advertised as a 2″ lift. It is more like a 3-4″ lift and as of right now (empty truck, no topper) the shocks are the limiting factor on the rear. This is not ideal and we are going to keep an eye on this moving forward.
There is a reason that when you speak to Toyota gear heads that they all recommend Old Man Emu/ARB for suspension components on these rigs. They are proven, reliable, and tough. Short of installing a custom spring combination, this setup is hard to beat. We will see how these springs hold up on the road, washboard forest service tracks, and off-road trails.
New shocks all around and new springs in the rear make for a really good ride height and hopefully a really solid setup to build on. The beauty of this setup is that if the rear proves to be lacking, it’s easy to add an Add A Leaf (AAL) to the rear pack. We will report back with real-life results from our time on the road and update our impressions of this setup once we have had a chance to use it a bit.
One way to stay up to date with our adventures is to follow us on social media. We share photos, videos, and travel updates about where we are going and what we are doing.
Follow us on Facebook
Follow us on Instagram
Follow us on YouTube
As we always strive for transparency when displaying aspects of our nomadic lifestyle you should know that all of the links included in this article are affiliate links through Amazon.com. For every purchase that you make from one of these links, we receive a small amount and you don’t pay any extra. These links are one way that stay on the road longer, so thank you for your support of our adventures!
Over Prepared and Underprepared: How Both Can Keep You From Exploring
By: Ethan Hayman
Whether you choose to explore the world around you by motor vehicle, bicycle, or by foot there is a fine line between wandering dangerously into the unknown with no preparation, being safely prepared for the adventure ahead, and being paralyzed by the insecurity of not having every piece of equipment you can imagine. If your goal is to explore the world and to be able to do so for a long time there are certain items and skills that will be necessities and others that can simply keep you from exploring at all. The most important question to ask is, do you want to sit around and wait for the stars to align, or do you want to plunge head first into the unknown and seize every opportunity for adventure?
The first multi day backpacking trip I ever did definitely fell on the less prepared end of the spectrum. Three of my best friends and I had planned out a five day fifty mile plus trek through the Mark Twain National Forest in Missouri. Combined, we had very little experience and almost no proper gear suited to the task at hand. Those of us with some cash to spend invested in various items of the outdoors persuasion, and do we ever look back and laugh at those choices. Some items were solid selections. I purchased a pair of Vasque hiking boots which have now been worn for four years, gone hundreds of miles, summited peaks in Colorado, traversed the Grand Canyon, and waded through the Buffalo National River. I also bought a Fiskars chopping axe which weighed over five pounds and was proudly strapped to the outside of my pack to be carried fifty miles and was necessary approximately zero times. One friend opted to spend no money and wore old sneakers, military fatigues (in navy digital camouflage), and borrowed an ancient external frame backpack.

To keep a long story short, we got absolutely destroyed within two days of being on the trail. Five inches of rain fell the morning we were supposed to set off, turning our path into a tiny flowing river and making every step treacherous. The forecast also changed drastically from when we packed up and when we arrived leaving us expecting mild weather. Instead we woke up to snow falling the second morning. It was at this point that our spirits were broken and we decided to detour to a nearby state park and call for a very expensive shuttle ride back to our vehicle. Many experienced backpackers have told us we were foolish for going out with the equipment and lack of experience we had. We certainly felt foolish and were lucky that no serious injuries occured, communications were maintained, and there were options to bail out. To add to the point here, two of us attempted a return trip at the opposite time of the year with a different group and experienced one hundred degree temperatures and drought causing the expedition to throw in the towel at the exact same location as on the first attempt. All that being said, I am so thankful that I experienced both of those trips and would absolutely not trade the memories for anything. We learned a great deal about ourselves, our equipment, and our passion the hard way. And sometimes that’s the best way.

Since these experiences, many more lessons have been learned and many thousands of miles have been successfully traversed by foot, car, and bicycle. As I gain more experience and begin to slowly accumulate better, more useful equipment I find that sometimes I am held back by this desire to have all the right gear before setting off on the next adventure. Some of the hesitation is warranted, lack of potable water on our second trip to the MTNF could have been a fatal mistake, but I will probably be ok on every trip without a solar panel, 50” LED light bar or even steel bumpers on my expedition rig. While all of these can make certain situations easier, safer or simply more convenient the lack of them should never keep you from exploring the world around you.
As long as you have the basics covered, water/food, communications, first aid, navigation, and shelter I say go out and find something amazing in the world around you. Waiting until you have every tool and gadget will keep you from ever seeing the world and being totally unprepared could end your grand adventure we call life, but with minimal expense, basic gear and careful planning you should be all set to get out there and safely venture into the unknown.
Today’s post was written by Ethan Hayman. Ethan is a hiker, wood-worker, and general outdoorsman. Ethan’s adventures take him all over the South Central United States including Oklahoma, Arkansas, Missouri, New Mexico, and Arizona. Follow him on Facebook to keep up with his shenanagins
If you would like to contribute to the blog, submit your short stories or articles to okienomads@gmail.com. As always, check out our social media accounts on Facebook, Instagram, and YouTube.
#Vanlife Solar System: 300 Watts Solar, MPPT Controller, and Pure Sine Inverter
Know What You Need and How You Will Use It
The house electrical system of any conversion or RV is a pretty daunting and scary adventure for a first timer. To get the right system, a user has to know their current needs for electricity and how those needs will change when they are on the road. The best way to figure out how much electricity generation and storage a particular system will need to generate is to invest in a small device called a Kill-a-Watt. This device plugs into a standard 110V home outlet and has a female plug for the appliance that you seek to understand.
By keeping a spreadsheet of all of the appliances that you wish to use on the road, the amount of time you plan to use them and their perspective amps drawn, you can get an idea of how much storage (battery) and generation (solar or generator) you will need.
Our needs were simple and below is a table of the regular appliances that we use with our system:
Appliance | Amps |
Whynter 62 Qt Refrigerator | 4.5*.25 hours * 20 hours=22.5A |
Fantastic Fan | 2*8 hours= 16A |
Sureflo Water Pump | <1A |
LED Puck Lights | <1A |
Macbook Air | 4.3A*2 hours= 8.6A |
Cell/Cam Batteries | 1A*2 hours= 2A |
Total | ~51.1 A |
A second consideration when designing an electrical system is knowing how you are going to utilize the system. For example, if you planned to spend the entire Fall in the Pacific Northwest as a camp host in a campground, you wouldn’t want to rely on a solar system that needs 4-8 hours of direct sun per day. Likewise, if you plan to park in Quartzite, AZ for the Winter, it would be silly to not take advantage of all of the direct sunlight.
We landed somewhere in the middle and knew there would be days that we would be tucked back in the woods and weeks at a time would be spent in the desert. We needed the ability to store some juice for the day or so that we wouldn’t have sunshine, but also be able to use the vehicle alternator to charge the house batteries in a pinch if needed.
Okienomads Solar Electrical System
Below is a diagram of our electric system. All components are listed below with links to where we purchased them. If you have any questions about why we chose a particular part over another, e-mail us at okienomads@gmail.com and we will answer in the best way we can.
We wanted as many options for power generation as possible in case our situation changed or if we needed to hunker down somewhere for the winter and wanted to add a generator to the system or utilize shore power (power sources are shaded in yellow). If we needed to add a generator, all we have to do is plug into the shore plug on the side of the bus.
Solar Panels
We were extremely green to solar systems (see what I did there?) when we started and opted to purchase a kit from Renogy Solar as opposed to piecing our system together and potentially missing something or purchasing incongruent parts. This kit included (3) 100-watt panels, a 40A charge controller, and most of the wiring needed to hook up the panels to the controller. We wired our solar panels in a series (see diagram above) to be able to pull solar even if the panels weren’t seeing a full 12 volts. This also allowed us the ability to run longer cable at smaller sizes than if we wired in parallel. Renogy Solar has an excellent page describing the different setups available.
Charge Controller
We opted for the Renogy Rover 40A MPPT controller for the option of wiring our panels in series and harvesting solar all day instead of waiting on 12 volts to hit the panels.
A smaller PMW charge controller would have worked for our needs, but would have limited the amount of solar we can grab and the options for expanding our system later if our bus turns into a more stationary fixture (think tiny cabin).
We searched for a cheap and easily expandable battery for our bank and landed on the Duracell GC-2, 6-volt golf cart battery wired in a series to create a 12v battery with 200 amp hours. These batteries are flooded, lead acid batteries that require checking the water levels from time to time. Although AGM gel batteries, common in cars and trucks, are sealed and require less maintenance, they are not made to be discharged heavily over and over like the golf-cart batteries.
Inverter Charger
Like with the rest of our system, we wanted to select an inverter that would grow with our needs. As of right now, the only appliances that we are running is a MacBook Air and the occasional food processor (in direct sunlight). We wanted to have an inverter that would be sufficient if we needed to run a couple of appliances down the road as we transition the bus to a tiny house and less of an adventure mobile.
The AIMS 1500-Watt (2000 peak) Pure Sine Inverter and Charger fit the bill perfectly. The built-in battery charger not only allows us to plug in to shore power, but it also charges our batteries at the same time. The pure-sine wave that our inverter uses is also safe for charging the more sensitive electronics like lithium-ion laptop batteries.
Manual Solenoid
This inexpensive fixture is meant for use in mobile audio applications, but works perfectly for what we needed. The solenoid allows us to utilize the current from the starting batteries to supplement our house battery bank when we park in the trees or on cloudy days. At the flip of switch, our bus alternator churns out enough energy to top off our house batteries. We rarely use this feature, but for the price it is good insurance. Plus, in a pinch, you could jump start you starting batteries from your house batteries if needed.
Miscellaneous Fixtures
On the graphic above there are a few fixtures that make the system work that are mostly replaceable with most other brands and the only thing you should ensure is that your breakers, bus bars, and other electrical components are rated for the amount of current you are sending through them. Below is a list of the components that we used and we have had good luck with them. There are obviously always better components, but these fit our budget and system needs well.
Blue Sea Systems 187 Circuit Breaker
Safety Considerations
Always disconnect your batteries and/or cover your solar panels before doing any work on your system. Electrical fires are a real possibility when working with these systems and you should have your setup inspected by an electrician before going live. After inspected, remember to keep a fire extinguisher handy. When living in a van, Skoolie or truck you never really know what could happen. Be prepared.
As we always strive for transparency when displaying aspects of our nomadic lifestyle you should know that all of the links included in this article are affiliate links through Amazon.com. For every purchase that you make from one of these links, we receive a small amount and you don’t pay any extra. These links are one way that stay on the road longer, so thank you for your support of our adventures!
Vanlife Gear That We Can’t Live Without: Essentials for Living on the Road
When we purchased our bus and began to build it into a tiny home on wheels we were overwhelmed with the options of accessories and parts that were available and being shoved down our throats every time we opened Instagram. We sifted through the BS and did our own research and have built a bus that fits our needs very well. Below are the gadgets and modifications that we added to our bus that have genuinely enhanced our experience traveling the country in our skoolie.
Advanced Elements Solar Shower
There were a few items that we bought in the beginning of our build that I thought would get stuffed into a cubby in the back of the bus and reappear when we cleaned it out months later. The solar shower was one of those items. It seemed to good to be true that one could harness the sun into a warm shower after a mountain bike ride. Boy was I wrong!
The Advanced Elements Solar Shower has been used and abused during our travels and is still holding up great! The bag is tough, puncture resistant, and holds 5 gallons of water. We have found that we can both take a shower and still have water left over after we are done. The built in mirror is a little cheezy and the nozzle is a little hard to operate if you have soap on your hands, but for the price it is EXCELLENT! Couple this product with a cheap pop-up shelter, INSTANT PRIVATE SHOWER!
Fan-Tastic 1250 Vent Fan
Our first addition and maybe the most practical for traveling in the summer time has been our Fantastic Fan. We have the 1250 model which is the most basic and uncomplicated model that Fan-Tastic Vent makes. It has 3 speeds, ranging from “Is this thing even on” to “blow your cheeks off of your teeth”. We use our fan almost every night while sleeping as the gentle hum tends to drown out passing cars when urban camping and it blocks out most rowdy street-youths when we are on public land with others.
A cool feature of the Fan-Tastic Fan is the reverse mode which allows you to run the fan in “exhaust” mode and hypothetically you could suck out all of the smoke from when you over cooked the bacon.
One thing to consider when purchasing a roof vent fan is to purchase a cover/shield for the lid so that you can operate the fan in the rain as well. It also adds an element of protection to your fan lid in case of a stray limb or a stumbling significant other while on the rooftop deck. We installed our Fan-Tastic Vent Ultra Breeze Vent Cover after we had a slight leak due to installer error. You can see that whole story here where I installed a vent cover in the middle of the Moab, UT desert with great success:
AIMS Power 1500 Watt Pure Sine Inverter/Charger
The backbone of our entire electrical system is our pure-sine inverter. We use the inverter to charge our cameras and laptops as well as operate some of our more “luxurious” items like a food processor and our super trendy rope lights. We have found that 1500 watts has been more than enough and we bought this big of a unit to grow into it in case we wanted to add some extra power hungry appliances later. The pure-sine wave protects our computers and cameras and was well worth the investment over the modified wave.
A really cool feature of this particular inverter is the 50-amp battery charger and transfer switch that allows you to charge your house batteries and run a “shore” line if you ever need to plug in for any reason. We have only used these extra features a few times during our travels, but we suspect that when we settle in for the winter, we will utilize the shore line quite a bit.
Is it a lot of money? Yes. Is it worth it to protect your electronics and batteries of your rig? Also yes!
Clenna Dual USB Charging Port
Talk about a game changer! The Clenna USB Charging Port was a fantastic addition to how we charge our devices. We added one outlet to the driver’s area of the bus and have been blown away by how much we use it. We have yet to permanently install it as I haven’t found the perfect place for it, but I will update photos when I get it secured to the dash. This port would be perfect for those that run a full-time GPS or phone on the dash for navigation.
The wiring is a simple 2-wire hot and cold setup that we ran back to our AUX fuse box and grounded to the dash area. The outlet has a rubber plug that fits into the USB ports perfectly and blocks the light from the outlets as well. The USB ports emit a blue light that can be extremely bright, so I would suggest wiring a switch to your port so that you can turn it off and on. Ours is installed in the dash, so the light simply shines behind our curtains and hopefully eludes to would-be criminals that we have a stellar alarm system installed.
Whynter 65 Quart Refridgerator
Finally, the best enhancement that we have made to our skoolie has been the addition of our Whynter 65-quart refrigerator. The FM-65G 12 volt compressor refrigerator has been a god-send while traveling through the remote public lands of Southern Utah and Central Washington where temps can be quite high and ice can be very scarce. Our Whynter can hold enough food for Rachael and I for around seven days and even more if we ate less fresh fruit and vegetables.
The Whynter FM-65G is extremely efficient, only drawing 3-5 amps while connected to 12V. This draw is only present when the compressor is on and I was pleasantly surprised by how quiet the compressor is and when comparing it to $1000+ units from ARB, I find that this unit is only slightly louder.
The fit and finish of the 65G is exceptional and the latches/seal work perfectly for when we buy just a little too much food and need to cram it in there. We have used the handles to secure the fridge to the cabinet below it and have been really happy with it not moving around. The black feet on the bottom are very sturdy and almost suction cup to the cabinet. The fridge can also operate at up to a 30 degree angle, much steeper than anything our bus has seen or will see.
As we always strive for transparency when displaying aspects of our nomadic lifestyle you should know that all of the links included in this article are affiliate links through Amazon.com. For every purchase that you make from one of these links, we receive a small amount and you don’t pay any extra. These links are one way that stay on the road longer, so thank you for your support of our adventures!
Skoolie Overland Travel Part 1: Why a Skoolie-Conversion Makes a Bad Travel Rig
I need to clear this up before we get to the good stuff: My wife and I live in a school bus conversion, by choice. We love the freedom and simplicity that comes from a life with 78 square-feet of living space and having the whole world as our playground. That being said, there are aspects of skooliedom that we did not expect. We met several travelers on the road that shared some of these sentiments about their school buses too, so we knew we were not alone. There is a companion article to this one about why skoolies are great for travel, in case this one drags you down too much.
Check it out here: Skoolie Overland Travel Part 2: Why a Skoolie-Conversion Makes a Great Travel Rig
First, Skoolies are BIG! Even if you purchase the smallest modern school bus (which we did) it is still 20-22 feet long, 8 feet wide, and over 9 feet tall. After we gutted the interior, built out a home inside, and filled up our water and fuel tanks, our bus weighs just under 10,000 pounds! The size of these metal behemoths makes them difficult to navigate down narrow 4-wheel-drive trails and some forest service roads. The height and width can also make traveling through some tunnels equally as difficult. The tunnel entering Zion National Park from the East was going to charge us $20 to pass through their tunnel, luckily, we had time to spare and drove around the southern end of the park to enjoy Pink Sand Dunes State Park instead.
Imagine wanting to take that iconic Instagram shot on the beach with your skoolie looking all accomplished on the sand? Think again. Unless you have 4-wheel-drive (pretty rare), reliable recovery gear, and some know-how, you are going to get stuck. Expect to need a fairly large truck or tractor to pull your 10,000+ pound butt out of the sand.
Some skoolies can reach Class-A RV size and at that point, forget about leaving the pavement, passing through most tunnels, and parking in any parking lot other than a Wal-Mart.
Skoolies are SLOW!
While we are on the topic of driving slowly, expect to drive slowly…very slowly. Unless you commit significant amounts of money to increase your busses horsepower and torque, your bus will probably be underpowered. Expect to travel at speeds much slower than traffic around you and commit a lot of time to making the extremely coveted left turn or to pass a Volkswagen van travelling slower than even you are traveling.
If you read Part 2 of this post, you will see that this point also shows up as a positive of traveling via school bus conversion. Hop on over to that article to find out why.
Skoolies are built to haul kids around cities, not haul your stuff through mountain trails.
Think back to when you were a child and you rode the bus to school, if you were one of those important kids whose mothers coddled you, just imagine with me. You are engaged in conversation or a game of M.A.S.H (don’t lie, you know you did) and all of a sudden you hear a noise and a split second later you are catapulted several feet in the air and you are quickly joined by everyone else on the bus, except the driver, she has a seatbelt.
I can remember riding the bus back from high school basketball games as a student and after exhausting myself on the court, seeking refuge in the plush pleather seats of the school bus and drifting into a restful nap just in time for the bus to catch a small pothole and lift me several inches in the air and drop my face back on the seat with exceptional force. Riding in the passenger area of a school bus is not pleasant.
Now imagine that most of your belongings, your computer and camera, maybe even your dog is somewhere in the rear of your Skoolie conversion and you are driving through San Diego on your way to the Sierras. You hit an unavoidable pothole and now your belongings, passengers, and tastefully hand-crafted cabinet doors are at the mercy of your top-heavy, overweight school bus.
Some modern-day school buses now come equipped with air-ride suspension, air brakes, and sometimes even seatbelts for children. Ours, however, didn’t even come with a rear sway bar. Therefore, we roll over obstacles with the front wheel fine and feel the wrath of the rear axle as the bus topples side to side. Cornering with no rear sway bar is interesting as well as the risk of roll-over is greatly increased. We solve these problems by traveling very slowly, even through traffic. Yes, we could add a sway bar, and probably will. But, the added cost associated with making a Skoolie road-worthy pushes the budget too far. With a couple more thousand-dollar upgrades, we could have afforded a full-size truck with a slide-in camper and been able to travel much farther and as comfortably as we could in a Skoolie, for the same price.
If there isn’t a secure home for every item in your bus, it becomes a projectile.
This is more of a common issue with living in a vehicle in general, but when we first laid out our plans for the interior of the bus we never knew that we would need and want so many cubbies, shelves, drawers, and hiding places for the miscellaneous junk that finds its way onto the bed every couple of days.
Who knew that sitting 4 or 5 Nalgenes under the kitchen table and driving down a twisting mountain road would cause a ruckus like you have never heard as the bottle tip, tumble, and fly around the cozy passenger compartment?
Since moving into our bus full-time we have added shelves, baskets, nets, and a bunch of other containment solutions to keep our at-hand items from hitting us in the head on the freeway. When you see the #vanlifer on the grams with pictures hanging on the wall and glass mason jars on the counter with fresh flowers in them, understand that the scene before you is carefully crafted and in the event that the Skoolie in question is actually driven, those items are stowed somewhere or they are stowed everywhere.
When something breaks (and it will break), Skoolie parts are not easy to come by, especially on the road. We will use our bus as an example. Our bus is technically a 2000 Chevrolet 139 Cutaway with a 6.5L Turbo-charged diesel engine. This means we share a motor with a lot of different Chevy trucks, busses, vans, and even a few military and civilian HMMVV’s, and not much else.
So, when we need an air filter, we can just order one for the 6.5L and be done with it. Easy, peasy. However, when we need to buy a trailer hitch in Concrete, WA because ours is bending and dangling our precious bikes and new bike rack within inches of the asphalt, which vehicle model do we use? If we use the 2000 Chevy Express Van, which works with other parts, we will soon find out that the frame widths and construction were completely different between the two models and that our bus more closely resembles a full-size, heavy duty Chevy Pickup truck. The only challenge now is to find the model of Silverado with the same frame width as the bus, then order that model online, ship it general delivery to Concrete, WA, and install it in the post office parking lot with a cordless drill and hand tools.
Homework assignment: Go to your nearest parts store, tell the chap behind the counter that you need a driver’s door handle for a 2000 Chevy 139 Cutaway. Wait patiently, you will be there for a while.
Lastly, when you break down and the repair is above your skill level, finding a mechanic to work on a Skoolie is not easy. For some reason, a lot of shops that we have spoken with won’t even touch our rig because it is an 8-lug chassis and therefore bigger than they want to mess with or bigger than they are capable of messing with.
In Oakhurst, CA we needed a simple brake job done and didn’t feel comfortable replacing pads and shoes on a dirt forest service road. We contacted 6 shops and not a single one would even consider looking at our brakes. One even went as far as to tell us that the only way they would work on it is if they replaced the rotors too, at $215 a piece. We finally found a shop that had a cancellation and would fit us in, but it wasn’t cheap.
If you are still hanging on through all of that negative, I hope you have had the chances to read Part 2 of this article, Skoolie Overland Travel Part 2: Why a Skoolie-Conversion Makes a Great Travel Rig. We are really happy with our choice to hit the road in our Skoolie and we wouldn’t trade the experience for anything.
If you have enjoyed our article, please explore the blog some more as there are tons of stories, write-ups, and photos from our travels around the country. If you want a more streamlined media feed, check out our Instagram and Facebook pages, thanks for stopping by!
The Dirty Side of #vanlife: 4 Ways to Stay Fresh & Clean While Living on the Road
If your social media feeds are like mine, they are littered with #vanlifers that are sprawled out in their sprinter conversions, physically exquisite companion half naked lying next to them and they all have the same thing wrong with them: they are clean!
When we travel, we like to stay active. It helps to break up the long periods of driving or flying with as rigorous an activity as we can manage. With these rigorous activities, one develops a type of musk that tends to only be noticeable to everyone else but you. Some people have varying levels of stank when they are outdoors and others just go straight to “Level 4: Do not, under any circumstances lift your arms or open your legs” type of stank.
Fear not, we have a few solutions that we think might be helpful to you if you are approaching a dangerous level of outdoorsy musk. Most of these methods have been tested by the two of us at some point in our travels and we have first hand experience with them. Others, like the bear canister washing machine, we have not tried yet. But for the sake of science, we will probably give it a go when we have the chance.
Take a Shower- This one seems obvious, but some people really need this tip. Yes, your hippy dreads look much better when your hair hasn’t seen shampoo in weeks. But your B-O is still a problem and those of us trying to steal the same coffee shop WiFi as you, don’t want to smell you.
Our skoolie is equipped with a “bag” style solar shower much like this one:
We have used this shower all summer and it has worked really well. It’s as simple as filling the bag with water from the tap or the nearby stream and sitting the bag in the sun, black side up. That’s it! Now just wait for the water inside to reach an acceptable level of hot and voila! You have a warm shower!
BUSLIFE TIP: Shop around for a pop-up tent shelter. You can bathe in privacy, even in the middle of the Utah desert!
If you are parking in town or in an area where you can’t setup your shower, consider a gym or public pool. This summer, while passing through Omak, Washington, we stopped at their pool because an all-day pool admission with showers cost us $3/each. We got to beat the 100+ degree temps and take a proper shower!
Wash Your Clothes- This one should be a no-brainer too, but it must be said. If your clothes stink, you stink. We have utilized the small area at the foot of our bed as a his and hers laundry hamper. This way, after Rachael wears the same sports bra three days in a row, we don’t have to smell it as much as if it were just piled in the corner.
Laundromats are everywhere! Most campgrounds have laundry washing machines that are coin operated just like a laundromat. For Christmas this year, Rachael’s sister gave us a mason jar full of quarters for potential laundry stops. Rebecca, we are eternally grateful. On days that the temperature is unbearable or we need to catch up on blog posts or computer work, we will start some laundry and enjoy AC and WiFi.
Laundromat/Coffee Shop in Jasper, AB
Clean Your Rig- Each week there are areas that need to be cleaned and picked up just like living in a brick and mortar home. Tasks like keeping the food organized, sweeping, taking the garbage out, and keeping clothes where they belong. Similarly, every month there are other items like cleaning the solar panels, topping off batteries, and checking the fluids that are vital to staying efficient in our travels.
If your skoolie/van/truck camper/car smells, you will smell. What this means when building your vehicle is to make sure and vacuum, bleach, and wipe down every nook and cranny that you can. Traveling in a 1984 camper van? Make sure the shag carpet doesn’t smell like 1984.
Maintain Clean Gear
The last area that we notice the most stench is with our gear. The smells that are generated from two humans riding bicycles through gravel and mud for 50 miles are impressive. It is important to wash or clean your gear as soon as you can. Obviously if you just got out of The Grand Canyon on a 5-day backpacking trip (SPOILER: you will stink!) your gear is going to smell bad. However, use a rest day to recharge and wipe down your gear with either soap and water or a lot of Clorox wipes.
BUSLIFE TIP: Check with the manufacturer of your clothing or gear before using harsh cleaners or even some high-DEET bug sprays. Certain chemicals can stain or damage waterproofing on some gear.
We avoid a lot of smells by keeping our shoes in a separate “cubby” area, keeping our hydration packs and backpacks in the under-bed storage area and washing our clothes every 3 weeks or so ;).
How do you stay clean on the road? What glaring tips have we missed? We would love to hear about your tips and tricks for staying clean and fresh while living a nomadic lifestyle! E-mail us at okienomads@gmail.com.