165-Mile Thru-Hike of the Tahoe Rim Trail/Route Planning/Gear Lists

In June 2018 Rachael and I tore off on a thru hike around Lake Tahoe on the Tahoe Rim Trail. The TRT is a 165-mile long distance hike that passes through two Wilderness areas and crosses two state borders, California and Nevada.

Below are the details of our backpacking trip around the Tahoe Rim Trail that we completed in June 2018. The information below is intended to be used as a resource for others planning a similar hike and is broken down into sections to coincide with the sections used by the Tahoe Rim Trail Association (TRTA).

Our TRT Thru-Hike Route

Time to Complete: 13 days (daily mileage below)                Miles

Day 1: Kingsbury South TH to Star Lake (Mile 89.6)                           9

Day 2: Star Lake to Grass Lake Creek (Mile 102.4)                             12.8

Day 3: Grass Lake Creek to Showers Pass (Mile 114)                         11.6

Day 4: Showers Pass to Tamarack Lake (Mile 126)                            12

Day 5: Tamarack Lake to Dick’s Lake (Mile 137.3)                             11.3

Day 6: Dick’s Lake to Bear Lake Outlet (Mile 152)                             14.7

Day 7: Bear Lake Outlet to The Oven (Mile 167)                                15

Day 8: The Oven to Powerline (Mile 6)                                                10

Day 9: Powerline to Brockway Ridge (Mile 22)                                  16

Day 10: Brockway Ridge to Mt. Rose Camp (Mile 41)                        19

Day 11: Mt. Rose Camp to Marlette Lake Camp (Mile 54.4)             13.4

Day 12: Marlette Lake Camp to The Bench (Mile 69)                        14.6

Day 13: The Bench to Kingsbury South (Mile 81.4)                            12.4

Average Mileage:     13.22 Miles

Route Adjustments

Hindsight is 20/20, but after completing our thru-hike, these are the adjustments that we would have made:

Longer Days on the Trail

When we normally backpack, we hike 8-12 miles, stop for a long lunch and maybe a nap, then roll into camp around 3PM and take a load off until dinner around 6PM and bed around 8PM. When thru-hiking, we learned very quickly that there are benefits to longer days and more miles. We would have tried to average 16-20 miles per day and shortened our trip by a few days.

Less Food and 2 Resupplies

With the longer days, we would have needed less food and therefore, less weight. We only resupplied once at Tahoe City and would have added a second resupply somewhere like Mt. Rose Campground to only have to carry a few days of food at a time.

Cache Water at Brockway and Spooner Lake

The North and East sides of the lake are extremely dry and we could have been in bad shape if it weren’t for some good Samaritans and trail angels. We would have cached water at Brockway Summit TH and Spooner Lake TH. Although there is a water spigot at Spooner Lake, the detour adds 3+ miles to an already strenuous section.

Note: By late Summer the trail angels had picked up their efforts at Brockway TH and there was a steady supply of water jugs. Please clean up your trash and don’t leave empty bottles when you are done.

Section Descriptions

Section 1: Kingsbury South to Big Meadow

Kingsbury Grade Backpacking

This section of trail was an extremely good introduction to the TRT. Elevations hover around 9,000 feet and the temperatures up high are much more pleasant that some of the hot days in the valley. We only encountered snow at the base of Freel Peak and it was gone before we hit Armstrong Pass.

There were plenty of places to camp at Star Lake as well as near the creak a few miles down trail toward Freel Peak. Our campsite at Star Lake was excellent, but we wished that we had pushed a little further to one of the many creeks flowing off of Freel Peak for the added mileage.

Star Lake Camping

This section was extremely wet and water was easy to come by. Most was running clean and clear with little-to-no color. We carried only one liter of water at a time and simply stopped when we needed more.

Section 2: Big Meadow to Echo Lakes

Big Meadow Backpacking

Section 2 was similar in difficulty to Section 1 with the introduction of some interesting trail surface at Echo Lakes, mostly jagged shale and sharp rocks. It made walking a little more challenging in places. We encountered very little snow on this section, only on the descent from Showers Pass and it was avoidable. We chose to dry camp on the ridge above Showers Lake and really enjoyed the seclusion of not being by other campers, plus the view was excellent.

More streams ran through this section with no need to carry more than one liter at a time unless dry camping. Round Lake and Showers Lake appeared in good shape and drinkable, despite the annoyance of the mosquitos.

Section 3: Echo Lakes to Barker Pass

This section was a bit more challenging than the previous sections as you cross several high-elevation points, including Dick’s and Barker Pass. The climb up Dick’s Pass is challenging and exposed, pack plenty of sunscreen. Water is still plentiful from Lake Aloha to Middle Velma then sparse before getting to Miller Creek.

View from Dick’s Pass

The Aloha Lake area is extremely popular for reason, it is breathtakingly beautiful. Be warned, there are tons of mosquitoes at the lake and they are persistent. We picked up the pace around standing water and tried to enjoy the view when the mosquitoes weren’t attacking us. Reports from the area later in the Summer were worse.

Aloha Lake on Tahoe Rim Trail

We encountered roughly a mile of snow on the North side of Dick’s Pass leading almost down to the lake. Our campsite on Dick’s Lake was one of the best of the trip and we were there almost entirely by ourselves. The hike up Barker the following day was strenuous and challenging, but the reward was a beautiful view. Keep in mind that road construction on Barker Pass Road had kept it from opening on time and therefore the toilets at the trailhead were locked.

Dick’s Pass Backpacking

Section 4: Barker Pass to Tahoe City

This section is also moderately strenuous as you must climb up and around Twin Peaks as well as climb out of Ward Creek Canyon. We encountered patches of snow on the North side of Twin Peaks and found the walk down into Ward Creek very pleasant. The bridge over the creek is a really nice addition to the trail. The climb across the highway and out of Ward Creek Canyon was less than pleasant on a rocky Forest Service Road. We camped on the hill above Tahoe City to have a short morning hike to resupply in TC the next day.

Barker Pass Snow Hiking

There was plenty of water on this section as well and we carried only one liter at a time. The trail is in great shape, with the exception of the aforementioned FS road. If one could ignore the mosquitos, Page Meadows was beautiful in the early morning sun.

Section 5: Tahoe City to Brockway Summit

Views Above Tahoe City

Water becomes a problem on the TRT beginning in this section. Fill up water from Common Beach in Tahoe City as you will not have reliable water until you reach the creek down-trail from Watson Lake. From there, you should fill up again and prepare to carry all of your water for the climb up to Brockway Summit. Many hikers choose to cache water at Brockway for good reason, the next water is not for a few more miles at Grey Lake or Mud Lake; names aptly for their crystal clear drinking water.

There was no snow on this section of trail and despite the steepness, the trail was not in bad shape. You hike through several residential areas without really knowing it and camping locations are hard to come by between Watson Lake and Brockway.

Section 6: Brockway Summit to Tahoe Meadows

View from Relay Peak

Spectacular views continue on this section as you climb Martis Peak, Mt. Baldy, Rose Knob, and Relay Peak (the high point of the trail). This section is a strenuous walk with difficult and exposed sections throughout. The climbs are rewarding as you get mostly unhindered views of the North end of the lake from some of the highest points on the TRT.

View from the Tahoe Rim Trail

Water was hard to come by in this section as there is a reliable spring near Mt. Tamarack and no more reliable water until Mt. Rose Campground. With that being said, the water was turned off at Mt. Rose Campground when we arrived for quality testing. The camp host was very kind and offered us a water jug and his last open campsite, we gladly accepted and paid him our $20.

Section 7: Tahoe Meadows to Spooner Summit

Tahoe Rime Trail Backpacking

This is a generally mellow section of the trail with the exception of the climb up Herlan Peak and the close by Marlette Peak Campground. We filled up water near Tahoe Meadows and filled up again at the campground. The manual pump is a bit tricky to operate with one person and the water is supposedly high in aluminum, and it leaves an orangish residue. We drank it without treating it and had no ill-effects. The campground had a vault toilet, fire rings, and bear box. Ironically, a flat tent site was difficult to locate in the campground. We couldn’t complain, it’s FREE.

Camping at Marlette Peak

The views to the South of Marlette Lake were astounding and some of the best of the TRT. Once you reach the top, you begin the descent toward Spooner Lake, the next reliable water source. This section of trail is extremely popular with mountain bikers and bikes are only allowed on this section during even days of the week. We unfortunately hit and even day when we came through and spent much of the day getting off of the trail for over two hundred cyclists.

Marlette Lake

Section 8: Spooner Summit to Kingsbury South

Prepare for tough climbs and little water in this section of the TRT. The climb from Spooner to Genoa Peak is not for the faint of heart, but the views from “The Bench” are worth it. There are plenty of places to the East of the ridge near South Camp and Genoa Peaks for pitching a tent or hammock.

Sunset from the Bench

Once off of the ridge, you descend toward Kingsbury and can see Heavenly Ski Resort in the distance. You make it to the highway only to climb back up the side of the resort to the Kingsbury South Trailhead.

*Note: Heavenly Ski Resort no longer allows overnight parking for TRT thru-hikers for claimed insurance reasons. We parked there for the duration of our hike and notified the resort of our plans and itinerary only after we were on-trail and unable to remove the vehicle, your mileage may vary.

Gear

We are not ultra-light hikers by any stretch of the imagination and we like to have some comforts on the trail such as hot food and a tent. Below is the breakdown of each of our packs:

Osprey EXOS Backpack

Zach’s Pack

Osprey Exos 58 Pack

Marmot Sawtooth 30°sleeping bag

Thermarest Foam Sleeping Pad

Thermarest Backpacking Pillow

Polyester Sleeping Bag Liner

GSI Dualist Cookset

MSR Pocket Rocket Stove

MSR Fuel

Sporks (2)

1 L Nalgene Bottle

(2) 2.5 L Platypus Bottles

Steripen Classic Water Purifier

MSR Water Hand Pump

Rain Jacket

Hiking Convertible Pants

Running Shorts

(3) Underwear

(3) socks

Hiking Shirt

Long Sleeve Shirt

Short Sleeve Shirt

Pocket Knife

Flexible Solar Panel

7200 mah Battery

Cell Phone

GPS watch

Bugspray

Credit Cards, Cash, and Bus Key

Baseball Cap

Osprey Atmos Backpacking Pack

Rachael’s Pack

Osprey Atmos 65

Thermarest Air Sleeping Pad

Kelty 20°Sleeping Bag

Sea to Summit Extreme Insulated Bag Liner

Mountainsmith Morrison 2 Tent

Campmas Stakes

Steripen Adventure Water Purifier

1 L Nalgene Bottle

(2) 2.5 L Platypus Bottles

Rain Jacket

Leggings

Hiking Shorts

Comfy Shorts

Long Sleeve Shirt

(2) Short Sleeve Shirts

Vest

Tank Top

(2) Sports Bras

(3) Socks

(4) Underwear

Beanie Hat

Baseball Cap

Gear Adjustments:

In hindsight, we should have left several things at home. First, the hand-pump water filter was almost 100% unneeded. We could have made it without it and not sacrificed a lot of convenience. We also could have left behind the Steripens. Although they are effective, they are heavy and dependent on batteries and technology. We will take a Sawyer Mini next time instead.

Home for Two Weeks on TRT

Second, we are now on the lookout for a lighter tent. Although the Mountainsmith has been very reliable and is well-made, it will soon be retired to car-camping duty and a lighter tent will replace it. We are considering several different options from Six Moon Designs, only time and money will dictate what we go with.

Camp Kitchen on TRT

The third gear adjustment that we would have made would be the addition of a small aluminum windscreen for the MSR Pocket Rocket. The winds on the TRT could be downright impressive and a windscreen was much needed and worth the added weight.

Echo Lake in Desolation Wilderness

Thru hiking the Tahoe Rim Trail was an extremely rewarding experience. We got to see one of the most beautiful and largest lakes in the United States from ALL sides! The trail was not so long that you have to dedicate a ton of time to it and the terrain is accommodating enough that the most beginner hikers can hike the entire trail. For me (Zach) this trail really lit a fire in me to begin planning a larger through hike in the future. I have begun researching thru hikes on the Appalachian Trail (AT) or the Pacific Crest Trail (PCT) in the future. For Rachael, this hike seemed to solidify her extreme enjoyment of 6-8 day backpacking trips. She loves camping and being in the woods, but thru hiking is not for her. That is the real beauty of the TRT, it presents an opportunity for everyone to enjoy the beauty of the Lake Tahoe Basin in their own way.

One way to stay up to date with our adventures is to follow us on social media. We share photos, videos, and travel updates about where we are going and what we are doing.

Follow us on Facebook

Follow us on Instagram

Follow us on YouTube

As we always strive for transparency when displaying aspects of our nomadic lifestyle you should know that all of the links included in this article are affiliate links through Amazon.com. For every purchase that you make from one of these links, we receive a small amount and you don’t pay any extra. These links are one way that stay on the road longer, so thank you for your support of our adventures!

How to Enjoy Lake Tahoe on a Budget

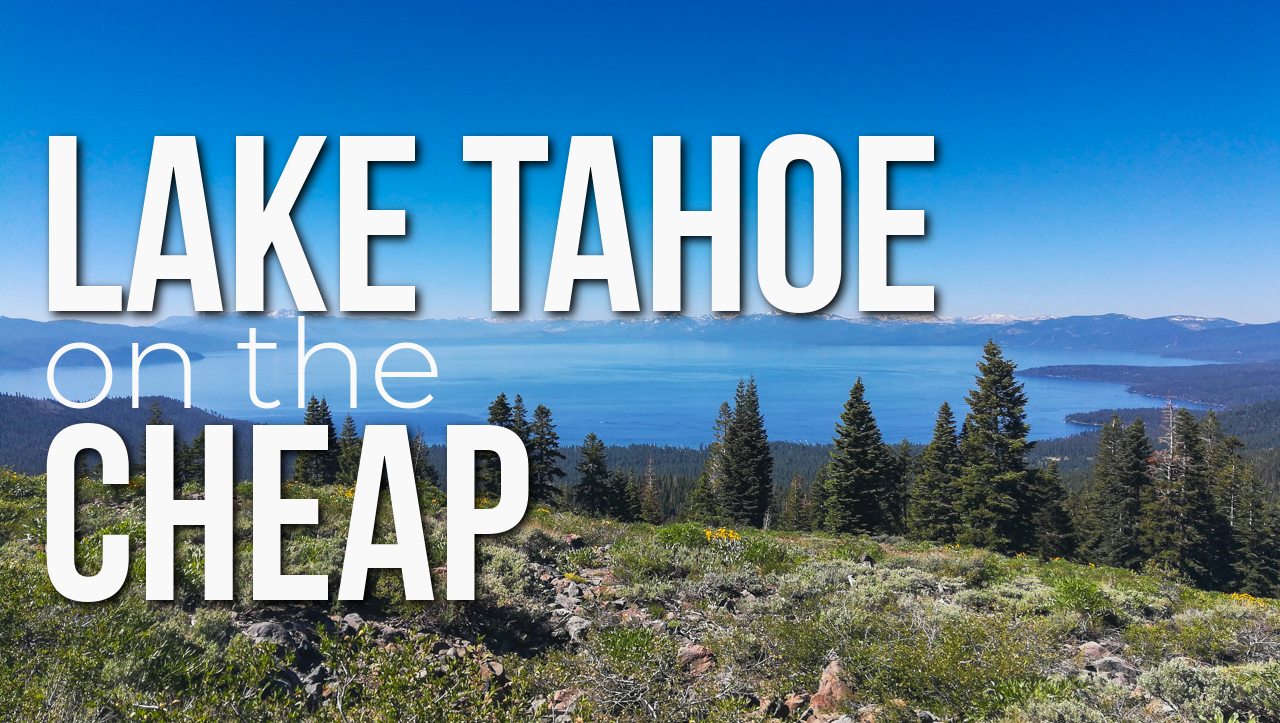
We have all seen the images or videos of the picturesque scene with the bikini-clad paddleboarder gliding across the iconic crystal-clear water of Lake Tahoe and it looks like she is the only person on the lake. This is NOT REAL. Being one of the prettiest and largest freshwater lakes (that also happens to be surrounded by an immense tourism infrastructure from the winter season) makes Tahoe a destination for thousands as soon as the snow melts. This means that most everything will be expensive; however, we found a way to actually cut our weekly expenses in Tahoe and still enjoy most everything that the area had to offer.

Camp or Boondock to Save on Lodging

The Tahoe Basin is one of the most popular destinations for outdoor recreation in California and Nevada. That being said, during the summer, all of the beaches and campgrounds are extremely full. Even Forest Service Campgrounds with no water service will cost you $20 or more. We chose to park for FREE!

 Everyone knows you are trying to park for FREE. Business owners that cater to the needs of millionaire tourists year-round know when you circle their empty parking lot that you are looking for free parking, keep that in mind when trying to park in Tahoe.

As with anywhere, keep your eyes open for stores, shops, and trailheads that will be empty or low-traffic in the evening. Don’t hang out all day and don’t be obnoxious. Avoid locations that have signage prohibiting overnight parking.  We spoke with several shop employees that recommended spots all over the lake to park for free.


Attractions

It’s Lake Tahoe, there is so much to do outside you can’t actually do it all without living there all summer. We’ve outlined a few of the activities that we did while in the basin and that we would recommend to travelers in the area.


SUP, Paddle, or Swim

There are a lot of day-use ($$) beaches to put in your paddleboard or kayak or to swim in Lake Tahoe, but there are also some free beaches to enjoy the water.

tahoepublicbeaches.com

Thomas F. Regan Memorial Beach

South Lake Tahoe, CA

GPS: 38.944427, -119.985645

Regan was a great place to park for the day and enjoy the view, have lunch, and take a swim. The parking was more than adequate and flush toilets and water were available for FREE. There was a playground and a sand-beach for swimming.


Commons Beach

Tahoe City, CA

GPS: 39.170372, -120.140866

We spent the afternoon on Commons Beach while taking a low-mile day on the Tahoe Rim Trail while we re-supplied for the rest of our hike. Thursdays at the beach boast a Farmer’s Market (talk about good luck, we walked in to TC on Thursday; more on that later in the article). The beach is beautiful and didn’t seem very crowded. There was water and flush toilets on site with kayak rentals available on the beach.


www.tahoeactivities.com

Kiva Beach

South Lake Tahoe, CA

GPS: 38.939583, -120.047892

Kiva Beach was a recommendation from a nice Forest Service Tech named Jennifer that we met while hiking the Tahoe Rim Trail. This beach is not as well signed as others in the area and requires a walk down a short trail from the Visitor’s Center. The walk is well worth it as this beach is pristine. This hard to find beach should be at the top of your list in Tahoe.


Hike the Tahoe Rim Trail (in sections or all at once)

The Tahoe Rim Trail (TRT) is a 170-mile scenic trail that circumnavigates Lake Tahoe, mostly on the rim above the lake. This trail system can be broken down into day hikes or tackled all at once for a 10-14-day adventure.

Tahoe Rim Trail

We chose to thru-hike the rim trail all at once, starting at Kingsbury South Trailhead and re-supplying at Tahoe City, CA. Rachael and I finished the trail in 13-days and could have easily cut it to eleven or twelve. For tips and more information on thru-hiking the Tahoe Rim Trail, check out our post with tips and things that we wish we had known before we set off.

Dick’s Pass Backpacking

Mountain Biking

As accessible as most of the trails in Tahoe are, it is no wonder that mountain bikers flock to this area to ride some of the smoothest single-track in the country. From extreme downhill, to cross-country, to bikepacking, Tahoe has something for EVERYONE. Below is a list of recommended rides in the Tahoe Basin:

Zach’s Pick in Tahoe

Tahoe Twirl Bikepacking Route

 Big shock that the guy that enjoyed the 170-mile hike around the rim would suggest riding around the lake on your mountain bike, but sure enough, my favorite ride in Tahoe is essentially riding the entire lake in 4-5 days.

Although most of the TRT is open to cyclists, some sections such as Desolation and Mt. Rose Wilderness are bike-free, so the route linked above starts in Reno, NV, takes you through the heart of Lake Tahoe, and back to Reno a week later. There are plenty of re-supply points and places to stop for food, coffee, and a dip in the lake, which makes this route very appealing for a beginner or seasoned bikepacker.

www.bikepacking.com

We met a group of guys at Tahoe Meadows that had just started this route and happened to run into them a few days later while we were camping outside of Reno (conveniently on the same route) and they had the same smiles on their faces 4 days later as they did on the second day of their trip.


Toad’s Wild Ride

We hiked up and past this trail on our way around the lake and it is knarly. It offers plenty of rugged downhill, berms, jumps, and obstacles for the most experienced riders. We advise renting a full-suspension, long travel bike for this trail as the old hardtail probably won’t make it out alive.

Enjoy the ride up the Forest Service road leading to Armstrong Pass and let it rip on Toad’s all the way back to lake-level.


The Flume Trail

@biketruckee

The Flume Trail is as iconic of a mountain bike trail as you can find. With very little climbing and beautiful white sand single-track, it’s no wonder that thousands of mountain bikers flock to this trail every summer.

Get to the trailhead early and expect to see a bunch of riders, hikers, and potentially some equestrians as this trail is extremely popular.


Food, Groceries, and Amenities

GLUTEN FREE RATING: A+

We spent a total of about 15 days in Tahoe and 13 of them were on the Tahoe Rim Trail where we made our own food every breakfast, lunch, and dinner. That being said, on our days before and after our hike and on our half-day in Tahoe City, we found Lake Tahoe to be incredibly Gluten Free Friendly.

Groceries were simple in South Lake Tahoe with a Safeway that had everything that we hadn’t picked up in Carson City, NV a few days prior. Speaking of, Carson is a great location to fill up on cheap gas, restock your groceries and supplies, and enjoy the dry heat before heading into the Tahoe Basin.  We found gas in Nevada to be over $1/gal cheaper than buying in California.


Rachael’s Pick in Tahoe

As mentioned above, there is an excellent Farmer’s Market in Tahoe City on Thursdays that had a ton of fresh produce, gluten free pastries, fine wines and cheeses, and even live music. We highly recommend scheduling your time in TC to include the Common’s Beach Farmer’s Market. We picked up some gluten free goodies from Sugar Pine Cakery and pick up some raw white cheddar from Spring Hill Cheese, the cheese was unreal!


A quality of life indicator that we look for in our travels and observations of potential new homes is the abundance and quality of the outdoor stores in the area. Despite a moderate addiction to Amazon and REI (we are working on cutting back…) we would really prefer to live in a place that has a decent and affordable outdoor store for when our gear breaks or we feel the urge to upgrade. On day one of our 13-day trek, the shoulder strap on my cheap, 6-year old pack broke, snapped right off at the seam. We rigged it up and got into Tahoe City on a bum strap and shoulder from the maldistributed weight.

@alpenglowsports

The folks at Alpenglow Sports saved the day! Not only did they carry Osprey packs, the brand that I have been eyeing for years, but they also had a knowledgeable sales person that had hiked most of the TRT and knew exactly what type of pack to suggest. She helped me pick out a really solid pack at the price point that we were comfortable paying. They even let me try it on, load it down with weight, and walk around the store with it to make sure it fit just right. Did I mention that we hadn’t showered in 7 days?

*A bonus perk of Alpenglow Sports is that if you are thru-hiking they will let you ship a resupply box to their PO Box and they will hold it for you until you hike into town, FOR FREE! Talk about great customer service!


Lodging/Accommodations

This is an area that we really don’t get to comment on too often, because we live in our bus and don’t stay in hotels or even campgrounds very often. However, after wearing the same clothes for 13 days with no shower, we decided to splurge on a $50 hotel room in Reno, NV. Accommodations in Tahoe, even during the week, were over $100/night and we simply can’t afford that. The Harrah’s Casino in downtown Reno was cheap, clean, and a great value! We spent a full day relaxing, cleaning and sorting gear, and stuffing our face at the two-for-one buffet. For the money, you really can’t beat a casino hotel after a thru-hike!

The Sierras

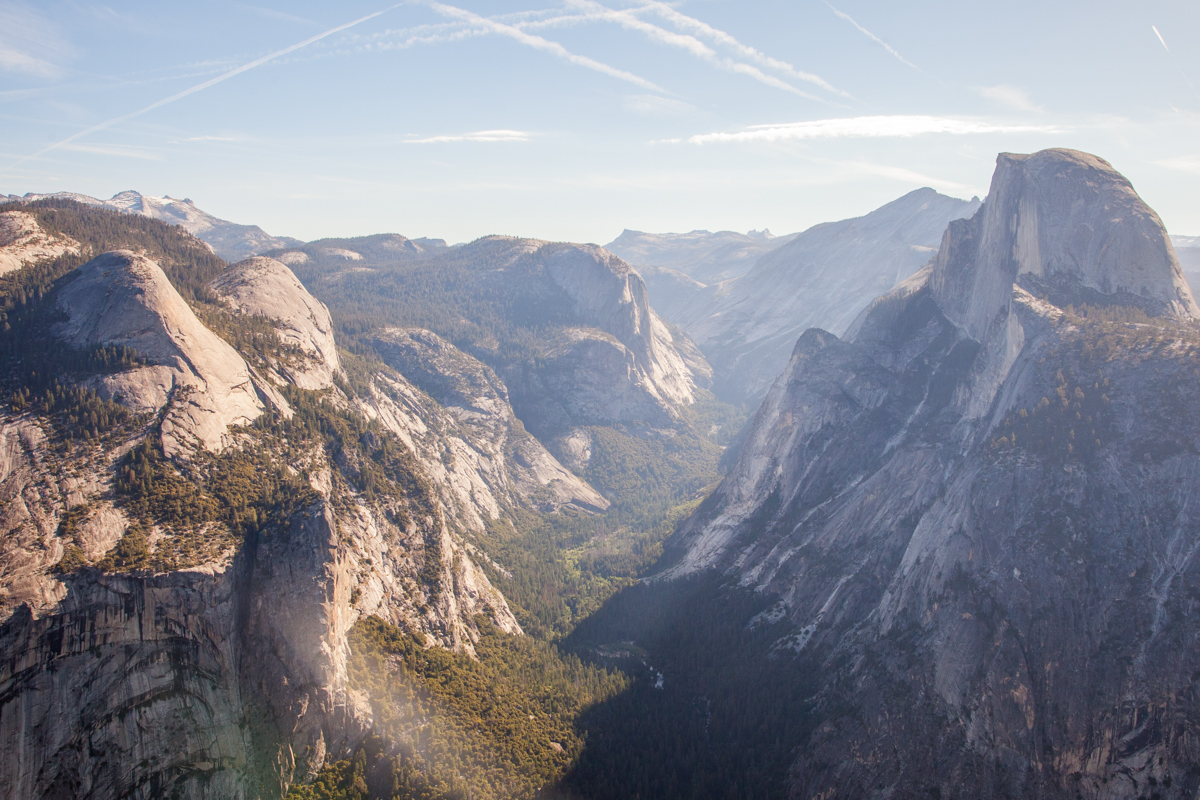
Entry into the Sierra Mountain Range was special for both of us. Neither of us had ever been to this part of the country and we had both had most of the region on our respective bucket lists for a long time. Yosemite, Kings Canyon, Tahoe, who doesn’t dream about visiting these places? This is how we did it!

Camping

Surprisingly we have found some fairly epic, FREE campsites in California. Because we only spent a few nights in SoCal, we have included those campsites in our post about FREE camping in California and you can find it HERE!

FREE CAMPING IN THE SIERRAS

Considerations for boondocking in and around California:

 -Be Courteous

Parking in places that most people don’t use for camping spots can sometimes produce some weird vibes with folks. We found that being friendly and courteous of others goes a long way when living in your car, bus, or truck. When a security guard or sheriff passes you, wave and say hello. Be friendly, you will be surprised how well it will pay off.

-Leave It Better Than You Found It

Our biggest complaint while traveling through California is the overuse and misuse of public lands. If you can’t dig a cat hole deep enough to bury your poop and toilet paper, you don’t deserve to enjoy public lands. Pick up your trash, bury your poop, and don’t leave food laying around in bear country. It’s really simple and when everyone takes care of public lands we all win.

Attractions

California is the most diverse state in the United States. You can surf in San Diego and in a few hundred miles be scaling the granite walls of Yosemite Valley. There are bike trails, hiking trails, OHV trails, sand dunes, beach dunes, thru-hikes, rock-climbing, and so much more. We have tried to summarize our time in California with the highlights of our trip.

Sequoia National Park

Sequoia National Park is one of the least crowded and most underrated of the National Parks, in our opinion. In one park you are able to see thousand-year-old trees that have withstood the efforts of humans and mother nature to grow bigger than any other living creature.

The Sherman Sequoia is worth the drive up the winding road into Sequoia National Park all on its own. Better yet, take some time and explore the backcountry of the park with an overnighter to Twin Lakes from the Lodgepole Campground. The permit process is super easy and the park rangers will even rent you a bear cannister to comply with their rules regarding bears and backpacking. If you dare, try to take a dip in Twin Lakes, it will take your breath away!

Sequoia National Park was mellow and easy to navigate. Our advice, with any National Park, is to start your day very early and enjoy watching the crowds wander onto the trail as you are heading back to camp for a mid-morning nap.

Kings Canyon National Park

A smidge North of Sequoia National Park is a park surrounding a canyon deeper than the Grand Canyon in Arizona, Kings Canyon National Park. This park is home to amazing views of the parks namesake, Kings Canyon as well as some other notable massive trees such as the Grant Giant Sequoia.


Hot Springs

The Sierras are home to some of the most scenic and accessible hot-springs in the country. We stopped at a couple and have added a few more to our list for our next drive through California.

-Remington Hot Springs

GPS: 35.5758934, -118.5528070

Remington Hot Springs is at the foot of the Sierra Range yet boasts some amazing scenery along the Kern River. The springs were discovered and later enclosed with rock and mortar. The temperatures vary, but we rather enjoyed the experience of swimming in the ice-cold river followed by warming up in the second-hottest hot spring.

-Travertine Hot Springs

GPS: 38.245922, -119.205372

Travertine is a BLM trail-head to a set of hot springs near the town of Bridgeport, CA. There are many springs to choose from but get there early in the day and stake your spot out, it gets busy.

*Keep in mind that many like to enjoy the hot springs in their most natural form, naked. Remember this as you are hiking over the boulders to the springs at Travertine and don’t be surprised when you make eye contact with a 90 year-old naked man slipping into the pools!


Yosemite National Park

The Valley may be one of the grandest spectacles of nature that I have seen. Granite walls tower thousands of feet up from the valley floor, one of the most beautiful National Park lodges ever built, and deep green meadows that stretch as far as you can see are all reasons that everyone should see Yosemite once in their lives.

We spent our first morning in the park driving to Glacier Point, one of the most spectacular views of Yosemite from above. The road to Glacier Point is not for the oversized vehicle or those scared of heights or precipitous drop-offs. Once you reach the top though, you are rewarded with exquisite views of the valley below. Half-Dome is on full display in front of you and several HUGE waterfalls can be seen in the same blink. There are a couple of small interpretive trails around the top and some longer trails that connect to the valley.

Speaking of waterfalls, if you are a waterfall junkie like we are, the Mist Trail will not disappoint. The hike begins at the Happy Isles trailhead and meanders up the valley wall past Vernal and Nevada Falls, two of the most spectacular waterfalls in California. Once you reach the top of Nevada Falls, the trail connects to the John Muir Trail (JMT). The JMT is a National Scenic Trail that wanders through some of the most iconic and beautiful areas of the United States. The JMT takes hikers back down into the valley and eventually returns to the trailhead.

An entire day could be devoted to time just in the Valley itself with sights like El-Capitan, Half-Dome, and the Awahnee Lodge towering over the Valley floor. The morning that we arrived (and added our bus to the ranks of vans, busses, and old cars that belonged to the many climbers who flock to the valley daily) Alex Honnald and Tommy Caldwell had just broken the speed record for climbing El-Cap. The valley was a buzz with reporters and climbers chatting about how they had accomplished the feat several times in the week leading up to it and were merely breaking their own record that morning. There are impressive exhibitions of human ability every week in Yosemite it seems.


Lassen Volcano National Park

As one of the lesser known and visited National Parks, Lassen Volcano National Park boasts beautiful scenery and unique geo-thermal properties that rival that of Yellowstone.

We chose to enter the park at the less popular Warner Valley Entrance and hiked the Devil’s Kitchen Trail. This easy trail crosses through Warner Valley and up the hill to the geothermal pools.

Hiking through the pools was an interesting experience as you can feel the heat and smell the sulfur. The most interesting part of the scene above is that the creek running through the area is still ice-cold while the pools and puddles around it are in excess of 100 degrees!

On this trail we also had our first encounter of the summer with a bear. A cinnamon black bear approached us on the trail and you can read all about that encounter in our article about it: When Nothing Works in a Bear Encounter.

Food, Groceries, and Amenities 

GLUTEN FREE RATING: B

Since the majority of the attractions in the Sierras are in fact, in the mountains, it is important to resupply on food and supplies before heading higher in elevation and higher in price. The National Parks and surrounding communities have done a really good job of exploiting the careless traveler with prices that sometimes exceed 200% of what they cost in the real world. While diesel fuel was still $3.85/gal in Fresno, fuel at the gas station leaving Yosemite was $6/gal! I understand the costs of getting fuel into remote places like Yosemite, but it’s not that remote, there is a major road running through it. It’s a bit of a shame when it still costs $25+ for a vehicle to enter the park and $40+ to camp for a night in a parking lot, but the Parks can still gouge tourists for fuel.

I digress. We resupplied in Fresno before heading into the mountains and had really good luck with the shopping center near Woodward Park on Nees Ave. There was a Trader Joe’s and a Sportsman’s Warehouse so we were able to stock up on all of our food needs and replace any broken gear or supplies that had run out. We missed a few things and had to pick them up in Oakhurst, CA and the prices weren’t overly inflated on most things but there were simply less stores to choose from.


Alpenglow Gear Co.

Oakhurst, CA


Part of the appeal of traveling through parts of the country where really affluent sportsmen recreate is that they will sell their old gear to used gear stores and we can in-turn get a lightly used piece of gear that we couldn’t previously have afforded. That’s the idea behind Alpenglow Used Gear.

This shop is just starting out but is located right off of the highway and already offers a wide supply of used clothing, cycling gear, climbing gear, backpacking gear, and much more. The staff is super fun and we even ran into him utilizing another local small business at the coffee shop in town; it’s very cool to see small businesses supporting each other in a tight knit community as well as giving back through trail clean ups and conservation.

The Cool Bean Café

Oakhurst, CA

We tend to only use coffee shops when we need wi-fi and this shop was sufficient at uploading some images and getting out. The atmosphere was really fun but the clientele made our experience crummy, through no fault of the shop. A table of nearly ten, seemingly intoxicated, street youths spent over two hours yelling, screaming, and carrying on while the rest of us tried to enjoy the mellow music that none of us could hear. We would really like to come back and visit this shop again to give it a fair shake.

If you need to resupply on food or supplies, nearby cities of Fresno or Bakersfield are in the valley and quite warm but have all of the stores you would need before a few weeks in the mountains.

The Sierras have been spectacular to visit and we already have a list of sites that we want to spend more time in including visiting this area in the winter when the crowds are smaller and the parks are empty.


Free Camping in the Sierras

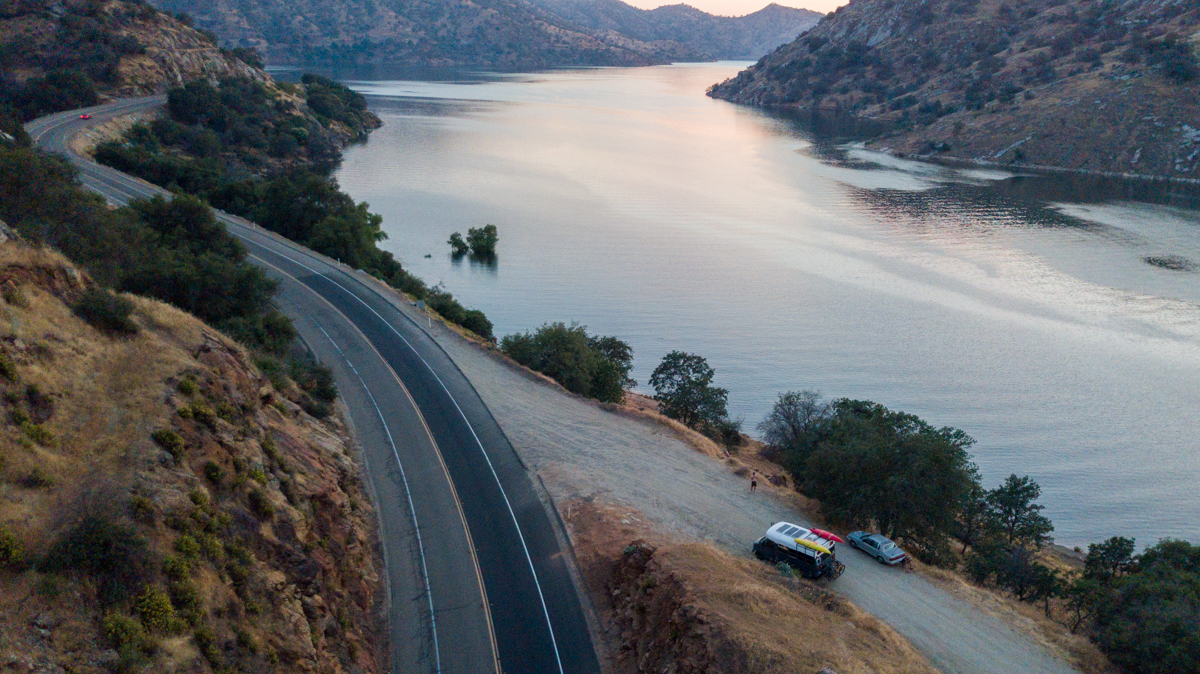
Remington Hot Springs

Lake Isabella, CA

GPS: 35.576386, -118.552872

Much like many of the sites we review, this is a parking lot. There are pull-outs all along this road, but this GPS point is a lot. It has excellent views of the Kern River below, and access to the Remington Hot Springs just down-hill.

The springs are nice and this spot is a great place to park to enjoy a late-night or early-morning soak.

Behind the Rock

Three Rivers, CA

GPS: 36.409936, -118.94564

This spot is exactly how the title sounds, behind the rock. There is a turnout at this GPS point that is behind a large mound of rocks that insulates the lake-side of the boulder from most of the road noise nearby.

There are toilets just down the road from this spot in the day-use area on the lake and the entrance to Sequoia National Park is only a short drive up the hill.


Stone Creek

Sequoia National Park

GPS: 36.663691, -118.846050

When exiting Sequoia National Park, you will pass Stone Creek Store and just after the store on the left you will see a Forest Service Road that is blocked with a tree. Next to the tree is a new trail/road leading back to several secluded spots.

This is a great spot to explore both National Parks nearby and a short hike North of here is a beautiful cascade waterfall. Animals walk through this area all day and don’t seem to mind people one bit.


Buck Rock Meadow

Kings Canyon National Park

GPS: 36.722725, -118.850537

There are pull-outs all down this road between Kings Canyon and Sequoia National Parks. Any sized rig can fit somewhere on this road. We found a spot right near a meadow a few miles down the road with a good view and level ground.


There were vault toilets near the beginning of the road and at both park visitor centers.


Bass Lake

Bass Lake, CA

GPS: 37.293835, -119.531886

Bass Lake is more of a stopover campsite instead of a “stay for a week” campsite. We stayed two nights and moved our rig during the day. The sheriff drove by at least once and waved, very friendly. We kayaked on the lake and explored the “town” before heading into Yosemite. Please don’t abuse this spot by having campfires, leaving trash, or being belligerent. This is a great rest stop before the National Park.

The nearby boat launch had bathrooms and potable water. The local authorities are very serious about collecting their day-use fees and were writing tickets during the week while we were there in the early summer. Tread lightly.

Miami Creek OHV Area

Fish Camp, CA

GPS: 37.415164, -119.636342

This is an OHV area and it appears that OHV drivers get to do whatever they want here. We stayed the evening up this road and only had a few rigs “BRRAAAAAPP” past us in the evening. The mosquitos were moderately aggressive, but the spot was level and relatively quiet.

Makes for a great basecamp for resupply in Oakhurst or traveling into Yosemite.

Goat Meadow Trailhead

Fish Camp, CA

GPS: 37.491268, -119.623491


This is a pretty straight forward parking lot and small wooded section nearby for dispersed camping. This is a simple lot with no amenities. Pack it in, pack it out.

Have you traveled frequently in this area and have a suggested spot? We would love to hear about it and potentially add it to our article. Email us at okienomads@gmail.com


When Nothing Works in a Bear Encounter

Our legs were tired, our feet blistered and our skin sunburned after hiking 170-miles around Lake Tahoe on the Tahoe Rim Trail. My wife Rachael and I had decided to take it easy and enjoy some small day hikes in the less-traveled region of Lassen National Park, the Warner Valley Trailhead.

We started out on the trail early and reached a geothermal feature called Devil’s Kitchen before most people had woken up in their tents. We enjoyed a quick stroll through the creekside pockets of 100◦F+ water that reeked of sulfur.

We followed the ultra-easy and well-marked trail back the way we had hiked to find the geothermal pools and soon found ourselves face-to-face with something that we hadn’t yet experienced in over 3-months of spending nearly every day outside in the forests and deserts of the American West, a bear.

Rachael stopped first. She reached across my chest, like Kramer from Seinfeld and halted our traffic down the trail. She thought it was a large dog that had escaped it’s owners in the nearby campground, it wasn’t. It was a juvenile brown bear that was too old to be a cub and too young to be a mature bear. My pulse quickened as the bear approached slowly, but directly toward us. I snapped a couple of very quick photos from a good distance then began to execute standard procedure for handling a bear encounter, outlined below. SPOILER ALERT: standard procedure didn’t work.

We ensured that the bear was not a cub- This is really important step in deciding what you are going to do next. If a juvenile bear is alone, it should be afraid of you and run away fairly quickly after you do steps 2 & 3 below. If the bear is a cub with a near by momma-bear, it might run away, but you should be prepared for an angry and aggressive adult bear to follow close-behind the cub. In this case, the bear was a juvenile but not a cub, however, this bear was very intent on walking toward us on the trail.

We made ourselves BIG- In previous encounters with non-grizzly bears, at 6′ 3″ tall, I have had success with standing tall, raising my arms, and jumping in the air to scare off an approaching bear. If you have trekking poles or in our case, nearby sticks, pick them up and bang them together over your head.The idea is to get as big as you can and present yourself as a bigger predator than the bear. After getting big, the bear approaching us was not fazed by our attempts to scare it back into the woods with our size.

We made a lot of noise- Additionally, after we got big, we made a lot of racket. I normally start with a stern and deep “Hey Bear” and gradually make myself louder and more aggressive. We continued to have a fairly aggressive and loud conversation with this bear and it did not react at all. If anything, our words seemed to invite further investigation from the bear. After exhausting all of our options, we resorted to a last resort when dealing with bears, get out of the way.

We got out of the way- After making all attempts to reinforce fear of humans into this small bear’s world, we simply did the only option we had left, get out of the way. We stepped nearly 20-feet off of the trail and away from the bear’s path. He continued to advance uncomfortably close to our position, but passed us with no aggression. Once the bear had passed us, he lingered and seemed interested to see if we would stick around. We walked quickly with our eyes never leaving the bear for more than a couple of seconds. We cleared the next hill and the bear continued on the path away from the trailhead.

After a few minutes had passed, our collective blood pressures dropped and we reflected on what had just happened. This bear, being a young bear and living so close to a campground has probably associated humans with food. This is the unfortunate result of people spending a lot of time in bear-country and not properly storing their food and other scented items. This is a perfect example of why hanging a bear bag or using bear boxes is essential in the wilderness.

Keep in mind that these suggestions are sufficient for black and brown bears, not grizzlies. Grizzly bears are aggressive carnivores and if you encounter one, make yourself as small as possible and play dead. Acting aggressive toward a grizzly is dumb and will get your face ripped off if you are lucky, and killed if you’re not.

Have you ever experienced a bear in the wild? What was it like? We want to hear about your story and share it on our blog. Send us an e-mail at okienomads@gmail.com and tell us all about it.

FREE Camping in Southern California

We were pleasantly surprised to find more than enough FREE camping SoCal and we didn’t have to camp in a Wal-Mart parking lot! Below are some of our favorite sites from our time in Southern California.

Laguna Mountain

Julian, CA

GPS: 32.977978, -116.524818

We end up in trailhead parking lots a lot of the time because they are well-traveled, have access to trails, and normally have toilets. This spot was simple, had a great view of Anza Borrego in the distance, and was right on the Pacific Crest Trail.

There are quite a few level spots here and a vault toilet is available. Take a walk on the nearby Sunset Trail for beautiful views at the foot of the Sierras.


San Diego River Preserve

San Diego, CA

GPS: 32.76000856, -117.2250726

This site is a pull-out along the San Diego River in the heart of SD. There is bound to be a fair bit of traffic noise and potential conversations with homeless people living nearby, but you can’t beat the location for a quick night’s sleep and 5-minute drives to Sea World, Ocean Beach, and much more.

This can be an intimidating place to park, but we left our rig here for 4-5 hours at night and rode our bikes to Ocean Beach to have dinner and drinks and enjoy the ocean. There are plenty of runners and cyclists that use this abandoned road day and night, so we never felt unsafe here.


Law Street Beach

San Diego, CA

GPS: 32.8025916, -117.2595628

This section of curbside next to Pacific Beach is one of the best FREE camping spots we have ever had. The view of the Ocean is magnificent and the amount of active people around was very refreshing. There is not a lot of solitude here, but there is plenty of ocean to share.

This site had bathrooms and showers nearby and one only had to make sure not to park here during street sweeping, one day per week.


Thomas Mountain

Anza, CA

GPS: 33.5792566, -116.6241575

There are loads of pull outs and campsites along this OHV trail/road near Anza, CA. The road can be a bit rough and steep, so we stopped short of the top and had a great view of the valley below.

Vehicle with low-clearance should really try somewhere else, this road is rutted and rocky in places and could be hard to navigate in a rig larger than 24 feet.


North Joshua Tree BLM

Joshua Tree, CA

GPS: 34.172932, -116.224663

If you are looking for a peaceful escape from the modern world, this is not it. This is a dry creek bed that is used heavily for off-roading, dirt biking, and any other loud vehicle driving that you can think of. The lake bed is beautiful and very flat, but don’t plan on going to sleep until dark.

This is a perfect overnight spot before entering Joshua Tree National Park. The West Entrance is just minutes away and has a bathroom and brochure station for the park.


Sawtooth Canyon (New Jack City)

Barstow, CA

GPS: 34.670395, -116.98423

We recently (March 2020) added this campsite as we traveled to LA for work and this made a perfect stopover from Northern Arizona.

This campground is managed by the Bureau of Land Management and is very busy in the climbing season (October-March). There is a ton of climbing available in this area and something can be found for climbers of all skill levels. This site has toilets but they were full when we visited, there was also zero occupancy when we arrived on a Wednesday night in March-arrive early. All in all, it wasn’t a bad place to stopover on the way to LA. Be sure and hike to the top of the ridge and check out the views looking toward Big Bear.

We had some of our most unique campsites of our whole summer in So Cal and we think you will enjoy them too! Did we miss any spots along our route? E-mail us and let us know!

The Mist Trail: Hike Through Yosemite’s Iconic Waterfalls

The Mist Trail

Distance: 3 miles to Vernal Falls (round trip), 7 miles to Nevada Falls (round trip).

Elevation: 4000 feet @ trailhead, 1000 feet to Vernal Falls, 1900 feet to Nevada Falls

View of Yosemite Falls

When to Hike: Mid-April thru Mid-July; You want to catch the peak runoff flow from the mountains into the valley to get the best waterfalls. Time of day is a huge factor on this trail as well as it is extremely popular. Pack a snack, eat a quick breakfast and hit the trail by sunrise to avoid the crowds on the way up and barely catch them on the way back down.

Why Hike This Trail: Simply put, the views! Spectacular views are scattered throughout this half-day hike. Views of both falls, Liberty Cap, and the rest of the valley can be had from nearly every spot of this hike. An added bonus is you get to hike a section of the iconic John Muir Trail (JMT) on the way down from Nevada Falls.

Vernal Falls from the Mist Trail

Time to Complete: Depending on distance, fitness level and time of day, this trail can be completed in 2-6 hours.

Difficulty: The climb up the falls is not technical, but it is strenuous given the elevation gain. The hike down is mellow with gracious switchbacks.

Eye-to-Eye with Vernal Falls

What to Bring: Rain gear and plenty of it. The hike up runs right along both large waterfalls and you will get wet, very wet. Bring a jacket and something to protect your camera and other electronics. Also bring plenty of drinking water and snacks for the top of the hike, there’s a good chance you could be worn out by the time you reach the top.

Above Nevada Falls

Parking: Park at the Happy Isles Trailhead and walk on the paved path toward the falls. There is a nearby campground if you’d rather spend the night close to the trailhead and bathrooms are plentiful both on the valley floor and all along the Mist Trail.

Enjoy this beautiful trail and remember to be aware of where you are at all times when outdoors. More people die in Yosemite National Park on the Mist Trail than anywhere else in the park. Most accidents occur from hikers falling or swimming in the water and being swept away by the current.

error

Enjoy our content? Help spread the word! ;)

Follow by Email
YouTube
YouTube
Instagram