165-Mile Thru-Hike of the Tahoe Rim Trail/Route Planning/Gear Lists
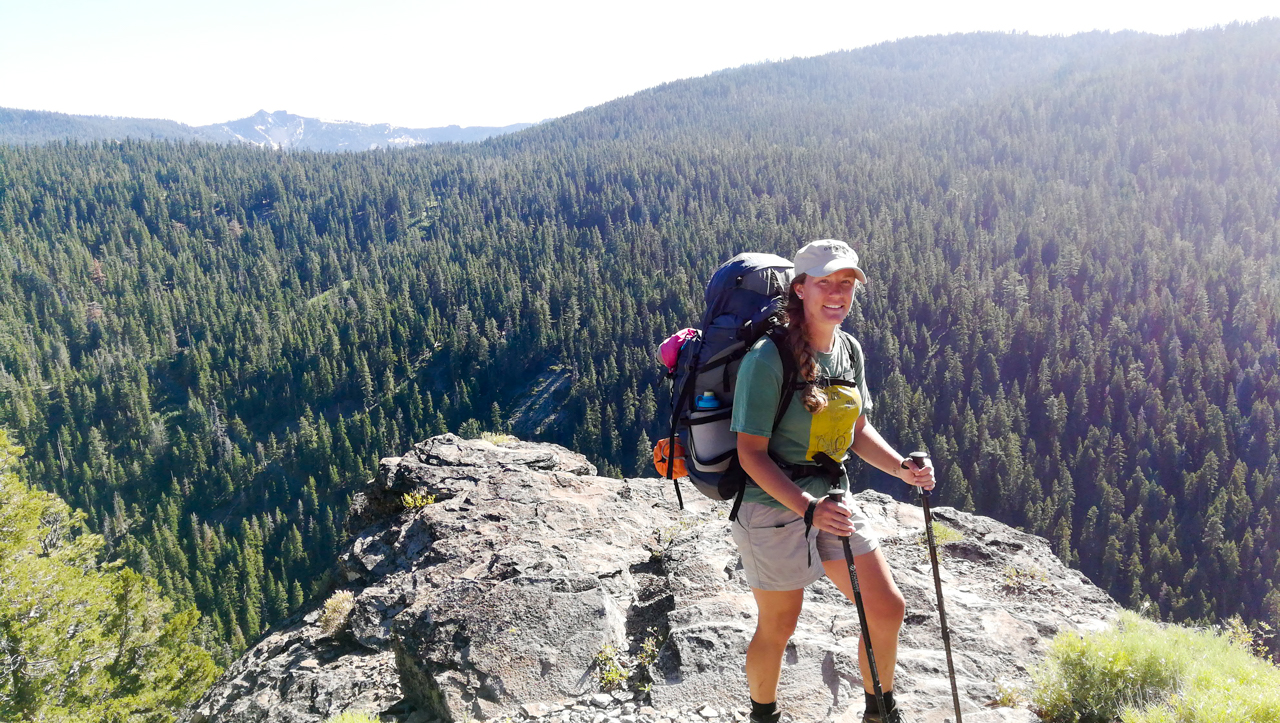
In June 2018 Rachael and I tore off on a thru hike around Lake Tahoe on the Tahoe Rim Trail. The TRT is a 165-mile long distance hike that passes through two Wilderness areas and crosses two state borders, California and Nevada.
Below are the details of our backpacking trip around the Tahoe Rim Trail that we completed in June 2018. The information below is intended to be used as a resource for others planning a similar hike and is broken down into sections to coincide with the sections used by the Tahoe Rim Trail Association (TRTA).
Our TRT Thru-Hike Route
Time to Complete: 13 days (daily mileage below) Miles
Day 1: Kingsbury South TH to Star Lake (Mile 89.6) 9
Day 2: Star Lake to Grass Lake Creek (Mile 102.4) 12.8
Day 3: Grass Lake Creek to Showers Pass (Mile 114) 11.6
Day 4: Showers Pass to Tamarack Lake (Mile 126) 12
Day 5: Tamarack Lake to Dick’s Lake (Mile 137.3) 11.3
Day 6: Dick’s Lake to Bear Lake Outlet (Mile 152) 14.7
Day 7: Bear Lake Outlet to The Oven (Mile 167) 15
Day 8: The Oven to Powerline (Mile 6) 10
Day 9: Powerline to Brockway Ridge (Mile 22) 16
Day 10: Brockway Ridge to Mt. Rose Camp (Mile 41) 19
Day 11: Mt. Rose Camp to Marlette Lake Camp (Mile 54.4) 13.4
Day 12: Marlette Lake Camp to The Bench (Mile 69) 14.6
Day 13: The Bench to Kingsbury South (Mile 81.4) 12.4
Average Mileage: 13.22 Miles
Route Adjustments
Hindsight is 20/20, but after completing our thru-hike, these are the adjustments that we would have made:
Longer Days on the Trail
When we normally backpack, we hike 8-12 miles, stop for a long lunch and maybe a nap, then roll into camp around 3PM and take a load off until dinner around 6PM and bed around 8PM. When thru-hiking, we learned very quickly that there are benefits to longer days and more miles. We would have tried to average 16-20 miles per day and shortened our trip by a few days.
Less Food and 2 Resupplies
With the longer days, we would have needed less food and therefore, less weight. We only resupplied once at Tahoe City and would have added a second resupply somewhere like Mt. Rose Campground to only have to carry a few days of food at a time.
Cache Water at Brockway and Spooner Lake
The North and East sides of the lake are extremely dry and we could have been in bad shape if it weren’t for some good Samaritans and trail angels. We would have cached water at Brockway Summit TH and Spooner Lake TH. Although there is a water spigot at Spooner Lake, the detour adds 3+ miles to an already strenuous section.
Note: By late Summer the trail angels had picked up their efforts at Brockway TH and there was a steady supply of water jugs. Please clean up your trash and don’t leave empty bottles when you are done.
Section Descriptions
Section 1: Kingsbury South to Big Meadow
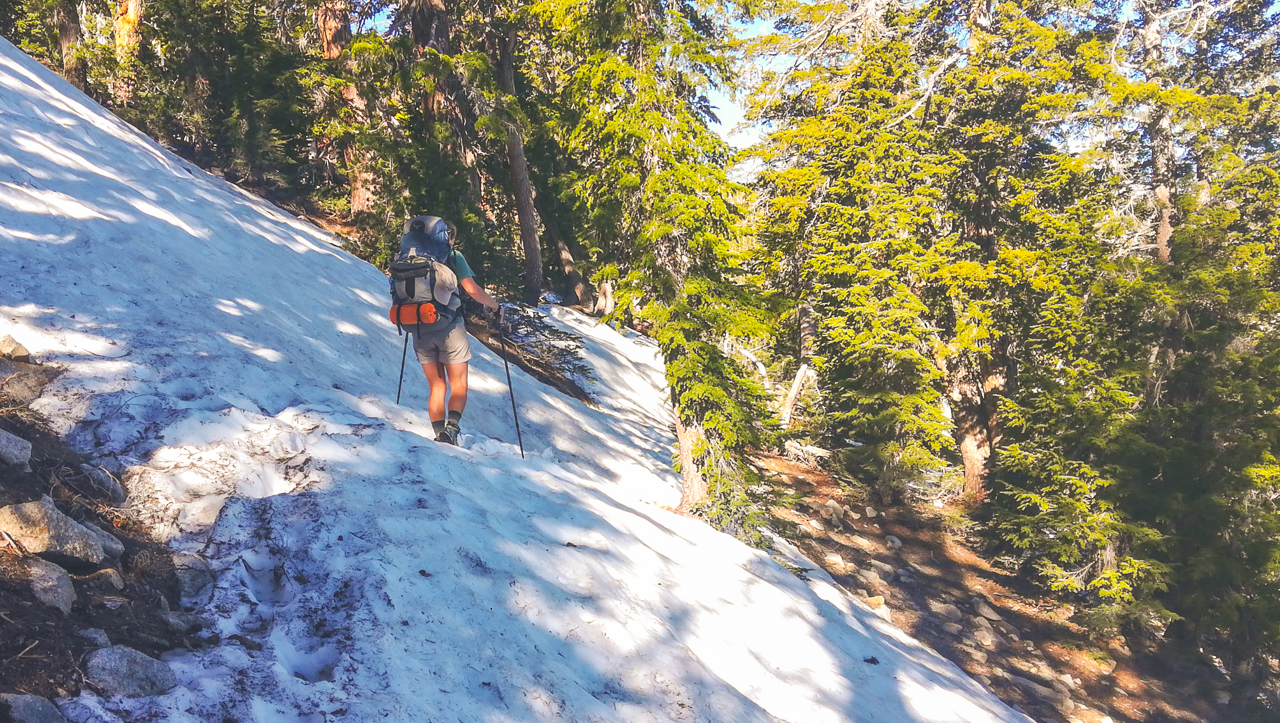
This section of trail was an extremely good introduction to the TRT. Elevations hover around 9,000 feet and the temperatures up high are much more pleasant that some of the hot days in the valley. We only encountered snow at the base of Freel Peak and it was gone before we hit Armstrong Pass.
There were plenty of places to camp at Star Lake as well as near the creak a few miles down trail toward Freel Peak. Our campsite at Star Lake was excellent, but we wished that we had pushed a little further to one of the many creeks flowing off of Freel Peak for the added mileage.

This section was extremely wet and water was easy to come by. Most was running clean and clear with little-to-no color. We carried only one liter of water at a time and simply stopped when we needed more.
Section 2: Big Meadow to Echo Lakes
Section 2 was similar in difficulty to Section 1 with the introduction of some interesting trail surface at Echo Lakes, mostly jagged shale and sharp rocks. It made walking a little more challenging in places. We encountered very little snow on this section, only on the descent from Showers Pass and it was avoidable. We chose to dry camp on the ridge above Showers Lake and really enjoyed the seclusion of not being by other campers, plus the view was excellent.
More streams ran through this section with no need to carry more than one liter at a time unless dry camping. Round Lake and Showers Lake appeared in good shape and drinkable, despite the annoyance of the mosquitos.
Section 3: Echo Lakes to Barker Pass
This section was a bit more challenging than the previous sections as you cross several high-elevation points, including Dick’s and Barker Pass. The climb up Dick’s Pass is challenging and exposed, pack plenty of sunscreen. Water is still plentiful from Lake Aloha to Middle Velma then sparse before getting to Miller Creek.
The Aloha Lake area is extremely popular for reason, it is breathtakingly beautiful. Be warned, there are tons of mosquitoes at the lake and they are persistent. We picked up the pace around standing water and tried to enjoy the view when the mosquitoes weren’t attacking us. Reports from the area later in the Summer were worse.

We encountered roughly a mile of snow on the North side of Dick’s Pass leading almost down to the lake. Our campsite on Dick’s Lake was one of the best of the trip and we were there almost entirely by ourselves. The hike up Barker the following day was strenuous and challenging, but the reward was a beautiful view. Keep in mind that road construction on Barker Pass Road had kept it from opening on time and therefore the toilets at the trailhead were locked.

Section 4: Barker Pass to Tahoe City
This section is also moderately strenuous as you must climb up and around Twin Peaks as well as climb out of Ward Creek Canyon. We encountered patches of snow on the North side of Twin Peaks and found the walk down into Ward Creek very pleasant. The bridge over the creek is a really nice addition to the trail. The climb across the highway and out of Ward Creek Canyon was less than pleasant on a rocky Forest Service Road. We camped on the hill above Tahoe City to have a short morning hike to resupply in TC the next day.
There was plenty of water on this section as well and we carried only one liter at a time. The trail is in great shape, with the exception of the aforementioned FS road. If one could ignore the mosquitos, Page Meadows was beautiful in the early morning sun.
Section 5: Tahoe City to Brockway Summit

Water becomes a problem on the TRT beginning in this section. Fill up water from Common Beach in Tahoe City as you will not have reliable water until you reach the creek down-trail from Watson Lake. From there, you should fill up again and prepare to carry all of your water for the climb up to Brockway Summit. Many hikers choose to cache water at Brockway for good reason, the next water is not for a few more miles at Grey Lake or Mud Lake; names aptly for their crystal clear drinking water.
There was no snow on this section of trail and despite the steepness, the trail was not in bad shape. You hike through several residential areas without really knowing it and camping locations are hard to come by between Watson Lake and Brockway.
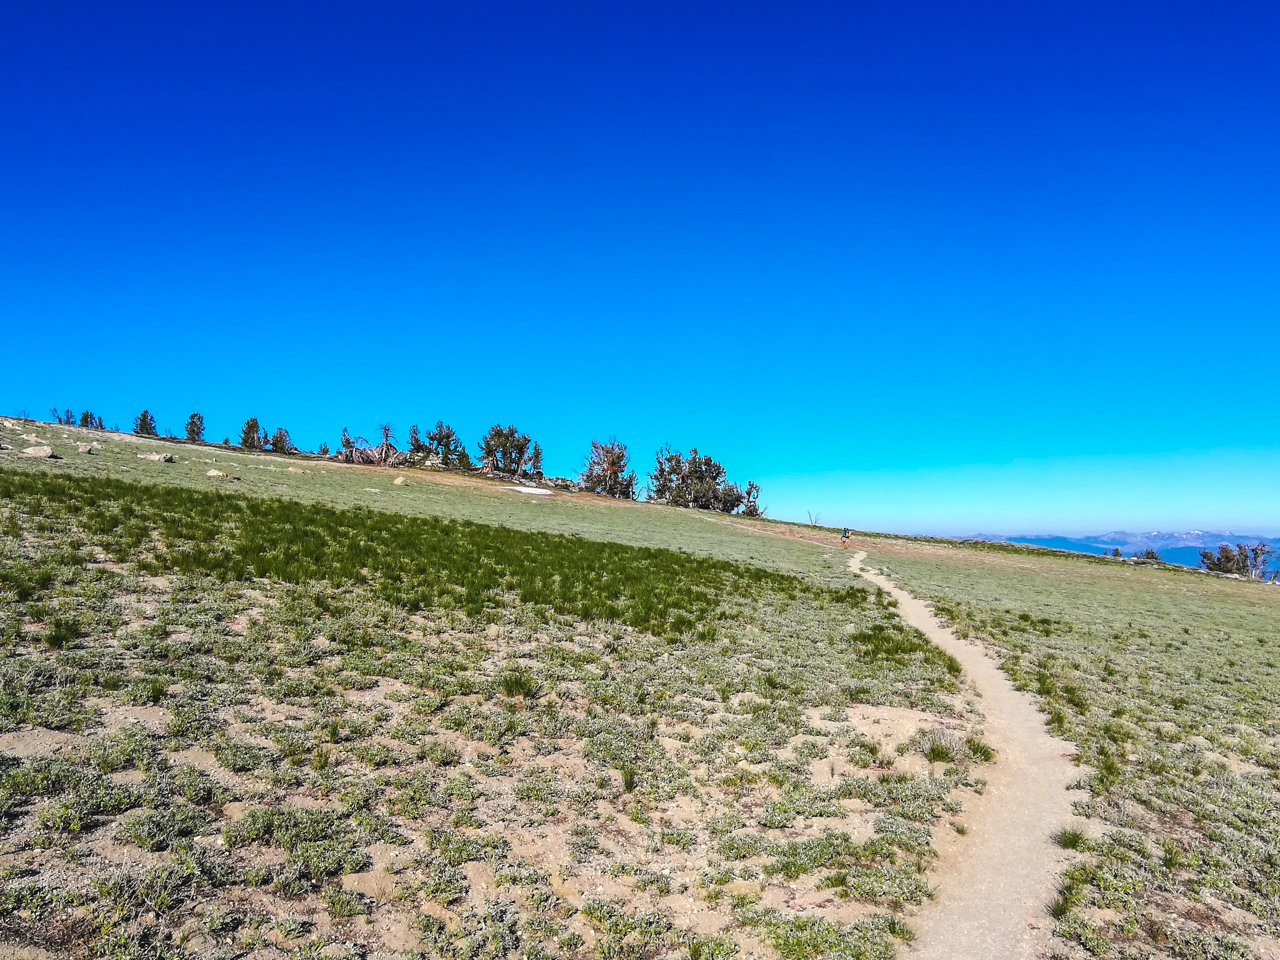
Section 6: Brockway Summit to Tahoe Meadows
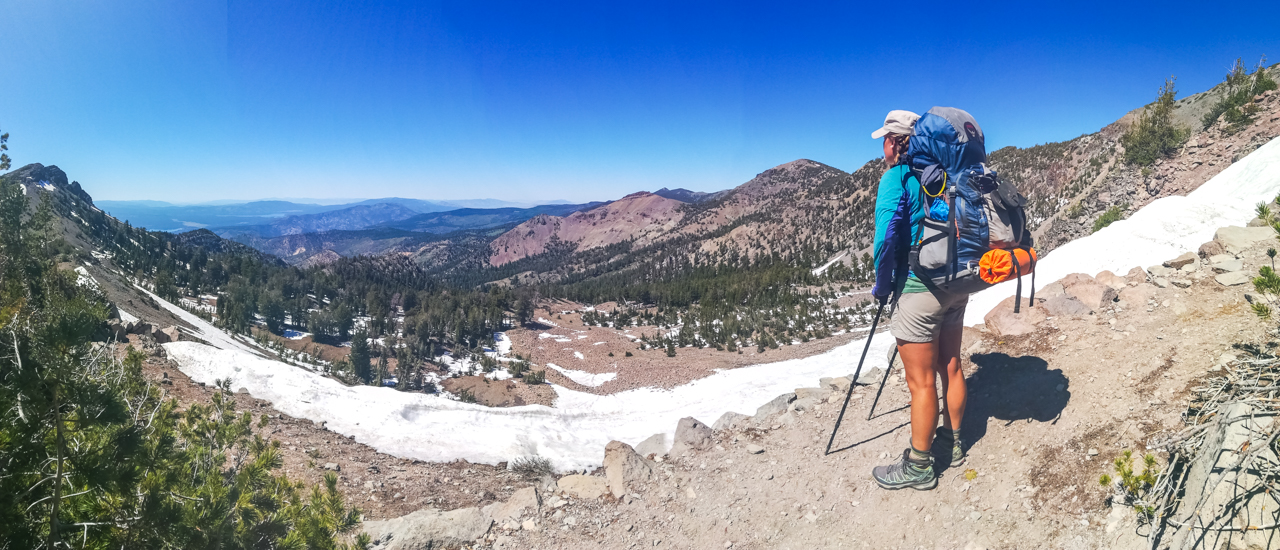
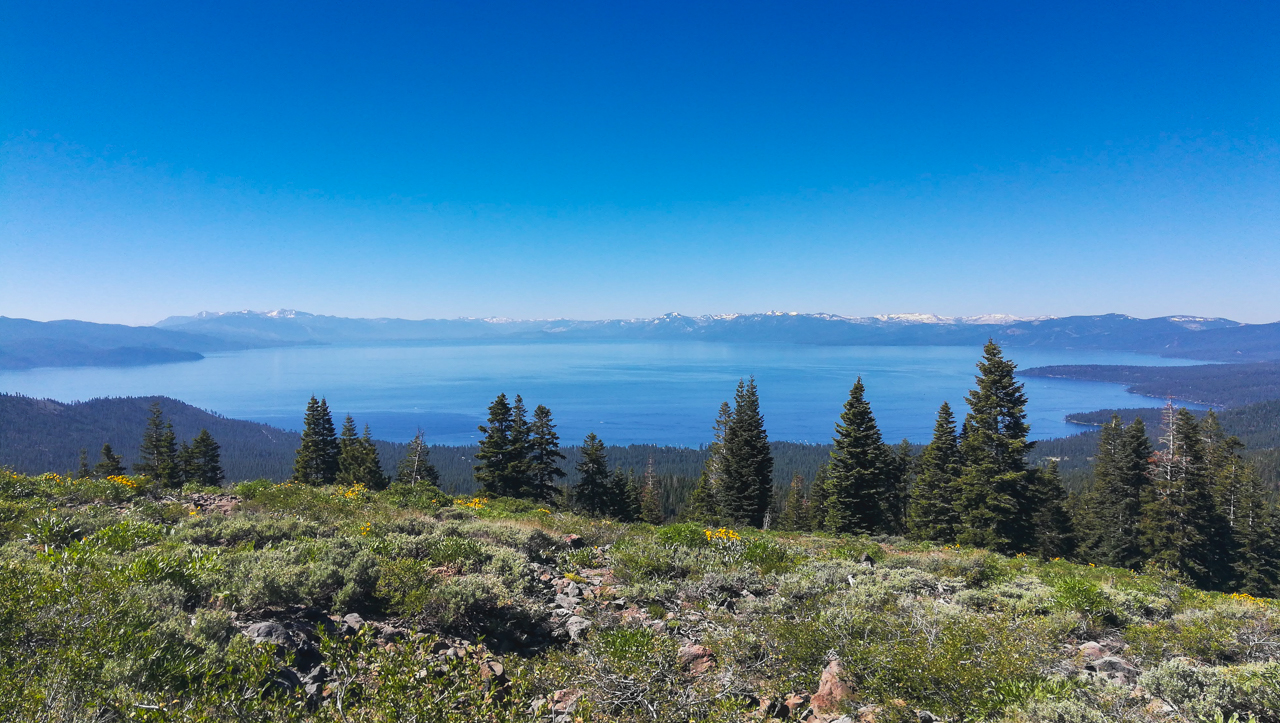
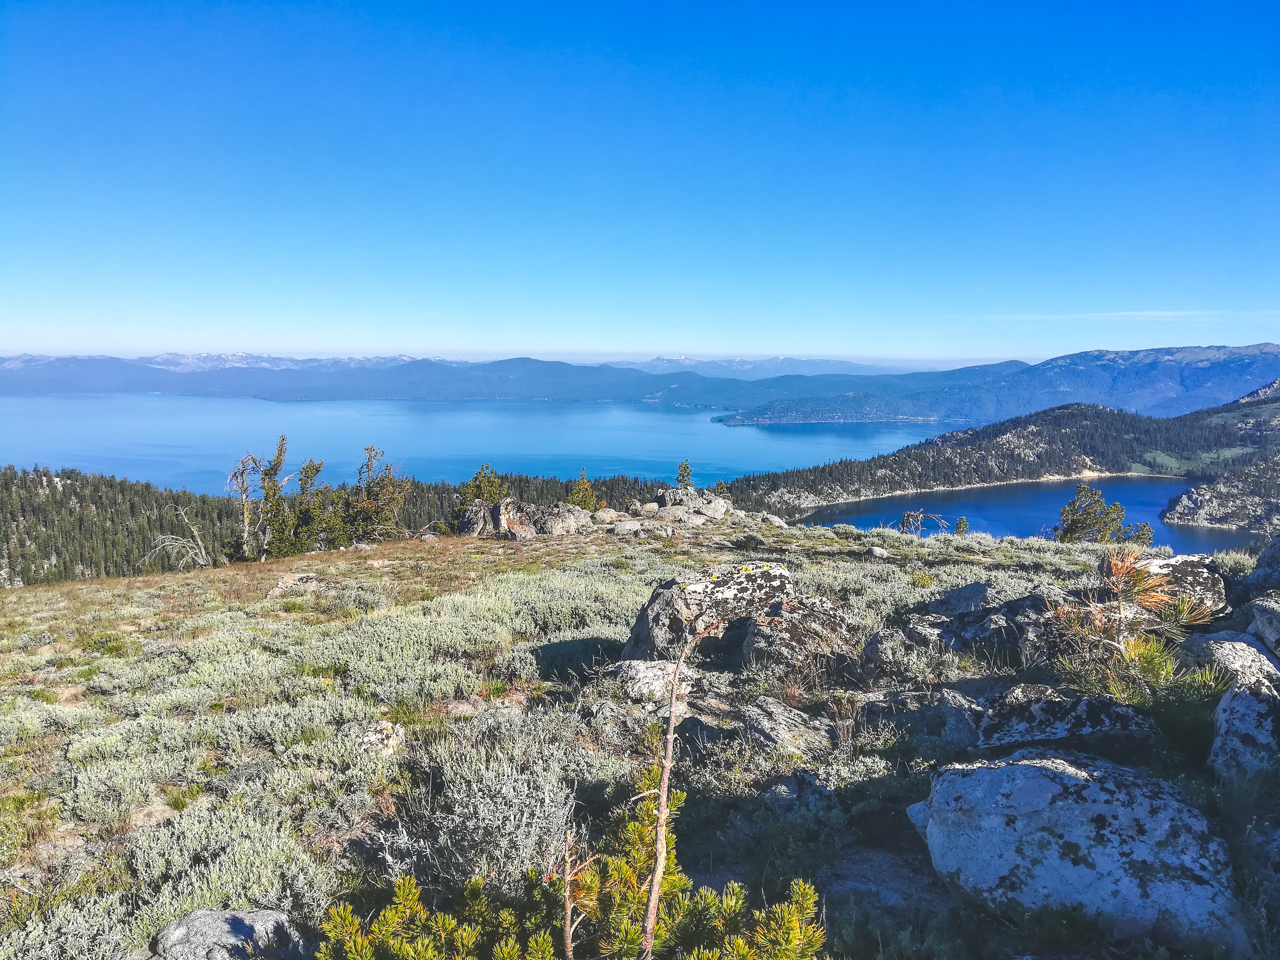
Spectacular views continue on this section as you climb Martis Peak, Mt. Baldy, Rose Knob, and Relay Peak (the high point of the trail). This section is a strenuous walk with difficult and exposed sections throughout. The climbs are rewarding as you get mostly unhindered views of the North end of the lake from some of the highest points on the TRT.
Water was hard to come by in this section as there is a reliable spring near Mt. Tamarack and no more reliable water until Mt. Rose Campground. With that being said, the water was turned off at Mt. Rose Campground when we arrived for quality testing. The camp host was very kind and offered us a water jug and his last open campsite, we gladly accepted and paid him our $20.
Section 7: Tahoe Meadows to Spooner Summit
This is a generally mellow section of the trail with the exception of the climb up Herlan Peak and the close by Marlette Peak Campground. We filled up water near Tahoe Meadows and filled up again at the campground. The manual pump is a bit tricky to operate with one person and the water is supposedly high in aluminum, and it leaves an orangish residue. We drank it without treating it and had no ill-effects. The campground had a vault toilet, fire rings, and bear box. Ironically, a flat tent site was difficult to locate in the campground. We couldn’t complain, it’s FREE.

The views to the South of Marlette Lake were astounding and some of the best of the TRT. Once you reach the top, you begin the descent toward Spooner Lake, the next reliable water source. This section of trail is extremely popular with mountain bikers and bikes are only allowed on this section during even days of the week. We unfortunately hit and even day when we came through and spent much of the day getting off of the trail for over two hundred cyclists.
Section 8: Spooner Summit to Kingsbury South
Prepare for tough climbs and little water in this section of the TRT. The climb from Spooner to Genoa Peak is not for the faint of heart, but the views from “The Bench” are worth it. There are plenty of places to the East of the ridge near South Camp and Genoa Peaks for pitching a tent or hammock.

Once off of the ridge, you descend toward Kingsbury and can see Heavenly Ski Resort in the distance. You make it to the highway only to climb back up the side of the resort to the Kingsbury South Trailhead.

*Note: Heavenly Ski Resort no longer allows overnight parking for TRT thru-hikers for claimed insurance reasons. We parked there for the duration of our hike and notified the resort of our plans and itinerary only after we were on-trail and unable to remove the vehicle, your mileage may vary.
Gear
We are not ultra-light hikers by any stretch of the imagination and we like to have some comforts on the trail such as hot food and a tent. Below is the breakdown of each of our packs:
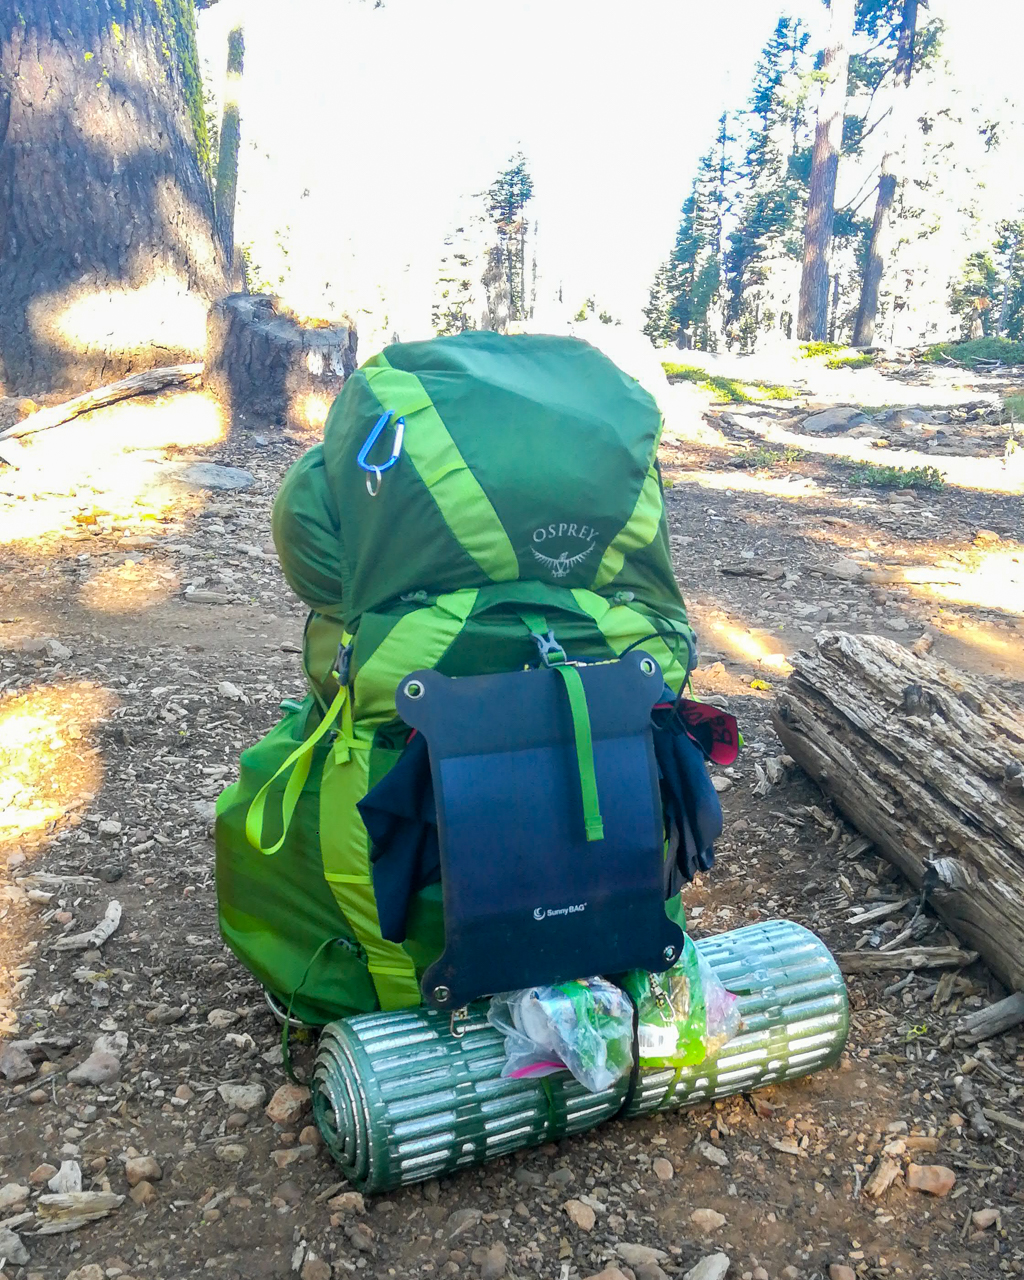
Zach’s Pack
Marmot Sawtooth 30°sleeping bag
Polyester Sleeping Bag Liner
MSR Fuel
Steripen Classic Water Purifier
Rain Jacket
Hiking Convertible Pants
Running Shorts
(3) Underwear
(3) socks
Hiking Shirt
Long Sleeve Shirt
Short Sleeve Shirt
Pocket Knife
Flexible Solar Panel
7200 mah Battery
Cell Phone
GPS watch
Bugspray
Credit Cards, Cash, and Bus Key
Baseball Cap
Rachael’s Pack
Sea to Summit Extreme Insulated Bag Liner
Campmas Stakes
Steripen Adventure Water Purifier
Rain Jacket
Leggings
Hiking Shorts
Comfy Shorts
Long Sleeve Shirt
(2) Short Sleeve Shirts
Vest
Tank Top
(2) Sports Bras
(3) Socks
(4) Underwear
Beanie Hat
Baseball Cap
Gear Adjustments:
In hindsight, we should have left several things at home. First, the hand-pump water filter was almost 100% unneeded. We could have made it without it and not sacrificed a lot of convenience. We also could have left behind the Steripens. Although they are effective, they are heavy and dependent on batteries and technology. We will take a Sawyer Mini next time instead.

Second, we are now on the lookout for a lighter tent. Although the Mountainsmith has been very reliable and is well-made, it will soon be retired to car-camping duty and a lighter tent will replace it. We are considering several different options from Six Moon Designs, only time and money will dictate what we go with.
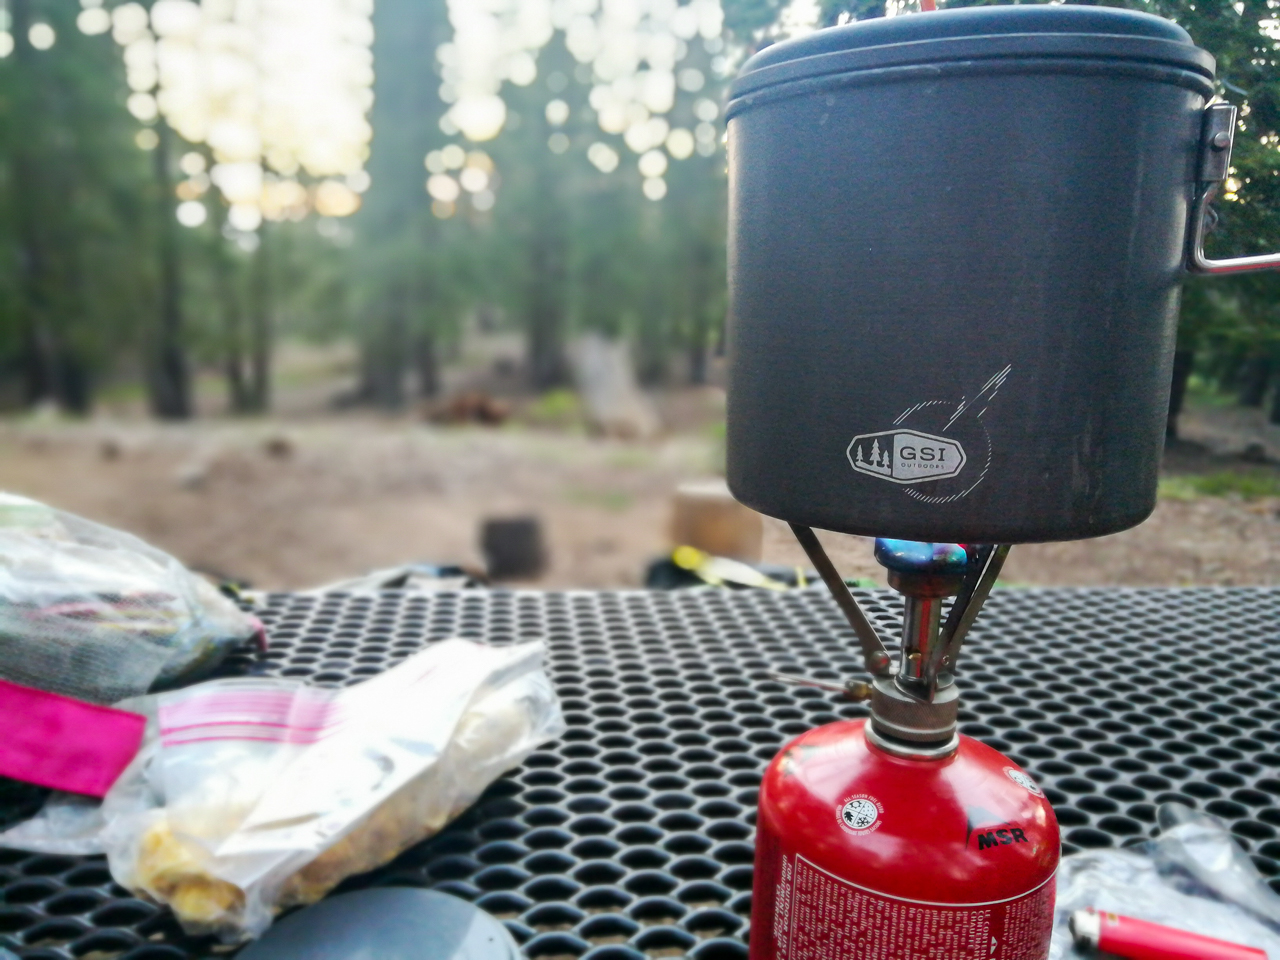
The third gear adjustment that we would have made would be the addition of a small aluminum windscreen for the MSR Pocket Rocket. The winds on the TRT could be downright impressive and a windscreen was much needed and worth the added weight.

Thru hiking the Tahoe Rim Trail was an extremely rewarding experience. We got to see one of the most beautiful and largest lakes in the United States from ALL sides! The trail was not so long that you have to dedicate a ton of time to it and the terrain is accommodating enough that the most beginner hikers can hike the entire trail. For me (Zach) this trail really lit a fire in me to begin planning a larger through hike in the future. I have begun researching thru hikes on the Appalachian Trail (AT) or the Pacific Crest Trail (PCT) in the future. For Rachael, this hike seemed to solidify her extreme enjoyment of 6-8 day backpacking trips. She loves camping and being in the woods, but thru hiking is not for her. That is the real beauty of the TRT, it presents an opportunity for everyone to enjoy the beauty of the Lake Tahoe Basin in their own way.
One way to stay up to date with our adventures is to follow us on social media. We share photos, videos, and travel updates about where we are going and what we are doing.
Follow us on Facebook
Follow us on Instagram
Follow us on YouTube
As we always strive for transparency when displaying aspects of our nomadic lifestyle you should know that all of the links included in this article are affiliate links through Amazon.com. For every purchase that you make from one of these links, we receive a small amount and you don’t pay any extra. These links are one way that stay on the road longer, so thank you for your support of our adventures!
Please share the temperature range you experienced.
Great question! I will add it to the post, but also leave it here.
The coldest night we had was on the hillside above Shower’s Lake and it got down to 26-28ºF and the warmest day we had was on Brockway. We lucked out with water at the cache/trailhead, but the climb up from the highway was warm.
Try the Lanshan 2. 2.5#, 2 doors, double wall, and $105 . What was your base weight, your skin out weight, and what was the most amount of water you carried?
Our base pack weight was around 25-30lbs each. I will check out that tent, looks like a bargain!
Thanks for the great writeup. Very helpful in planning my route for later this summer. Cheers.
That’s so good to hear! We really enjoyed our time on the TRT and we are glad that you are hitting the trail this summer. Happy hiking!
Thank you so much for your itinerary! I am planning on going in a few weeks (end of Aug). I had a few questions about your campsites as I am trying to figure out potential spots (I’m using a Tom Harrison Map of Lake Tahoe/Tahoe Rim Trail):
What’s Bear Lake Outlet referring to?
What’s The Oven referring to?
What’s the Powerline referring to?
Where did you camp by Brockway Summit (was it after the summit?)?
And what’s The Bench?
any help would be greatly appreciated and thank you again for sharing your experience – my dog and I are very excited to do this trek!
All of these locations are outlined in the Guthooks application (Tahoe Rim Trail Guide) that we used to navigate some of the trickier areas. The app is a must have if you plan to hike on the TRT and is well worth the money. Plan on the Tom Harrison map and take the phone app with you for on-trail navigation.
Thank you so much for the rec!