How to Improve the Handling, Steering, and Ride Quality of Your Van, Skoolie, or RV
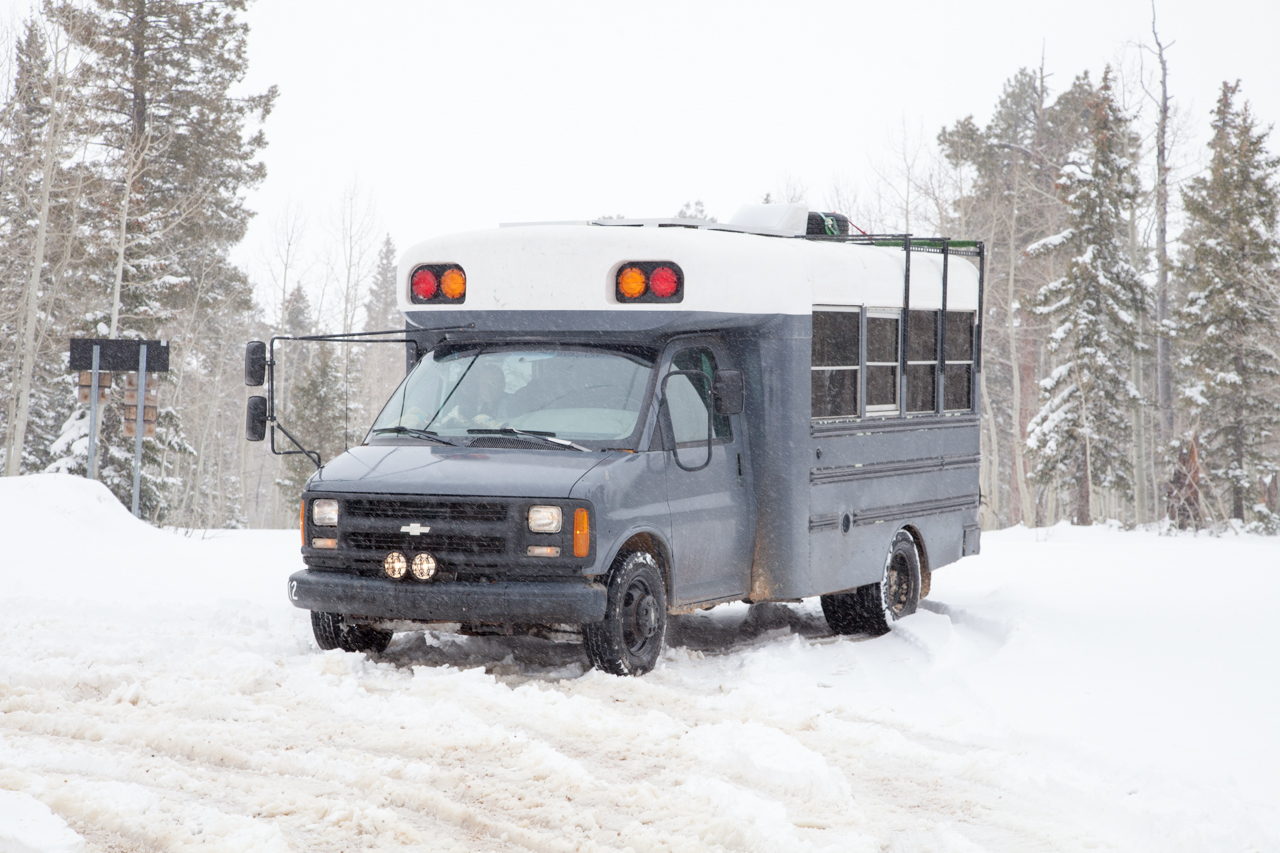
Originally our skoolie handled like a boat, it stills does. But now it handles like an appropriately nimble boat. We were constantly having to take turns much slower than we should have to prevent the entire bus from feeling like it was tipping over. Off-road the bus was a mess. Although it is built on a similar chassis to the Express Van and Silverado, it behaved oddly off-road with a 10,000 lbs GVWR. Every obstacle (think small rock or pothole) on forest service roads would create a lean and sway that was annoying, dangerous, and really inconvenient to handle behind the wheel. After a long day of driving like this, the person driving is completely spent which defeats the purpose of traveling in the first place. This will be a simple article walking you through how we improved the handling in our short skoolie conversion without breaking the bank.
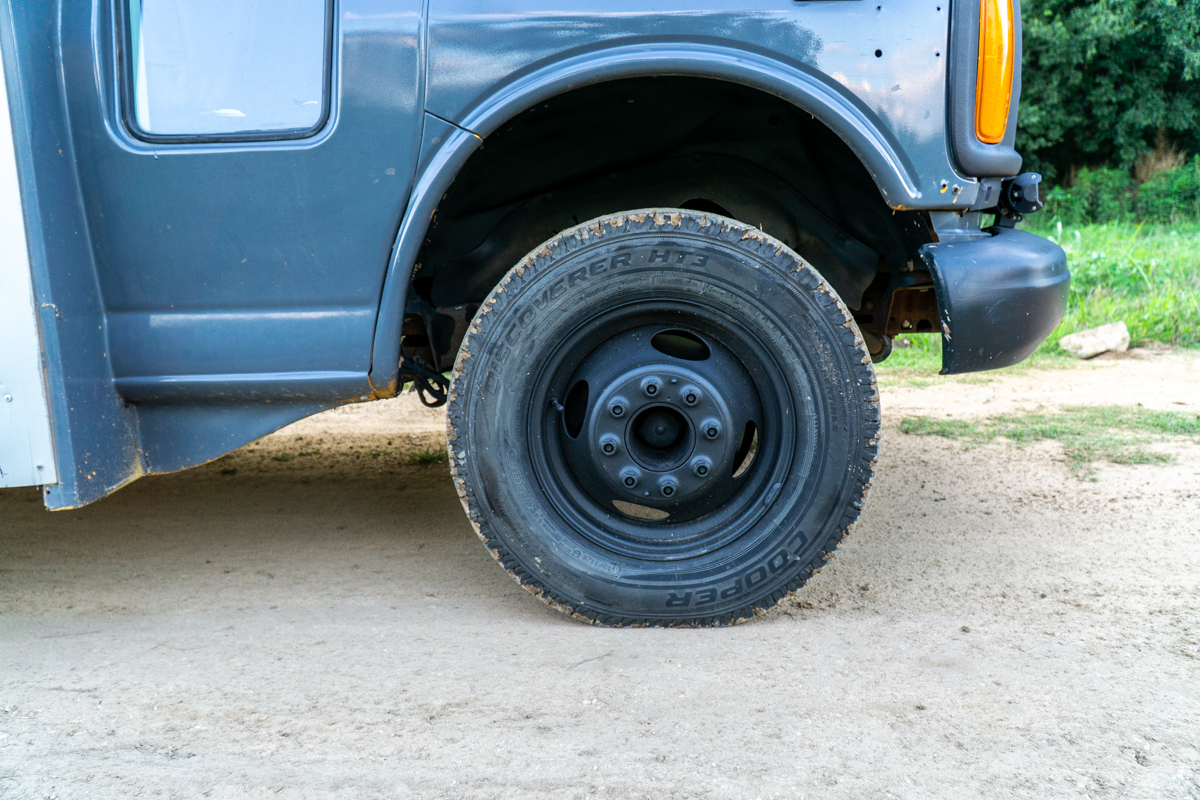
TIRES
High-quality tires with an appropriate load rating are extremely important when driving a vehicle that is near or over the manufacturer’s Gross Vehicle Weight Rating. When we bought our bus we replaced all six tires with high-quality all-terrain tires in the appropriate load rating and size and the difference was amazing. Traction is an obvious benefit of having good tires, but by maintaining good pressure in the tires you can drastically improve the handling characteristics of your rig. We will likely be due for new tires before we depart for Alaska in 2020 and we will probably upsize an inch or two for additional clearance and more sidewall to soften bumps.
All tires have a maximum tire air pressure and a recommended air pressure depending on the weight of the vehicle and the driving conditions that exist. We outline our standard pressures below, but for a more standard off-road vehicle, check out an article from Lifestyle Overland about tire pressures.
Regular highway driving: 65FR, 75R
Sand/Rocky Beach: 20FR, 25R
Mud: 30FR, 35R
Washboard/Corrugated: 40FR, 50R
SUSPENSION
Have you ever watched an old video of a horse-drawn wagon on wooden wheels bouncing down a cobblestone road? That’s what your rig would look and feel like if it weren’t for vehicle suspension.
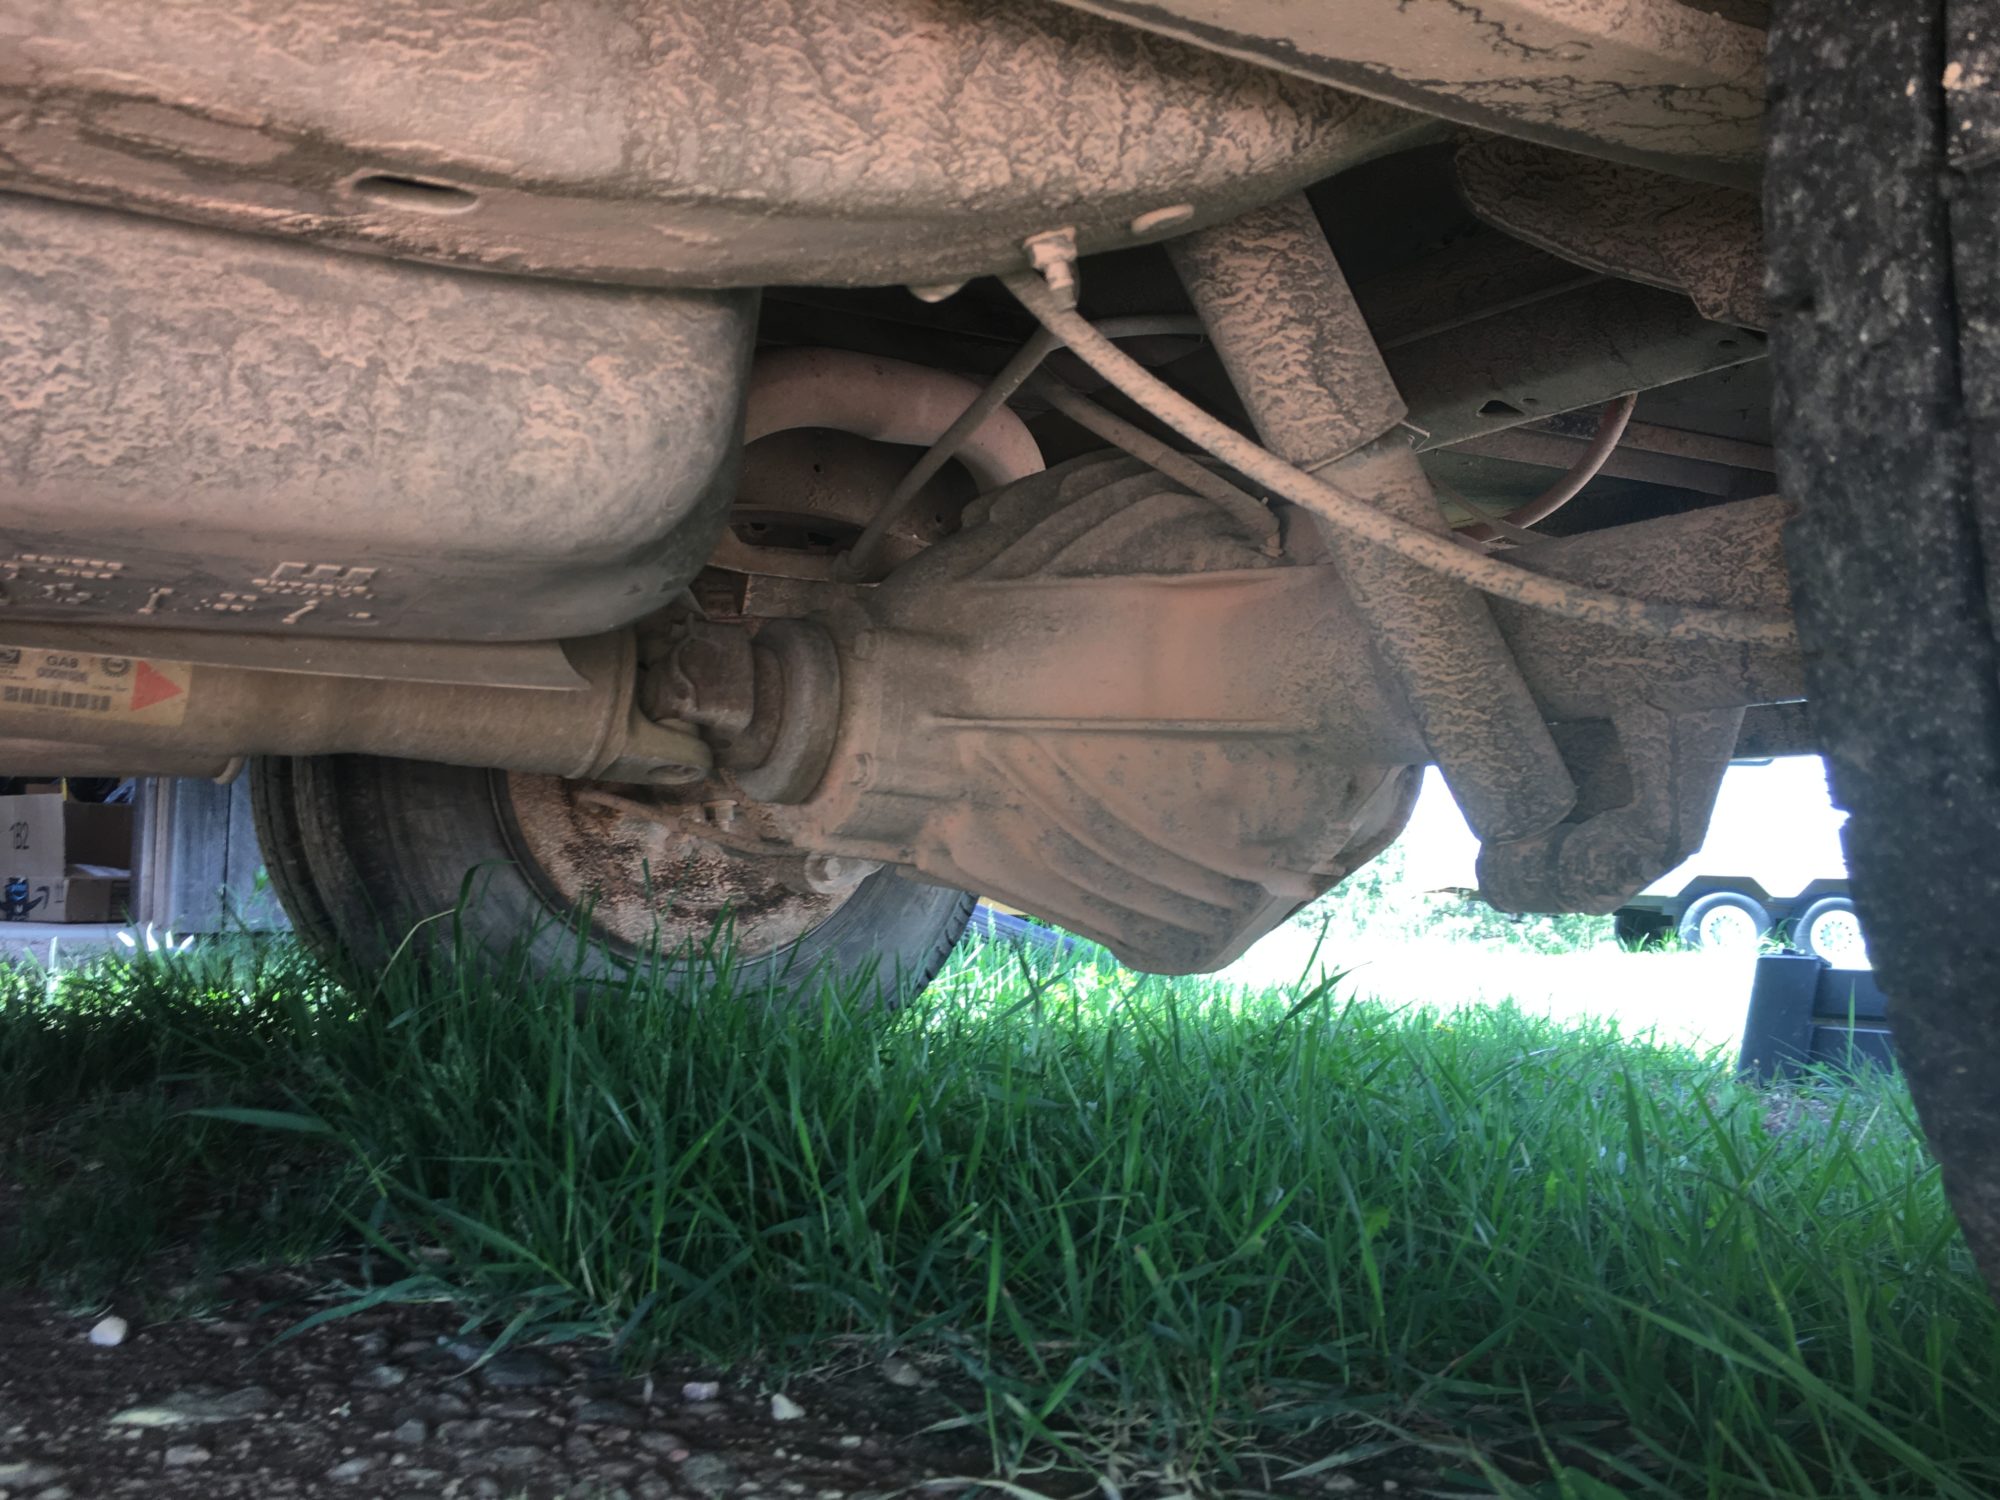
In our case, we have a coil spring front and a leaf spring rear with shocks on 4 corners. This is a very common setup, especially for camper vans and class-C RVs. The springs should be replaced as a last resort unless you know they are too blame for your rough ride.
Shocks and Struts First
Begin with the easiest thing first…shocks and struts. Potentially the most overlooked of all components on a vehicle are the shocks and struts. We neglected to replace our shocks before leaving in our skoolie and we regretted it almost immediately. Quality shocks will not only dampen the harshness of the road but they will also stabilize movement side to side.
Once we climbed under our bus and pulled the old shocks out we realized they were original from the factory with 107,000 miles of bumpy Oklahoma roads and 18,000 miles of us driving all over the West with 10,000 lbs of stuff built on top. Needless to say, they needed to go.
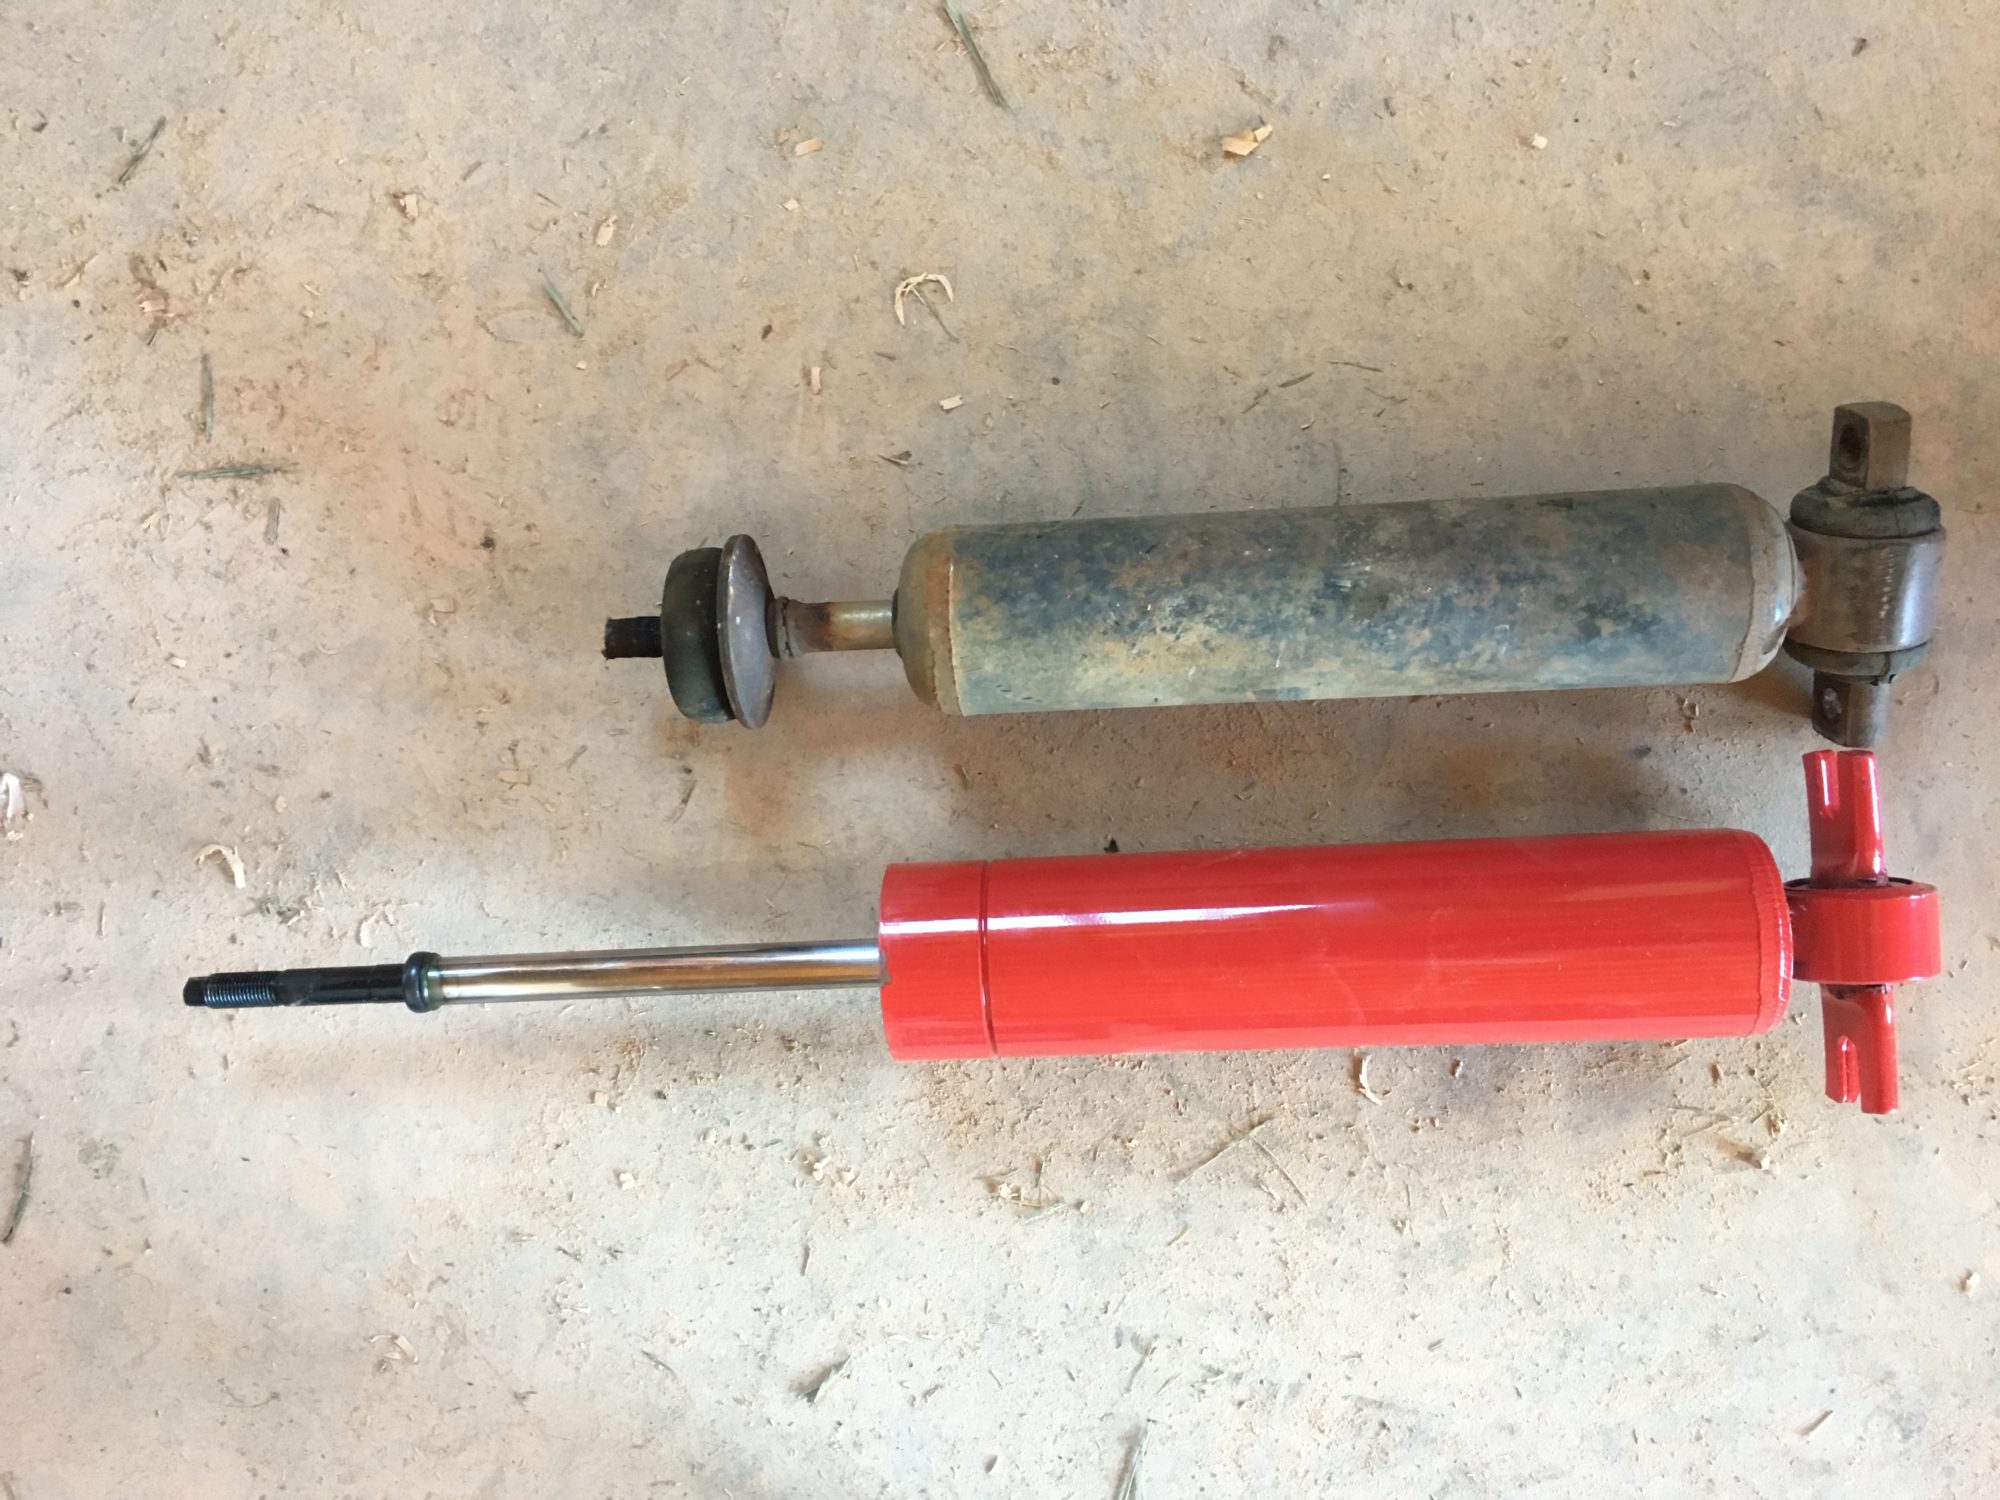
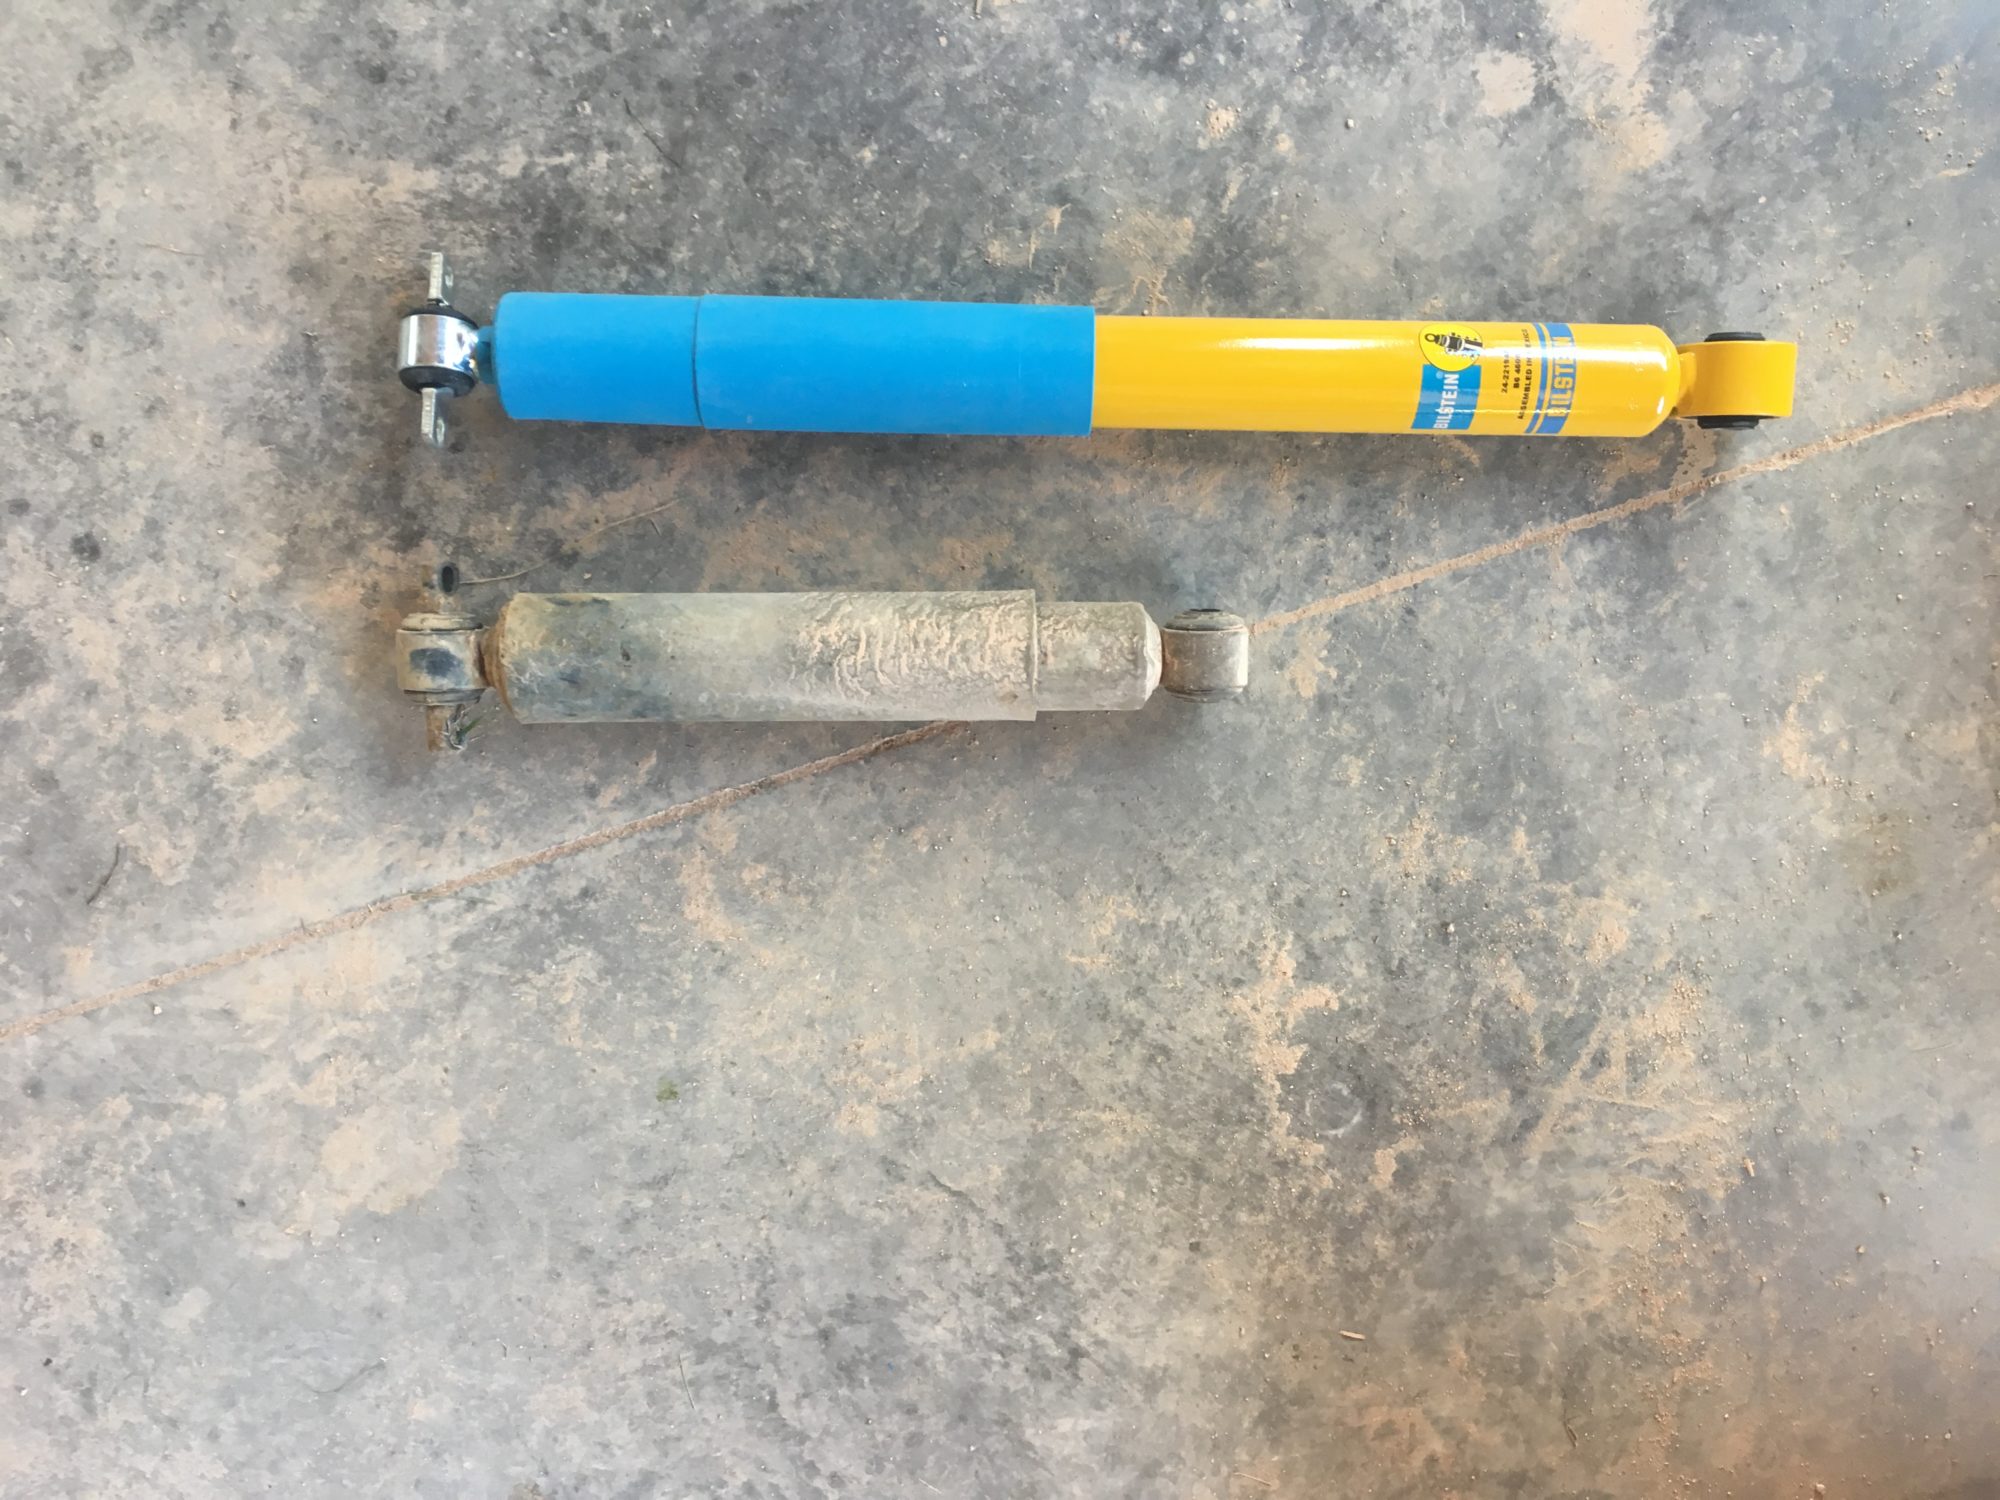
We replaced our shocks with Bilstien in the front and Koni shocks in the rear. While replacing the rear shocks, I noticed that the stock height shock was difficult to install, letting me know that the rear springs weren’t maintaining stock height. We will address that next.
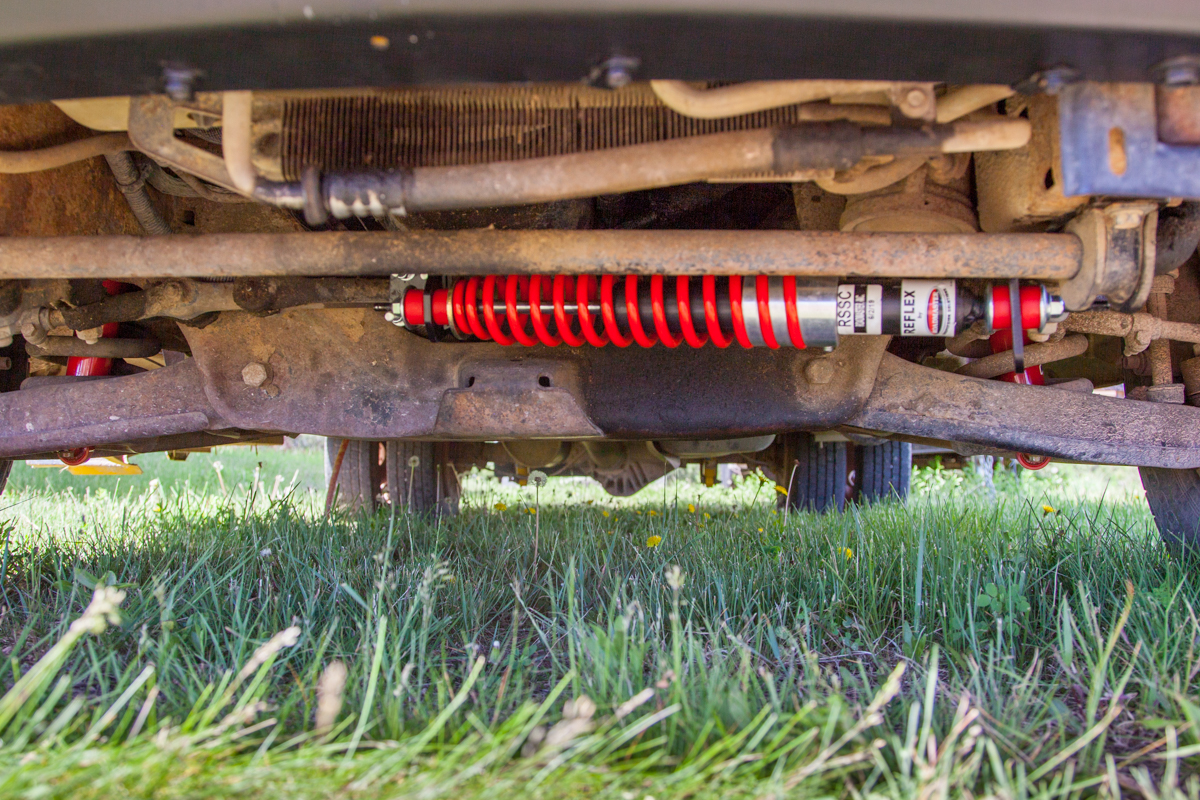
Helper Airbags
One of the most striking changes we have made to our suspension has been adding AirLift 5000 helper air springs on the rear axle. We gained about 2 inches of “lift” (likely back to stock height) and the ride is noticeably improved. The side-to-side sway is greatly diminished and we can take turns at greater than 7 miles per hour now without fear of tipping over.
Installation was extremely easy. First, you jack up the rear of your vehicle and jack from somewhere other than your axle; think of pushing the body from the axle. Once there is enough room and your tires are chocked and jack stands are placed correctly, assemble your airbags and install them per the instructions. Make sure to make note of air valve locations and the desired route that you want to take with your airline, we exited at the rear bumper. Once your bags are installed and bolts are torqued, clip in your airline and install your fill valves. Now it’s time to add air-we found that 88-92 PSI was a good spot for us as our rear springs are quite worn.
Stiffer Springs
After serving as a school/church bus in Oklahoma where the roads aren’t great, our bus springs were pretty much toast. That didn’t stop us from bouncing all over the country on worn-out springs. But as we found ourselves driving more and more, the need for new springs became more apparent.
We replaced the front coil springs with a Moog replacement one size taller: part # MOOG 81081. Using the Moog spring comparison chart, you can choose which will be appropriate for your vehicle.
Not only was the front of our bus much higher off the ground, but the ride also firmed up in a big way. I highly recommend upgrading your RV or skoolie springs with stiffer options. We should have done it before we left!
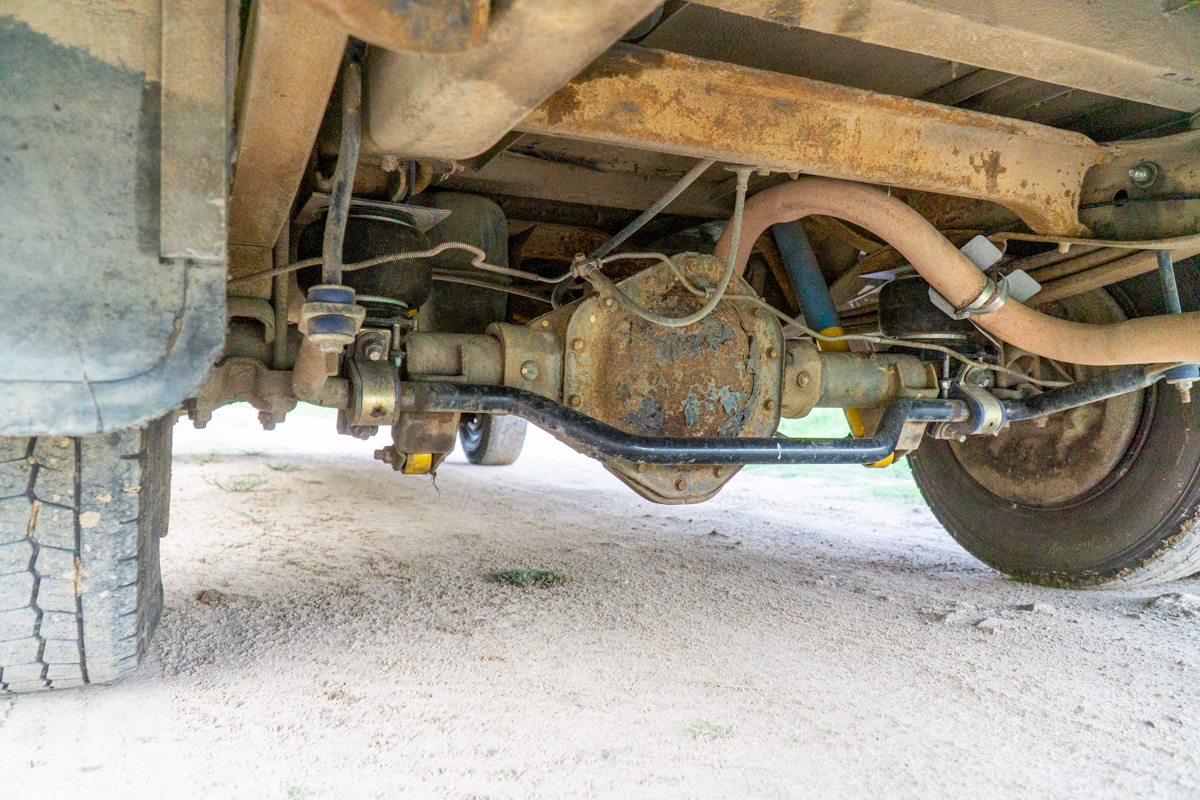
Add a Rear Sway Bar
The single best addition that we made to our rig was adding a Roadmaster rear sway bar. We inspected several different brands at trade shows and the Roadmaster provided the best value for the money along with really good support. The team at Roadmaster was responsive and helpful with all of our questions and concerns.
Installation was fairly simple and only really involved fitting the axle mount kit to our axle and then installing the sway bar like you would on any other vehicle. The sway of the rear was dramatically more predictable and much safer on the highway. We gave up a little flexibility off-road, but that was completely welcome to feel more confident on the highway.
STEERING
Steering Stabilizer
The steering on our bus was sloppy to say the least. Over the course of our ownership, we replaced nearly every part of the steering system, but the most noticeable difference was after we installed our steering stabilizer. We opted for the Roadmaster Reflex steering stabilizer and it was mostly because of the expertise that Roadmaster provided with outfitting our bus. Here is the blurb from the Roadmaster team:
Reflex Steering Stabilizers have a tempered steel spring secured at both ends to a specially designed and valved steering damper. One end of the stabilizer is attached to the tie rod itself; the other end is securely fastened to the chassis undercarriage. When the steering stabilizer is compressed, the spring pushes back to the neutral position. When extended, the spring pulls back to the neutral position. No matter what vehicle you have, your Reflex Steering Stabilizer installs in one hour, with no drilling or welding required.

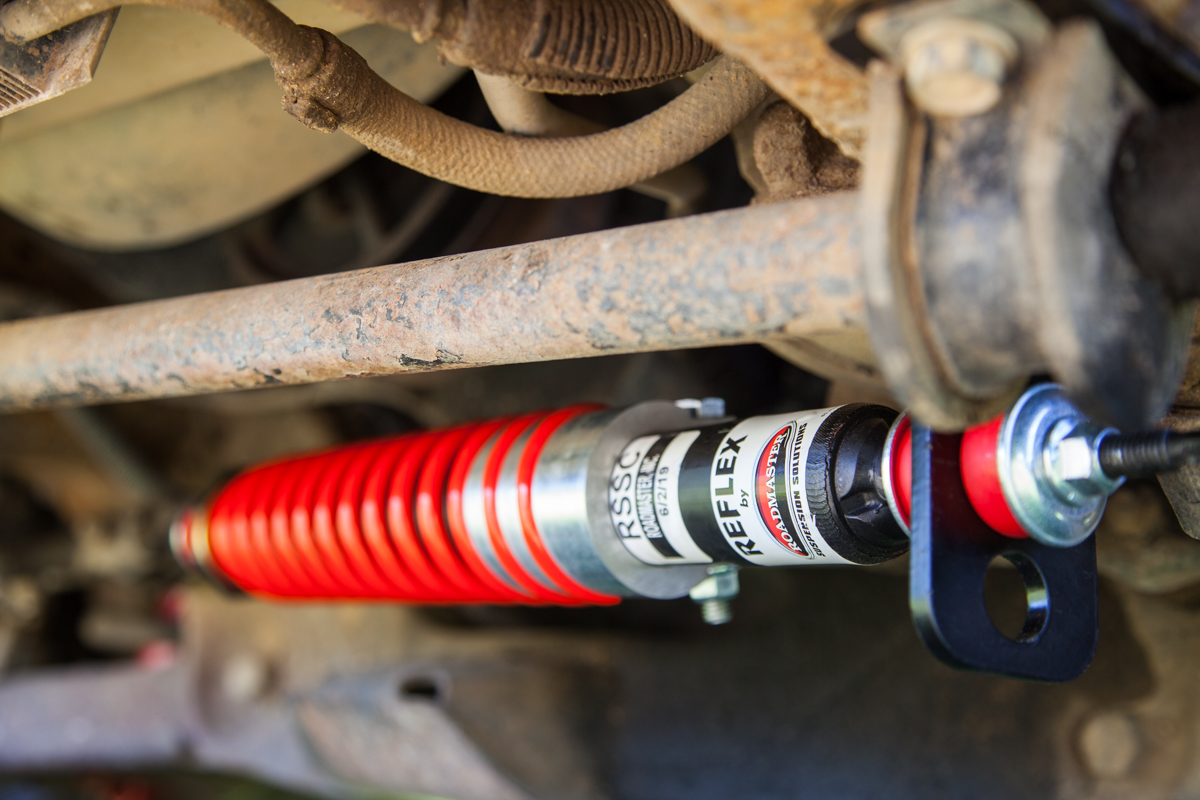
Install was less than an hour and our steering felt “1/4-ton pickup” tight!